Just when you thought whipping up delicious desserts couldn’t get any easier, we’ve rounded up 18 irresistible treats that require only three ingredients each! Perfect for busy home cooks in North America, these simple yet scrumptious recipes promise to satisfy your sweet tooth without the fuss. From creamy no-bake delights to quick-fix classics, get ready to dazzle your taste buds and impress your loved ones with minimal effort. Dive in and discover your next favorite dessert!
Chocolate Peanut Butter Cups

Yesterday, I found myself craving something sweet yet simple, and that’s when I remembered the classic Chocolate Peanut Butter Cups. There’s something about the combination of creamy peanut butter and rich chocolate that feels like a hug in dessert form. Plus, they’re incredibly easy to make, which is perfect for those days when you want a quick treat without the fuss.
Ingredients
- 1 cup creamy peanut butter, smooth and velvety
- 1/2 cup powdered sugar, finely sifted
- 1/4 tsp sea salt, for a subtle crunch
- 2 cups semi-sweet chocolate chips, high-quality and melt-in-your-mouth
- 1 tbsp coconut oil, unrefined and fragrant
Instructions
- Line a mini muffin tin with paper liners, ensuring each cup is ready for your mixture.
- In a medium bowl, mix together the creamy peanut butter, powdered sugar, and sea salt until smooth. This will be your peanut butter filling.
- Using a small spoon, scoop about 1 teaspoon of the peanut butter mixture into each lined muffin cup. Press down lightly to flatten. Tip: If the mixture sticks to your spoon, lightly coat it with coconut oil.
- In a microwave-safe bowl, combine the semi-sweet chocolate chips and coconut oil. Microwave in 30-second intervals, stirring in between, until fully melted and glossy. Tip: Be careful not to overheat the chocolate to avoid seizing.
- Carefully spoon the melted chocolate over the peanut butter in each muffin cup, ensuring the peanut butter is completely covered.
- Chill in the refrigerator for at least 30 minutes, or until the chocolate is set and firm to the touch. Tip: For an extra glossy finish, let them set at room temperature for a few minutes before refrigerating.
Perfectly balanced between sweet and salty, these Chocolate Peanut Butter Cups have a melt-in-your-mouth texture that’s irresistible. Try serving them slightly chilled for a refreshing twist, or drizzle with a bit of melted white chocolate for an elegant touch.
Banana Ice Cream
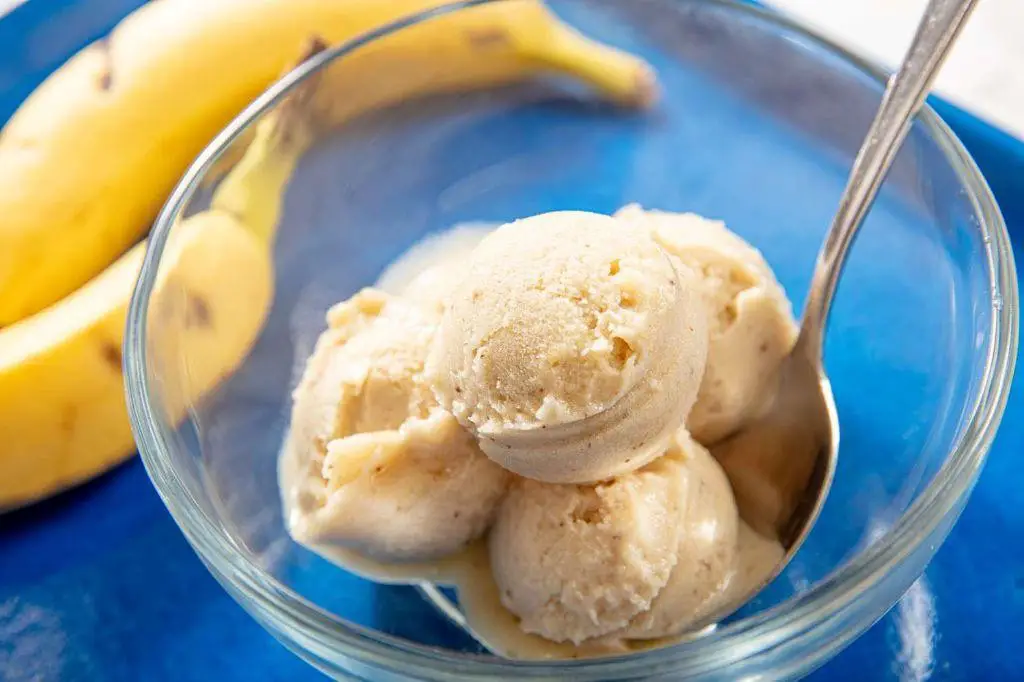
Nothing beats the simplicity and delight of making banana ice cream at home, especially when you’re craving something sweet but want to keep it healthy. I remember the first time I tried this; it was a hot summer afternoon, and I was amazed at how just frozen bananas could transform into such a creamy treat.
Ingredients
- 4 ripe bananas, peeled and sliced (the riper, the sweeter)
- 1/4 cup creamy peanut butter (for a rich, nutty flavor)
- 1 tsp pure vanilla extract (for that warm, aromatic touch)
- 2 tbsp honey (optional, for extra sweetness)
- A pinch of sea salt (to enhance all the flavors)
Instructions
- Place the sliced bananas in a single layer on a parchment-lined baking sheet and freeze for at least 2 hours, or until solid. Tip: Freezing them separately first prevents clumping.
- Once frozen, transfer the banana slices to a high-powered blender or food processor. Add the peanut butter, vanilla extract, honey, and sea salt.
- Blend on high for 1-2 minutes, stopping to scrape down the sides as needed, until the mixture is smooth and creamy. Tip: If it’s too thick, add a splash of almond milk to help it blend.
- For a firmer texture, transfer the mixture to a loaf pan and freeze for an additional 1-2 hours before serving. Tip: For a soft-serve consistency, enjoy it immediately.
Unbelievably creamy and packed with natural sweetness, this banana ice cream is a guilt-free indulgence. Serve it topped with a drizzle of melted dark chocolate and a sprinkle of crushed peanuts for an extra decadent touch.
Strawberry Mousse
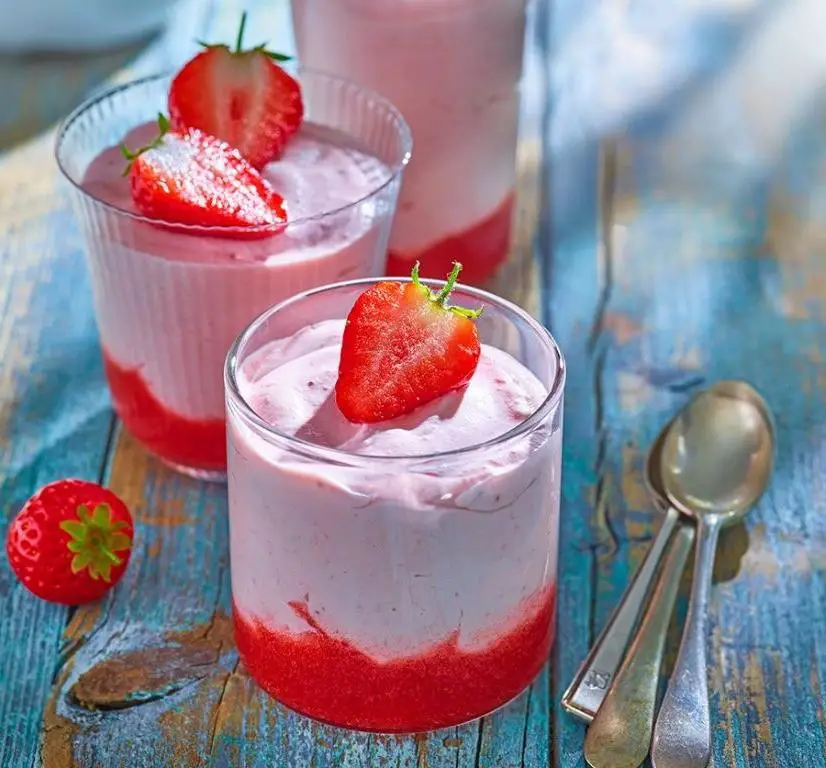
Nothing beats the joy of digging into a light, airy strawberry mousse on a warm summer day. I remember the first time I tried making it at home; the kitchen was a mess, but the result was absolutely worth it. Here’s how you can recreate this delightful dessert with ease.
Ingredients
- 1 cup fresh, ripe strawberries, hulled and pureed
- 1/2 cup granulated sugar, for a sweet touch
- 1 tbsp fresh lemon juice, to brighten the flavors
- 1 cup heavy cream, chilled for perfect peaks
- 1 tsp pure vanilla extract, for a hint of warmth
- 1 envelope unflavored gelatin, to set the mousse beautifully
- 1/4 cup cold water, to dissolve the gelatin
Instructions
- In a small bowl, sprinkle the gelatin over cold water and let it bloom for 5 minutes.
- Meanwhile, in a blender, puree the strawberries until smooth, then strain to remove seeds for a silky texture.
- In a saucepan, combine the strawberry puree, sugar, and lemon juice. Heat over medium until the sugar dissolves, about 3 minutes.
- Remove from heat and whisk in the bloomed gelatin until fully dissolved. Stir in the vanilla extract.
- Let the mixture cool to room temperature, about 10 minutes, stirring occasionally to prevent a skin from forming.
- In a large bowl, whip the heavy cream to stiff peaks, about 3 minutes. Be careful not to over-whip.
- Gently fold the cooled strawberry mixture into the whipped cream until no white streaks remain.
- Divide the mousse among serving glasses and refrigerate for at least 4 hours, or until set.
Delightfully creamy with a vibrant strawberry flavor, this mousse is a dream. Serve it with a sprinkle of crushed pistachios or a dollop of whipped cream for an extra special touch.
Lemon Bars
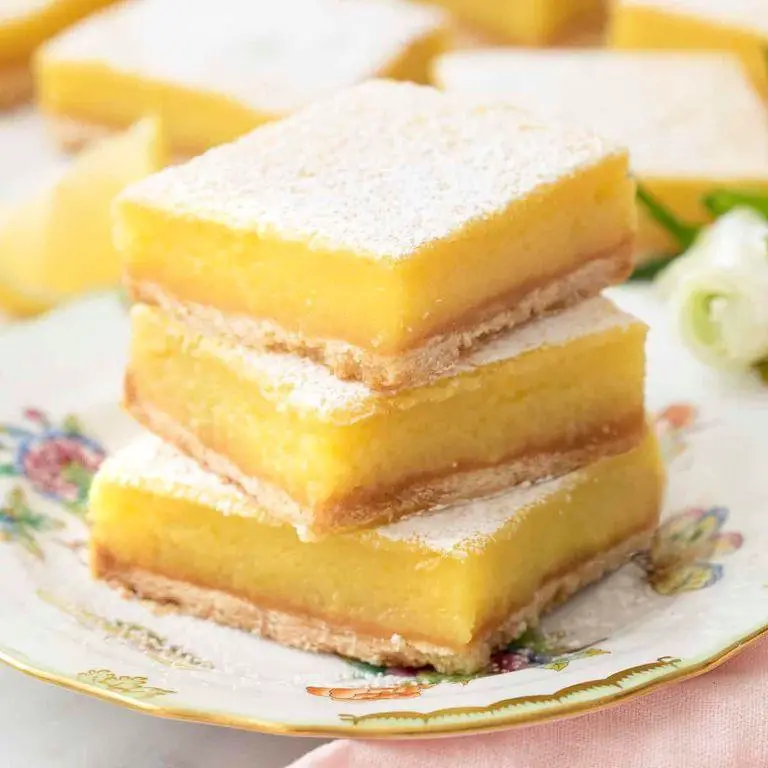
Amidst the hustle of summer, there’s nothing quite like the zesty, sweet embrace of lemon bars to brighten your day. I remember the first time I baked these; the kitchen filled with a citrusy aroma that promised a perfect balance of tart and sweet. Now, it’s my go-to recipe when I need a little sunshine on a plate.
Ingredients
- 1 cup all-purpose flour, sifted for lightness
- 1/2 cup unsalted butter, cold and cubed
- 1/4 cup powdered sugar, for a delicate sweetness
- 2 large farm-fresh eggs, at room temperature
- 1 cup granulated sugar, for that perfect sweetness
- 2 tablespoons lemon zest, freshly grated for vibrant flavor
- 1/3 cup freshly squeezed lemon juice, for a tangy punch
- 1/2 teaspoon baking powder, to ensure a slight lift
- Pinch of salt, to balance the flavors
Instructions
- Preheat your oven to 350°F (175°C) and line an 8×8 inch baking pan with parchment paper, leaving some overhang for easy removal.
- In a medium bowl, combine the sifted flour, powdered sugar, and salt. Add the cold, cubed butter and use your fingers to work it into the flour mixture until it resembles coarse crumbs.
- Press the mixture firmly into the bottom of the prepared pan to form an even crust. Bake for 15-20 minutes, or until the edges are just starting to turn golden. Tip: Chilling the crust for 10 minutes before baking can help prevent shrinking.
- While the crust bakes, whisk together the eggs, granulated sugar, lemon zest, lemon juice, and baking powder until smooth. Tip: Straining the mixture ensures a silky filling without any zest lumps.
- Pour the lemon mixture over the hot crust as soon as it comes out of the oven. Return to the oven and bake for another 20-25 minutes, or until the filling is set and slightly jiggly in the center.
- Allow the lemon bars to cool completely in the pan on a wire rack, then refrigerate for at least 2 hours to set fully. Tip: Dusting with powdered sugar just before serving adds a beautiful finish and extra sweetness.
Out of the fridge, these lemon bars are a dream—creamy yet firm, with a crust that’s buttery and crumbly. The lemon filling is the star, offering a bright, tangy flavor that’s perfectly balanced by the sweetness. Serve them chilled with a dollop of whipped cream or a sprinkle of toasted coconut for an extra special touch.
Nutella Mug Cake
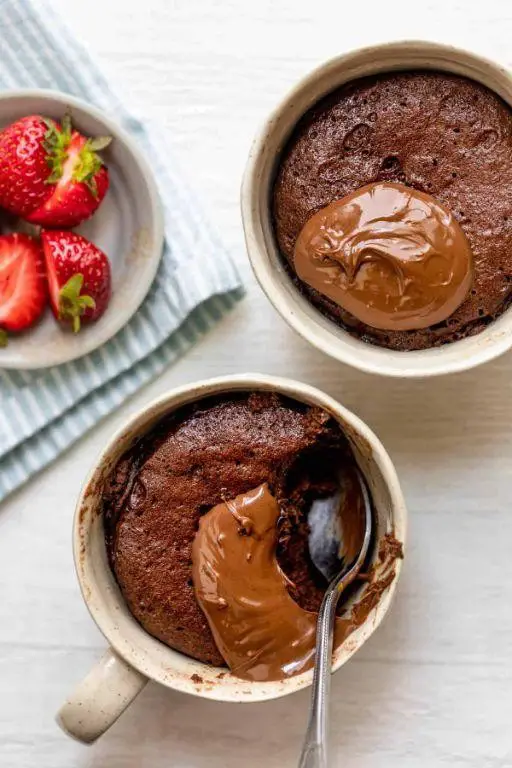
Zesty mornings call for something sweet, and nothing hits the spot quite like a warm, gooey Nutella Mug Cake. I remember the first time I whipped this up on a lazy Sunday; the aroma of chocolate and hazelnut filled my tiny kitchen, turning an ordinary morning into something special. It’s my go-to when I need a quick dessert fix without the fuss of baking a whole cake.
Ingredients
- 4 tablespoons of all-purpose flour (soft and powdery)
- 3 tablespoons of granulated sugar (fine and sparkling)
- 1/4 teaspoon of baking powder (light and airy)
- 1 pinch of salt (flaky and sea-kissed)
- 3 tablespoons of milk (whole and creamy)
- 2 tablespoons of Nutella (rich and velvety)
- 1 tablespoon of vegetable oil (neutral and smooth)
- 1/2 teaspoon of vanilla extract (pure and fragrant)
Instructions
- In a 12-ounce microwave-safe mug, whisk together the flour, sugar, baking powder, and salt until well combined.
- Add the milk, Nutella, vegetable oil, and vanilla extract to the dry ingredients. Stir vigorously with a fork until the batter is smooth and no lumps remain. Tip: Scrape the bottom and sides of the mug to ensure everything is incorporated.
- Microwave the mug on high for 70 seconds. The cake should rise and look set on top. Tip: Microwave strengths vary, so start checking at 60 seconds to avoid overcooking.
- Let the mug cake sit for 1 minute before digging in. It will be extremely hot. Tip: The waiting is the hardest part, but it allows the cake to finish cooking from residual heat.
Fluffy and moist, this Nutella Mug Cake is a chocolate lover’s dream with its deep hazelnut flavor. Serve it straight from the mug with a dollop of whipped cream or a scoop of vanilla ice cream for an extra indulgent treat.
Peanut Butter Cookies
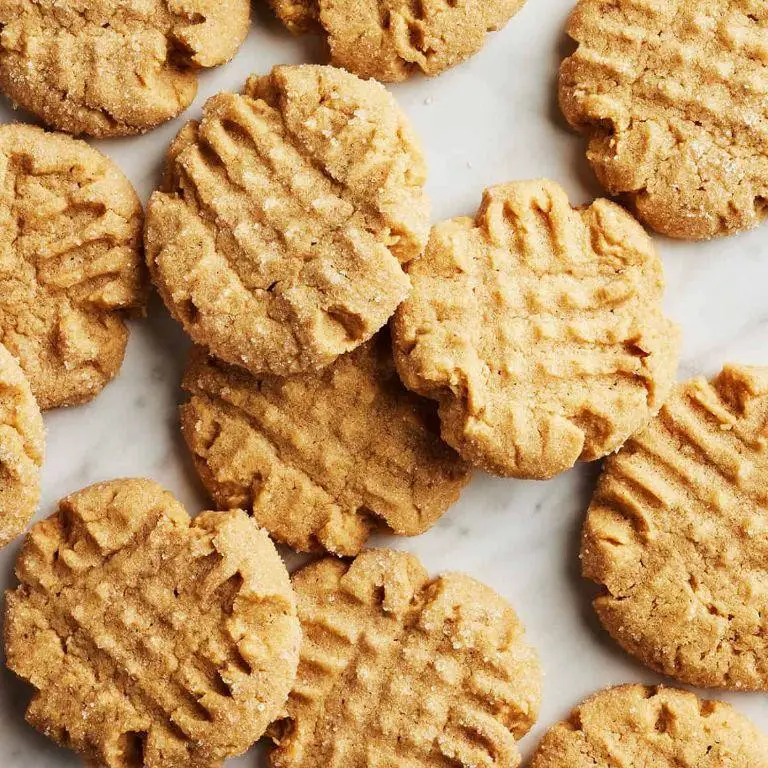
Zesty and comforting, peanut butter cookies have been my go-to treat since childhood, reminding me of afternoons spent baking with my grandma. Today, I’m sharing my foolproof recipe that’s sure to bring warmth to your kitchen and smiles to your loved ones’ faces.
Ingredients
- 1 cup creamy peanut butter, smooth and rich
- 1 cup granulated sugar, fine and sparkling
- 1 large egg, farm-fresh and room temperature
- 1 teaspoon pure vanilla extract, aromatic and sweet
- 1/2 teaspoon baking soda, fresh and active
- A pinch of sea salt, finely ground
Instructions
- Preheat your oven to 350°F (175°C) and line a baking sheet with parchment paper for easy cleanup.
- In a large mixing bowl, combine the creamy peanut butter and granulated sugar until the mixture is smooth and well incorporated.
- Beat in the farm-fresh egg and pure vanilla extract until the batter is uniform and slightly fluffy.
- Sprinkle in the baking soda and a pinch of finely ground sea salt, mixing just until combined to avoid overworking the dough.
- Using a tablespoon, scoop the dough and roll into 1-inch balls, placing them 2 inches apart on the prepared baking sheet.
- Flatten each ball slightly with a fork, creating a crisscross pattern for that classic peanut butter cookie look.
- Bake for 10-12 minutes, or until the edges are just starting to turn golden but the centers are still soft.
- Allow the cookies to cool on the baking sheet for 5 minutes before transferring to a wire rack to cool completely.
Heavenly soft with a slight crunch around the edges, these peanut butter cookies are a delightful balance of sweet and salty. Serve them with a cold glass of milk or crumble over vanilla ice cream for an indulgent dessert twist.
Vanilla Fudge

How many times have I found myself standing in the kitchen at midnight, craving something sweet yet simple? Vanilla fudge has been my go-to for those moments, a recipe passed down from my grandmother, who believed in the magic of vanilla. It’s creamy, rich, and just the right amount of sweet to satisfy any late-night craving or to share with friends over coffee.
Ingredients
- 2 cups granulated sugar (fine, for smoother texture)
- 1/2 cup unsalted butter (rich, creamy)
- 1/2 cup heavy cream (thick, luxurious)
- 1 tsp pure vanilla extract (aromatic, high-quality)
- 1 pinch salt (fine, to balance sweetness)
Instructions
- Line an 8-inch square baking pan with parchment paper, leaving an overhang on the sides for easy removal later.
- In a medium saucepan over medium heat, combine the granulated sugar, unsalted butter, and heavy cream. Stir constantly until the butter melts and the mixture is smooth.
- Bring the mixture to a boil, then reduce the heat to low. Continue to cook, stirring occasionally, until the temperature reaches 238°F on a candy thermometer, about 5 minutes. Tip: Avoid scraping the sides of the pan to prevent sugar crystals from forming.
- Remove the saucepan from the heat and stir in the pure vanilla extract and a pinch of salt. Let it sit undisturbed for 5 minutes to cool slightly.
- Using a wooden spoon, vigorously stir the mixture for about 5 minutes until it thickens and loses its gloss. Tip: This step is crucial for achieving the perfect fudge texture.
- Pour the fudge into the prepared pan, smoothing the top with a spatula. Let it cool at room temperature for at least 2 hours before cutting into squares. Tip: For cleaner cuts, dip your knife in hot water and wipe it dry between slices.
Just like that, you’ve got a batch of vanilla fudge that’s irresistibly smooth and creamy, with a depth of flavor that only real vanilla can provide. Serve it on a pretty plate for guests, or keep it all to yourself—I won’t judge. Either way, it’s a little square of happiness.
Coconut Macaroons
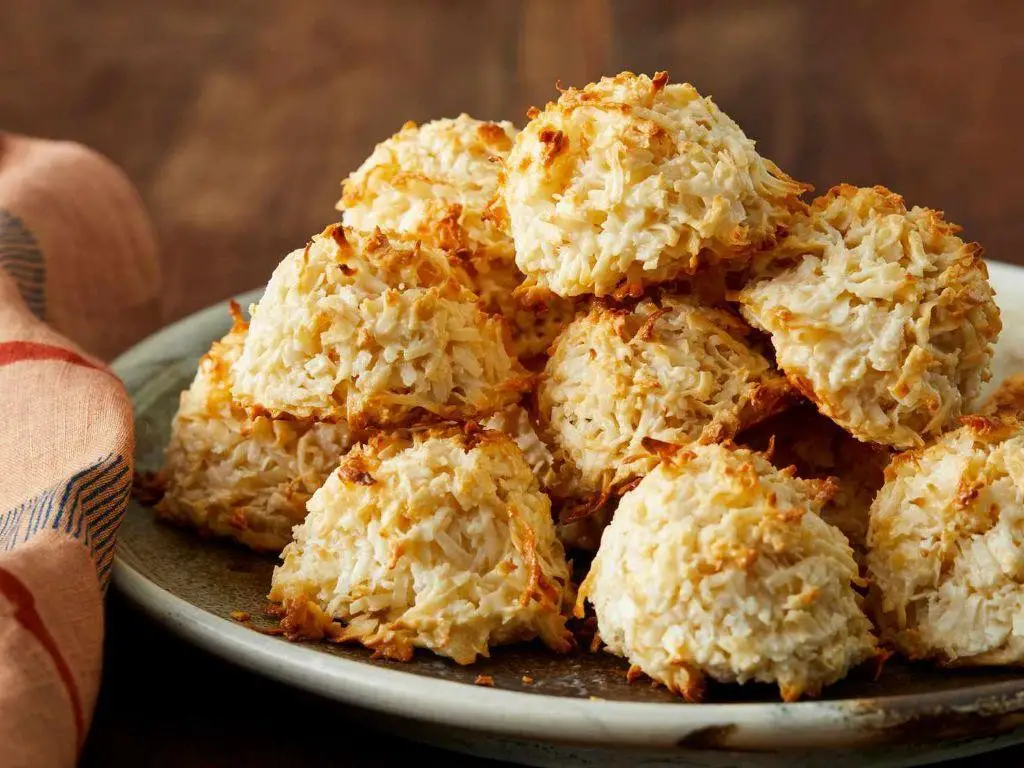
Ah, the sweet, tropical aroma of coconut macaroons baking in the oven takes me back to my grandmother’s kitchen, where these little delights were a staple during the holidays. Today, I’m sharing my foolproof recipe that’s as easy to make as it is delicious, perfect for those who love a chewy, coconutty treat with a golden exterior.
Ingredients
- 3 cups sweetened shredded coconut (moist and fluffy)
- 3/4 cup granulated sugar (fine and sparkling)
- 1/4 cup all-purpose flour (soft and powdery)
- 4 large egg whites (room temperature and slightly frothy)
- 1 tsp pure vanilla extract (aromatic and rich)
- 1/4 tsp salt (fine and dissolves easily)
Instructions
- Preheat your oven to 325°F (163°C) and line a baking sheet with parchment paper for easy cleanup.
- In a large mixing bowl, combine the sweetened shredded coconut, granulated sugar, all-purpose flour, and salt, stirring until well mixed.
- Add the egg whites and pure vanilla extract to the dry ingredients, mixing gently until the mixture is cohesive but not overly wet.
- Using a tablespoon or a small ice cream scoop, form the mixture into small mounds on the prepared baking sheet, spacing them about 2 inches apart.
- Bake for 20-25 minutes, or until the macaroons are golden brown around the edges and firm to the touch.
- Allow the macaroons to cool on the baking sheet for 5 minutes before transferring them to a wire rack to cool completely.
Perfectly baked coconut macaroons should have a crispy exterior with a soft, chewy center. For an extra indulgent twist, drizzle them with melted dark chocolate or serve alongside a scoop of vanilla ice cream for a delightful contrast of flavors and textures.
Apple Cinnamon Oatmeal Cookies
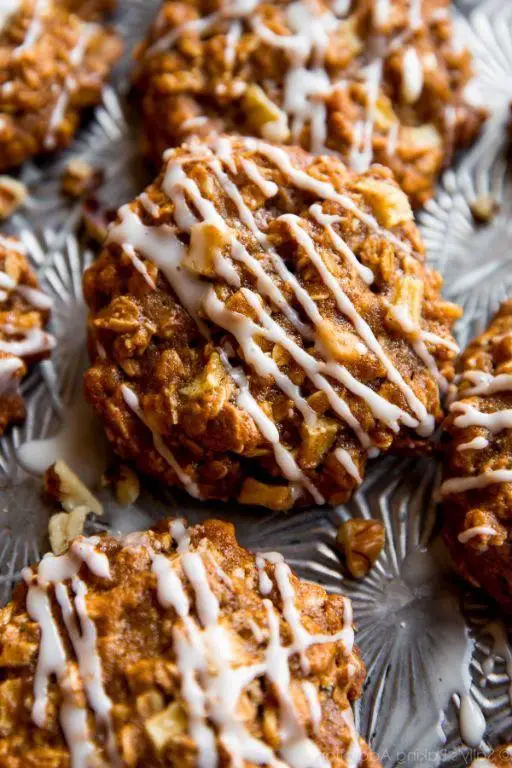
Zesty mornings call for something sweet and comforting, and that’s exactly what these Apple Cinnamon Oatmeal Cookies bring to the table. I remember the first time I baked these; the aroma of cinnamon and baked apples filled my kitchen, making it impossible to resist sneaking a bite before they even cooled.
Ingredients
- 1 cup of rolled oats, for a chewy texture
- 1/2 cup of unsalted butter, softened to room temperature
- 3/4 cup of light brown sugar, packed for a deep molasses flavor
- 1 large farm-fresh egg, to bind everything together
- 1 teaspoon of pure vanilla extract, for a warm aroma
- 1 cup of all-purpose flour, sifted for lightness
- 1/2 teaspoon of baking soda, to help them rise
- 1 teaspoon of ground cinnamon, for that quintessential spice
- 1/2 teaspoon of fine sea salt, to balance the sweetness
- 1 cup of finely diced apples, for a juicy burst in every bite
Instructions
- Preheat your oven to 350°F (175°C) and line a baking sheet with parchment paper.
- In a large bowl, cream together the softened unsalted butter and light brown sugar until light and fluffy, about 3 minutes.
- Beat in the large farm-fresh egg and pure vanilla extract until fully incorporated.
- In a separate bowl, whisk together the sifted all-purpose flour, baking soda, ground cinnamon, and fine sea salt.
- Gradually add the dry ingredients to the wet ingredients, mixing until just combined to avoid overworking the dough.
- Fold in the rolled oats and finely diced apples until evenly distributed throughout the dough.
- Drop tablespoon-sized portions of dough onto the prepared baking sheet, spacing them about 2 inches apart.
- Bake for 10-12 minutes, or until the edges are golden but the centers are still soft.
- Allow the cookies to cool on the baking sheet for 5 minutes before transferring to a wire rack to cool completely.
Rich in flavor and texture, these cookies are a delightful mix of chewy oats and tender apples, with a hint of cinnamon warmth. Serve them slightly warm with a dollop of vanilla ice cream for an indulgent treat, or pack them in your lunchbox for a sweet midday pick-me-up.
Chocolate Covered Strawberries

Zesty and vibrant, chocolate covered strawberries are the epitome of a simple yet luxurious treat that never fails to impress. I remember the first time I made them for a Valentine’s Day surprise; the combination of juicy strawberries and velvety chocolate was a hit, and now they’re my go-to for any occasion that calls for a touch of sweetness.
Ingredients
- 1 pound fresh, ripe strawberries with vibrant red hues and firm texture
- 8 ounces high-quality semi-sweet chocolate, finely chopped for smooth melting
- 1 tablespoon creamy unsalted butter
- 1/2 teaspoon pure vanilla extract for a hint of warmth
Instructions
- Rinse the strawberries under cold water and pat them completely dry with paper towels to ensure the chocolate adheres properly.
- Line a baking sheet with parchment paper, preparing a space for the strawberries to set after dipping.
- In a heatproof bowl, combine the chopped chocolate, butter, and vanilla extract.
- Create a double boiler by placing the bowl over a pot of simmering water, making sure the bottom of the bowl doesn’t touch the water, to melt the chocolate gently.
- Stir the chocolate mixture continuously with a silicone spatula until it’s completely smooth and glossy, about 5 minutes.
- Remove the bowl from the heat and let the chocolate cool slightly, about 2 minutes, to thicken just a bit for better coating.
- Hold a strawberry by the stem and dip it into the chocolate, swirling to coat it evenly up to the leaves.
- Allow any excess chocolate to drip off back into the bowl, then place the strawberry on the prepared baking sheet.
- Repeat with the remaining strawberries, then refrigerate them for 30 minutes, or until the chocolate is fully set.
Velvety chocolate encases each strawberry, creating a delightful contrast with the fruit’s natural juiciness. Serve them on a decorative platter for an elegant touch, or pack them in a cute box as a heartfelt homemade gift.
Pumpkin Spice Truffles

Gathering around the kitchen during the fall season always brings back memories of my grandmother’s cozy recipes, and these Pumpkin Spice Truffles are no exception. They’re the perfect bite-sized treat to enjoy with a cup of hot cider, embodying all the warmth and spice of autumn in one delicious morsel.
Ingredients
- 1 cup creamy pumpkin puree, homemade or canned
- 2 cups finely ground graham cracker crumbs
- 1/2 cup rich, velvety cream cheese, softened
- 1/4 cup pure maple syrup, dark and robust
- 1 tsp aromatic ground cinnamon
- 1/2 tsp freshly grated nutmeg
- 1/4 tsp pungent ground cloves
- 1/4 tsp zesty ground ginger
- 1 cup smooth white chocolate chips, for melting
- 1 tbsp vibrant coconut oil
- 1/4 cup toasted pecans, finely chopped for garnish
Instructions
- In a large mixing bowl, combine the pumpkin puree, graham cracker crumbs, softened cream cheese, maple syrup, cinnamon, nutmeg, cloves, and ginger until the mixture is uniformly blended.
- Using a small cookie scoop or a tablespoon, form the mixture into 1-inch balls and place them on a parchment-lined baking sheet. Tip: Wet your hands slightly to prevent the mixture from sticking.
- Freeze the formed balls for 30 minutes to firm up, making them easier to coat.
- In a microwave-safe bowl, melt the white chocolate chips and coconut oil in 30-second intervals, stirring between each, until smooth. Tip: Ensure no water gets into the chocolate to prevent seizing.
- Using a fork, dip each frozen pumpkin ball into the melted chocolate, allowing the excess to drip off before returning it to the parchment paper. Tip: Work quickly as the chocolate will start to set.
- Sprinkle the tops with chopped pecans before the chocolate sets for a crunchy contrast.
- Refrigerate the truffles for at least 15 minutes to allow the chocolate to fully harden.
The truffles boast a creamy center with a delightful crunch from the pecans, offering a symphony of autumnal flavors in every bite. Serve them on a rustic wooden board for a charming presentation at your next fall gathering.
Raspberry Sorbet
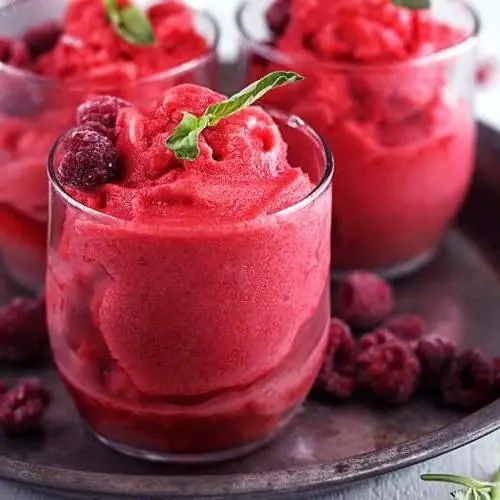
Nothing beats the refreshing taste of homemade raspberry sorbet on a hot summer day. I remember the first time I tried making it; the vibrant color and the burst of fruity flavor made me an instant fan. Now, it’s my go-to dessert when I need something light yet satisfying.
Ingredients
- 2 cups fresh, juicy raspberries
- 3/4 cup granulated sugar
- 1 cup cold, crisp water
- 1 tbsp freshly squeezed lemon juice
- 1 tsp pure vanilla extract
Instructions
- In a medium saucepan, combine the granulated sugar and cold water. Heat over medium heat, stirring constantly, until the sugar completely dissolves, about 3 minutes. Remove from heat and let cool to room temperature.
- While the sugar syrup cools, puree the fresh raspberries and lemon juice in a blender until smooth. Strain the mixture through a fine-mesh sieve to remove the seeds, pressing down with a spoon to extract as much liquid as possible.
- Stir the raspberry puree and vanilla extract into the cooled sugar syrup until well combined. Pour the mixture into an ice cream maker and churn according to the manufacturer’s instructions, usually about 20-25 minutes, until it reaches a soft sorbet consistency.
- Transfer the sorbet to an airtight container and freeze for at least 4 hours, or until firm. For the best texture, let it sit at room temperature for 5 minutes before scooping.
Just imagine the creamy texture and the tangy-sweet flavor of this raspberry sorbet melting in your mouth. Serve it in chilled glasses with a sprig of mint or alongside a slice of pound cake for an extra special treat.
Blueberry Yogurt Popsicles
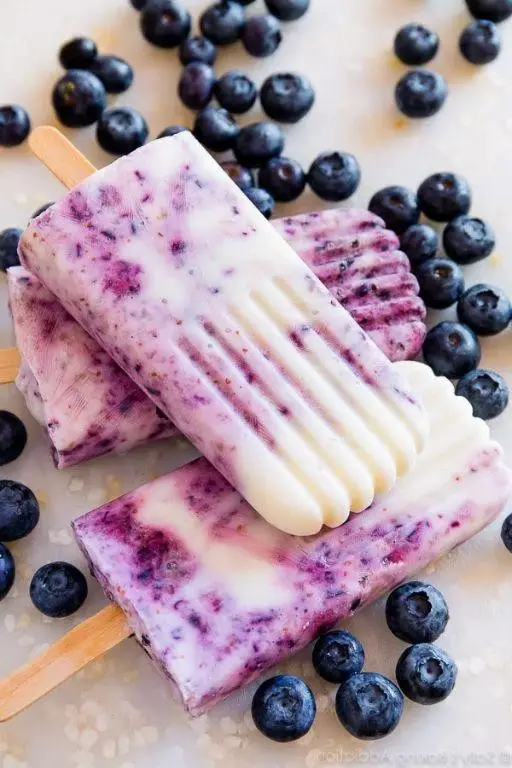
As the summer heat starts to peak, there’s nothing quite like the joy of biting into a cold, refreshing popsicle. I remember making these Blueberry Yogurt Popsicles with my niece last summer, and the way her face lit up with each bite was priceless. It’s a simple recipe that brings back memories and cools you down in the most delicious way.
Ingredients
- 2 cups of fresh, plump blueberries
- 1 cup of creamy Greek yogurt
- 1/4 cup of golden honey
- 1 tsp of pure vanilla extract
- A pinch of fine sea salt
Instructions
- In a blender, combine the fresh blueberries, creamy Greek yogurt, golden honey, pure vanilla extract, and a pinch of fine sea salt.
- Blend on high speed for about 1 minute, or until the mixture is completely smooth and no blueberry skins remain.
- Pour the mixture into popsicle molds, leaving a little space at the top for expansion as they freeze. Tip: Tap the molds gently on the counter to remove any air bubbles.
- Insert popsicle sticks into each mold, making sure they’re centered and straight.
- Freeze the popsicles for at least 6 hours, or overnight for best results. Tip: If you’re in a hurry, placing them in the coldest part of your freezer can speed up the process.
- Once fully frozen, run the molds under warm water for a few seconds to easily release the popsicles. Tip: Don’t use hot water, as it can melt the popsicles too quickly.
Enjoy the creamy texture and the perfect balance of sweet and tart flavors in these Blueberry Yogurt Popsicles. They’re even more delightful when served with a sprinkle of crushed graham crackers on top for an extra crunch.
Almond Butter Bites
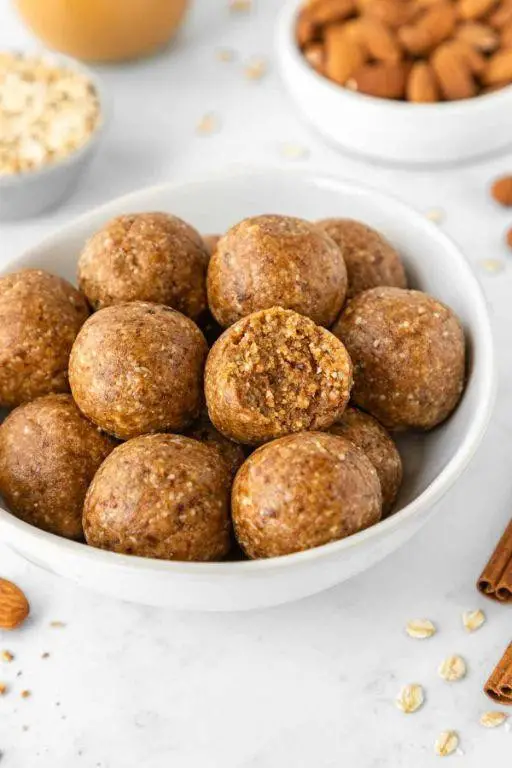
These Almond Butter Bites are my go-to when I need a quick, nutritious snack that feels indulgent. I stumbled upon this recipe during a hectic week when I was craving something sweet but didn’t want to spend hours in the kitchen.
Ingredients
- 1 cup creamy almond butter, smooth and unsweetened
- 1/3 cup honey, raw and golden
- 1/2 cup old-fashioned oats, hearty and thick
- 1/4 cup ground flaxseed, finely milled
- 1/2 tsp vanilla extract, pure and fragrant
- 1/4 tsp sea salt, fine and crunchy
- 1/4 cup dark chocolate chips, rich and melty
Instructions
- In a medium mixing bowl, combine the creamy almond butter and golden honey until smooth and well blended.
- Add the hearty old-fashioned oats and finely milled ground flaxseed to the bowl, stirring until all ingredients are evenly incorporated.
- Mix in the pure vanilla extract and fine sea salt, enhancing the flavors of the mixture.
- Fold in the rich dark chocolate chips, ensuring they’re distributed throughout the mixture for bursts of chocolate in every bite.
- Using a tablespoon, scoop the mixture and roll into 1-inch balls, placing them on a parchment-lined baking sheet.
- Chill the bites in the refrigerator for at least 30 minutes, or until firm to the touch, to help them set properly.
Just out of the fridge, these Almond Butter Bites have a delightful chewiness with a slight crunch from the oats and flaxseed. The dark chocolate chips add a luxurious melt-in-your-mouth contrast. Try serving them alongside a cup of hot coffee for a mid-afternoon pick-me-up that’s both satisfying and wholesome.
Chocolate Avocado Mousse
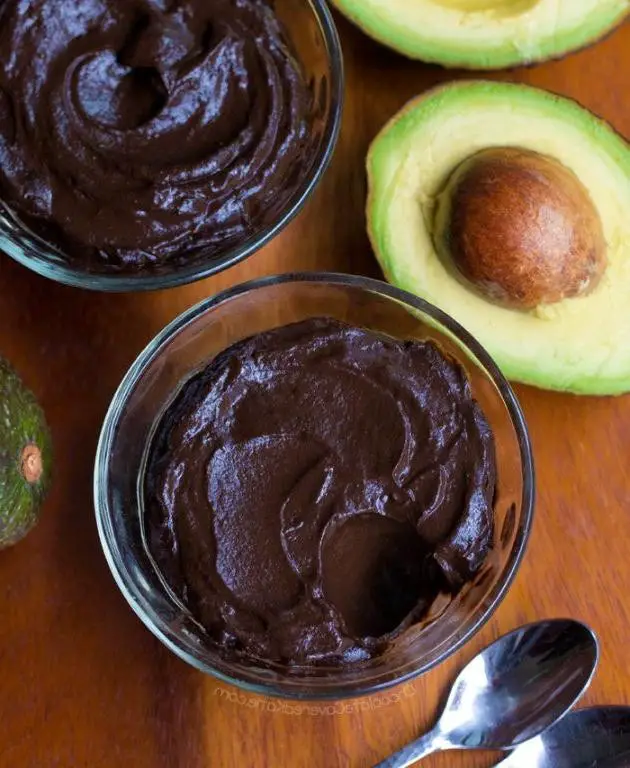
Kind of like discovering a hidden gem in your pantry, this Chocolate Avocado Mousse is a game-changer for anyone looking to indulge without the guilt. I stumbled upon this recipe during a late-night fridge raid, and it’s been my go-to dessert ever since.
Ingredients
- 2 ripe avocados, creamy and smooth
- 1/4 cup unsweetened cocoa powder, rich and dark
- 1/4 cup pure maple syrup, sweet and aromatic
- 1 tsp vanilla extract, pure and fragrant
- A pinch of sea salt, fine and flaky
- 1/2 cup coconut milk, full-fat and creamy
- Dark chocolate shavings, for garnish
Instructions
- Scoop the flesh of the avocados into a blender, ensuring no green bits are left behind for the smoothest texture.
- Add the cocoa powder, maple syrup, vanilla extract, and sea salt to the blender with the avocado.
- Pour in the coconut milk to help blend the ingredients into a silky consistency, scraping down the sides as needed.
- Blend on high for 1-2 minutes until the mixture is completely smooth and no avocado chunks remain. Tip: If the mousse is too thick, add a tablespoon of coconut milk at a time until desired consistency is reached.
- Transfer the mousse to serving dishes and chill in the refrigerator for at least 30 minutes to set. Tip: Covering the dishes with plastic wrap touching the surface of the mousse prevents a skin from forming.
- Before serving, garnish with dark chocolate shavings for an extra touch of decadence. Tip: Use a vegetable peeler on a bar of dark chocolate for elegant shavings.
Now, this mousse is luxuriously creamy with a deep chocolate flavor that’s perfectly balanced by the subtle sweetness of maple syrup. Serve it in elegant glasses for a dinner party or enjoy it straight from the bowl on a cozy night in.
Peach Cobbler

Very few desserts scream summer quite like a peach cobbler. I remember the first time I made it, the kitchen filled with the sweet aroma of peaches and cinnamon, and I knew it was going to be a hit. Now, it’s my go-to recipe when I want to impress guests or just treat myself to something special.
Ingredients
- 4 cups of ripe, juicy peaches, peeled and sliced
- 1 cup of granulated sugar, for that perfect sweetness
- 1/2 cup of unsalted butter, melted to a golden hue
- 1 cup of all-purpose flour, sifted for lightness
- 1 tablespoon of baking powder, to ensure a fluffy topping
- 1/4 teaspoon of salt, to balance the flavors
- 1 cup of whole milk, for a rich and tender dough
- 1 teaspoon of pure vanilla extract, for a hint of warmth
- 1/2 teaspoon of ground cinnamon, for a spicy undertone
Instructions
- Preheat your oven to 375°F (190°C) to ensure it’s ready for baking.
- In a 9×13 inch baking dish, pour the melted unsalted butter, spreading it evenly across the bottom.
- In a medium bowl, mix the sifted all-purpose flour, granulated sugar, baking powder, and salt until well combined.
- Stir in the whole milk and pure vanilla extract into the dry ingredients until just combined, avoiding overmixing to keep the topping light.
- Pour the batter over the melted butter in the baking dish; do not stir.
- Arrange the peeled and sliced ripe, juicy peaches evenly over the batter.
- Sprinkle the ground cinnamon over the peaches for that spicy undertone.
- Bake for 45 minutes, or until the topping is golden brown and the peaches are bubbling.
- Let the cobbler cool for 10 minutes before serving to allow the flavors to meld together beautifully.
Flaky, buttery topping meets soft, sweet peaches in this cobbler, creating a dessert that’s as comforting as it is delicious. Serve it warm with a scoop of vanilla ice cream for an extra indulgent treat, or enjoy it as is for a simpler pleasure.
Orange Julius

Orange Julius has always been my go-to drink for those sweltering summer afternoons when only something sweet, creamy, and citrusy will do. I remember first trying it at a local fair, and I’ve been hooked ever since, experimenting with the recipe until it was just right.
Ingredients
- 1 cup cold whole milk, creamy and rich
- 1/2 cup orange juice, freshly squeezed and vibrant
- 1/4 cup granulated sugar, for that perfect sweetness
- 1 tsp pure vanilla extract, for a hint of warmth
- 1 cup ice cubes, for the ultimate chill
Instructions
- In a blender, combine the cold whole milk and freshly squeezed orange juice for a smooth base.
- Add the granulated sugar and pure vanilla extract to the blender, ensuring every sip is perfectly sweetened with a warm undertone.
- Blend on high speed for 30 seconds, or until the sugar is completely dissolved and the mixture is homogenous.
- Add the ice cubes to the blender, blending again on high until the drink is frothy and the ice is fully crushed, about 1 minute.
- Pour the Orange Julius into two glasses immediately, serving it cold for the best experience.
Now, the texture of this Orange Julius is luxuriously creamy yet refreshingly light, with the vibrant orange flavor shining through. For an extra special touch, garnish with a thin orange slice on the rim of each glass.
Cherry Chocolate Chip Cookies
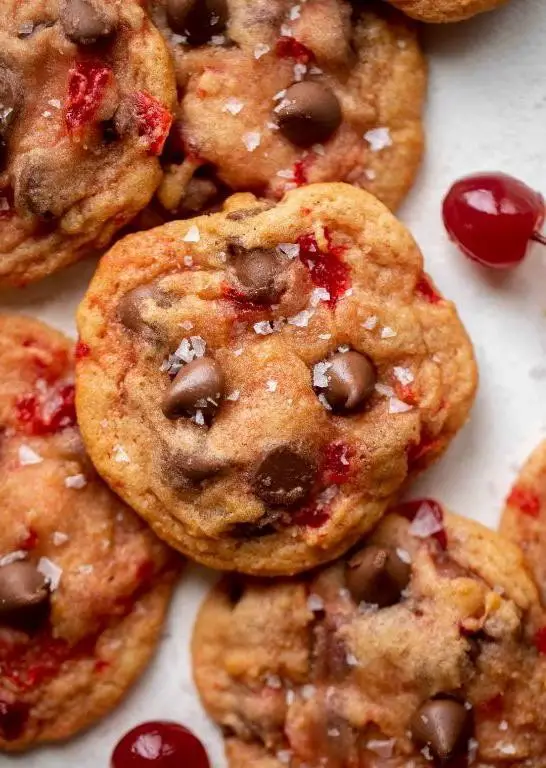
Goodness, there’s nothing quite like the smell of cookies baking in the oven to make a house feel like home. I remember the first time I tried adding cherries to my classic chocolate chip cookies; the tartness of the cherries paired with the sweet chocolate was a game-changer. Now, it’s a recipe I turn to whenever I need a little comfort or want to impress guests with something unexpectedly delightful.
Ingredients
- 1 cup unsalted butter, softened to room temperature
- 3/4 cup granulated sugar, for that perfect sweetness
- 3/4 cup packed brown sugar, adding a deep molasses flavor
- 2 large farm-fresh eggs, at room temperature
- 2 tsp pure vanilla extract, for aromatic warmth
- 2 1/4 cups all-purpose flour, sifted for lightness
- 1 tsp baking soda, to ensure a perfect rise
- 1/2 tsp fine sea salt, to balance the sweetness
- 1 cup semi-sweet chocolate chips, for rich, melty pockets
- 1 cup dried cherries, plump and tangy
Instructions
- Preheat your oven to 375°F (190°C) and line two baking sheets with parchment paper for easy cleanup.
- In a large bowl, cream together the softened butter, granulated sugar, and brown sugar until light and fluffy, about 3 minutes. Tip: Scrape down the sides of the bowl halfway through to ensure even mixing.
- Beat in the eggs one at a time, then stir in the vanilla extract until fully incorporated.
- In a separate bowl, whisk together the sifted flour, baking soda, and sea salt. Gradually add this to the wet ingredients, mixing just until combined. Tip: Overmixing can lead to tough cookies, so stop as soon as the flour disappears.
- Fold in the chocolate chips and dried cherries until evenly distributed throughout the dough.
- Drop rounded tablespoons of dough onto the prepared baking sheets, spacing them about 2 inches apart. Tip: For uniformly sized cookies, use a cookie scoop.
- Bake for 9-11 minutes, or until the edges are golden but the centers are still soft. Let them cool on the baking sheets for 5 minutes before transferring to a wire rack to cool completely.
Mmm, these cookies are a delightful contrast of textures and flavors—crispy edges giving way to a chewy center, with bursts of tart cherries and rich chocolate in every bite. Serve them warm with a glass of cold milk for the ultimate comfort food experience, or pack them in a pretty box for a thoughtful homemade gift.
Conclusion
Absolutely delightful! This roundup of 18 easy 3-ingredient dessert recipes proves that simplicity can lead to the most delicious treats. Perfect for busy home cooks looking to whip up something sweet without the fuss. We’d love to hear which recipes you try and adore—drop a comment with your favorites! Don’t forget to share the sweetness by pinning this article on Pinterest. Happy baking!

Michael Johnson is the founder of Pan Mastery, Inspired by his blacksmith grandfather’s legacy has a deep appreciation for hand-crafted pots and pans, he provides invaluable guides, reviews, and recipes to enhance your culinary journey.