Dive into a world of bold flavors with our collection of 18 Spicy Asian Seafood Recipes that promise to transform your dinner routine into an exciting culinary adventure. Perfect for home cooks looking to spice things up, these dishes blend the heat of Asian spices with the fresh, delicate taste of seafood. Get ready to impress your taste buds and keep everyone at the table asking for more!
Thai Spicy Shrimp Soup

Let’s dive into making a bowl of Thai Spicy Shrimp Soup that’ll warm your soul and spice up your dinner routine. It’s packed with flavors that are bold, bright, and utterly comforting.
Ingredients
- 1 lb shrimp, peeled and deveined (I like to keep the tails on for extra flavor)
- 4 cups chicken broth (homemade is best, but store-bought works in a pinch)
- 1 can (13.5 oz) coconut milk (go for full-fat for that creamy texture)
- 2 tbsp red curry paste (adjust based on your heat preference)
- 1 tbsp fish sauce (it’s the secret umami booster)
- 1 tbsp brown sugar (balances the heat perfectly)
- 1 cup sliced mushrooms (any kind you like, but I’m partial to shiitake)
- 1 red bell pepper, thinly sliced (adds a sweet crunch)
- 2 tbsp lime juice (freshly squeezed makes all the difference)
- 1/4 cup cilantro, chopped (for that fresh finish)
- 1 tbsp vegetable oil (or any neutral oil you have on hand)
Instructions
- Heat the vegetable oil in a large pot over medium heat until shimmering.
- Add the red curry paste and stir for about 1 minute until fragrant. Tip: Don’t let it burn!
- Pour in the chicken broth and coconut milk, stirring to combine. Bring to a gentle simmer.
- Add the fish sauce and brown sugar, stirring until the sugar dissolves.
- Toss in the mushrooms and red bell pepper. Simmer for 5 minutes until slightly softened.
- Add the shrimp and cook for 2-3 minutes until they turn pink and opaque. Tip: Overcooking shrimp makes them rubbery, so keep an eye out!
- Remove from heat and stir in the lime juice and cilantro. Tip: The lime juice brightens the whole dish, so don’t skip it!
This soup is a beautiful mix of creamy, spicy, and tangy with tender shrimp and crisp veggies. Serve it with a side of steamed jasmine rice to soak up all the delicious broth, or enjoy it as is for a lighter meal.
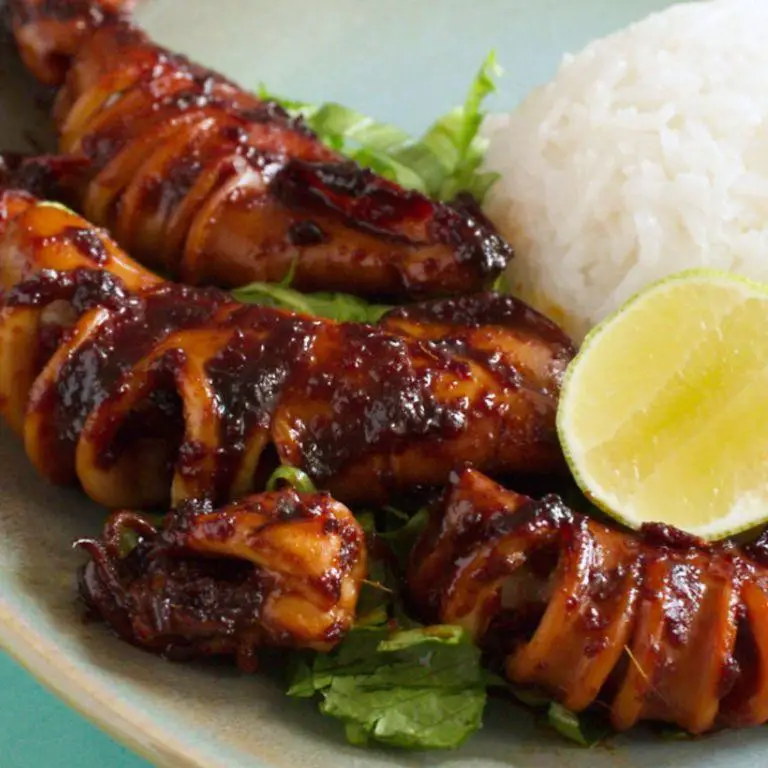
Vietnamese Caramelized Fish
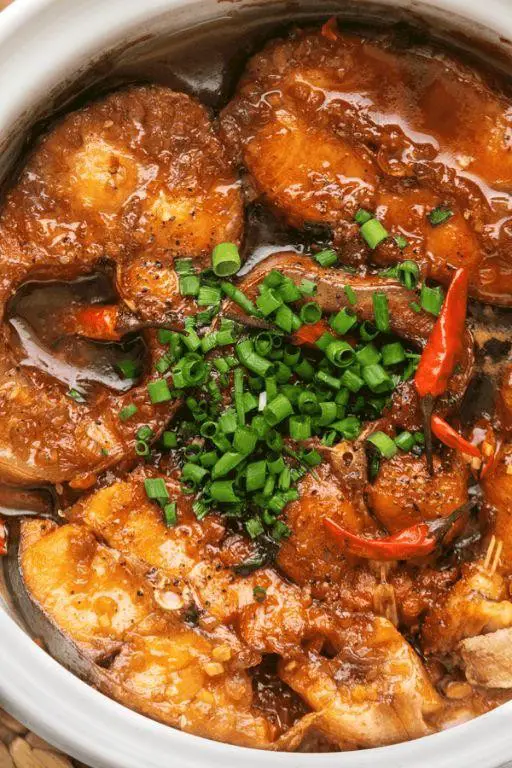
Craving something sweet, savory, and utterly delicious? Vietnamese Caramelized Fish is your answer. It’s a simple dish that packs a punch, perfect for a weeknight dinner that feels special.
Ingredients
- 1.5 lbs of white fish fillets (I love using cod for its flaky texture)
- 3 tbsp fish sauce (the good stuff makes all the difference)
- 1/4 cup brown sugar (for that deep caramel flavor)
- 2 cloves garlic, minced (fresh is best, but hey, we’ve all been there)
- 1 tbsp vegetable oil (extra virgin olive oil works in a pinch)
- 1/2 cup water (to help create the sauce)
- 2 green onions, sliced (for a fresh finish)
Instructions
- Heat the vegetable oil in a large skillet over medium heat until shimmering.
- Add the minced garlic and sauté for about 30 seconds, just until fragrant—don’t let it burn!
- Sprinkle the brown sugar evenly over the garlic, then pour in the water and fish sauce, stirring to combine.
- Carefully place the fish fillets into the skillet, spooning some of the sauce over the top.
- Reduce the heat to low, cover, and let simmer for 10 minutes. The sauce should thicken and the fish cook through.
- Flip the fish fillets halfway through cooking to ensure even caramelization.
- Once done, garnish with sliced green onions before serving.
You’ll love how the fish stays tender inside with a slightly sticky, sweet glaze on the outside. Serve it over steamed rice with a side of crisp veggies for a meal that’s balanced and bursting with flavor.
Korean Spicy Squid Stir Fry
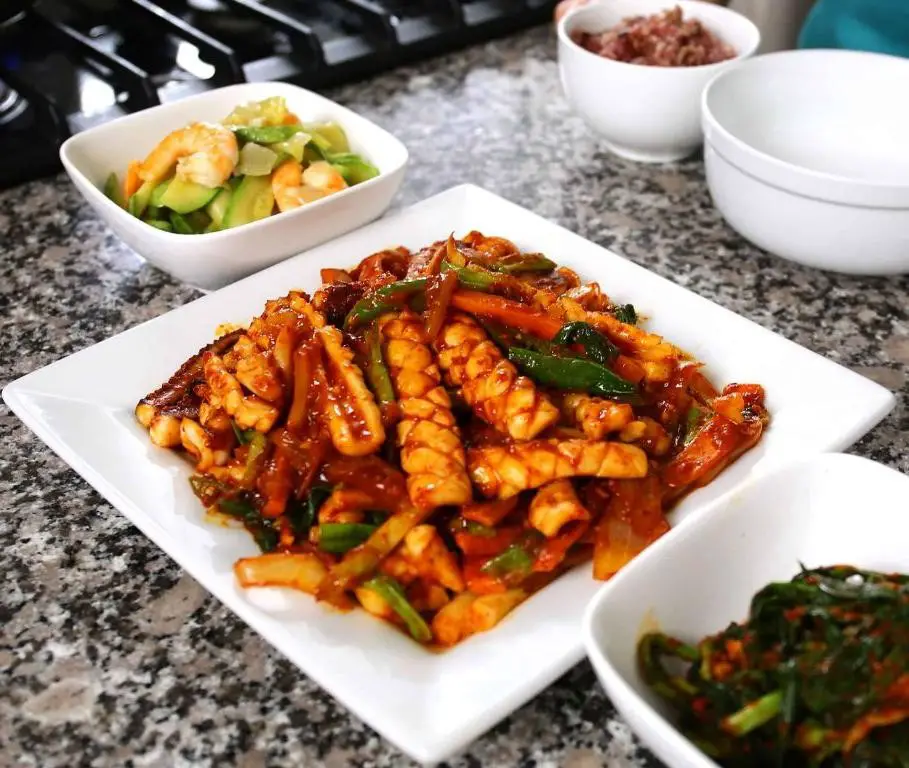
Perfect for those nights when you’re craving something bold and fiery, this Korean Spicy Squid Stir Fry is a game-changer. You’ll love how quickly it comes together, packing a punch of flavor in every bite.
Ingredients
- 1 lb fresh squid, cleaned and sliced into rings – trust me, fresh makes all the difference.
- 2 tbsp gochujang (Korean chili paste) – my kitchen staple for that authentic kick.
- 1 tbsp soy sauce – I always go for low-sodium to control the saltiness.
- 1 tbsp sugar – just a touch to balance the heat.
- 2 cloves garlic, minced – because more garlic is always better.
- 1 tbsp sesame oil – my secret for that nutty aroma.
- 1/2 cup sliced onions – they add a nice crunch.
- 1/2 cup sliced bell peppers – I like using red for a pop of color.
- 1 tbsp vegetable oil – for that perfect stir-fry sizzle.
Instructions
- In a bowl, mix gochujang, soy sauce, sugar, and minced garlic to make the sauce. Tip: Adjust the gochujang if you’re sensitive to heat.
- Heat vegetable oil in a large pan over medium-high heat until shimmering, about 1 minute.
- Add onions and bell peppers, stir-frying for 2 minutes until slightly softened.
- Toss in the squid rings, cooking for another 2 minutes until they start to curl. Tip: Don’t overcook, or they’ll get rubbery.
- Pour the sauce over the squid and veggies, stirring well to coat everything evenly. Cook for 1 more minute.
- Drizzle with sesame oil, give it a final stir, and remove from heat. Tip: The sesame oil adds depth, so don’t skip it.
Light and lively, this dish boasts a tender squid texture with a fiery, sweet glaze. Serve it over steamed rice or with a side of crisp lettuce wraps for a fun twist.
Japanese Seafood Ramen
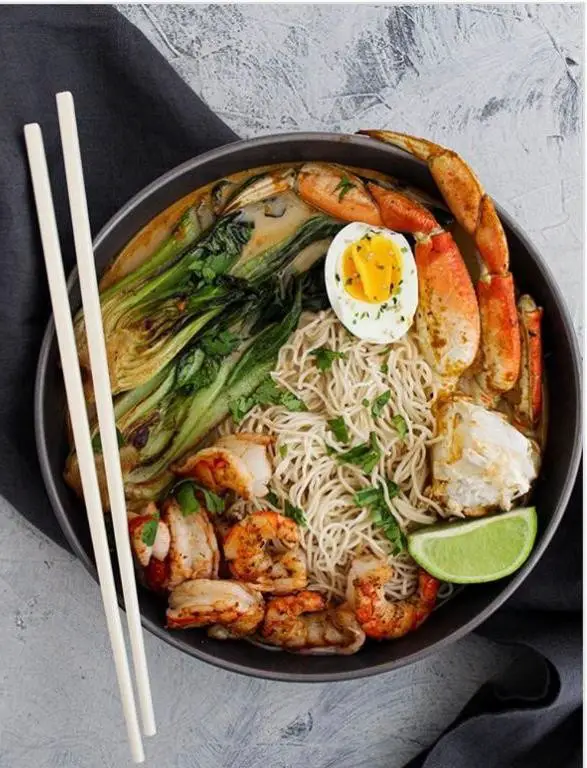
Craving something warm, comforting, and packed with umami? Japanese seafood ramen is your go-to dish, perfect for those chilly evenings or when you’re just in need of a little comfort food magic.
Ingredients
- 8 cups of chicken broth (homemade if you’ve got it, but store-bought works in a pinch)
- 2 tbsp soy sauce (I swear by the low-sodium kind for better control over the saltiness)
- 1 tbsp mirin (that sweet rice wine that adds a subtle depth)
- 2 cloves garlic, minced (because more garlic is always better)
- 1 inch ginger, sliced (peel it or don’t, I’m not your boss)
- 200g ramen noodles (fresh if you can find them, but dried is totally fine)
- 1 cup mixed seafood (shrimp and scallops are my favorites here)
- 2 soft-boiled eggs (room temp eggs make peeling less of a nightmare)
- 2 green onions, sliced (for that fresh crunch)
- 1 sheet nori, torn into pieces (because we’re fancy like that)
Instructions
- In a large pot, bring the chicken broth to a simmer over medium heat. This is your flavor base, so let’s get it right.
- Add the soy sauce, mirin, garlic, and ginger to the broth. Let it simmer for 10 minutes to infuse all those flavors together. Tip: Skim off any foam that rises to the top for a clearer broth.
- While the broth simmers, cook the ramen noodles according to the package instructions. Drain and set aside. Tip: Rinse the noodles under cold water to stop the cooking process and prevent them from sticking together.
- Add the mixed seafood to the broth and cook for 3-4 minutes, just until they’re opaque and cooked through. Overcooked seafood is a no-go.
- Divide the cooked noodles between two bowls. Ladle the hot broth and seafood over the noodles.
- Top each bowl with a soft-boiled egg, sliced green onions, and pieces of nori. Tip: Slice the eggs in half right before serving for that Instagram-worthy yolk drip.
Out of this world, right? The broth is rich and flavorful, the seafood is perfectly tender, and those noodles? Just the right amount of chew. Serve it with a side of kimchi for an extra kick, or keep it classic with a sprinkle of sesame seeds.
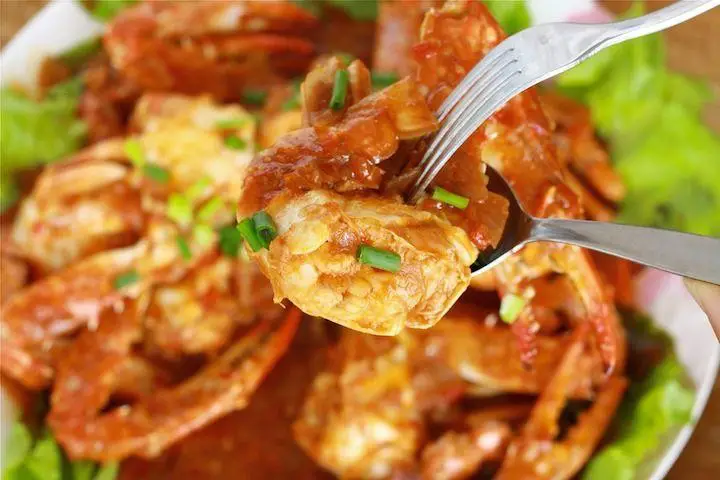
Chinese Sichuan Prawns
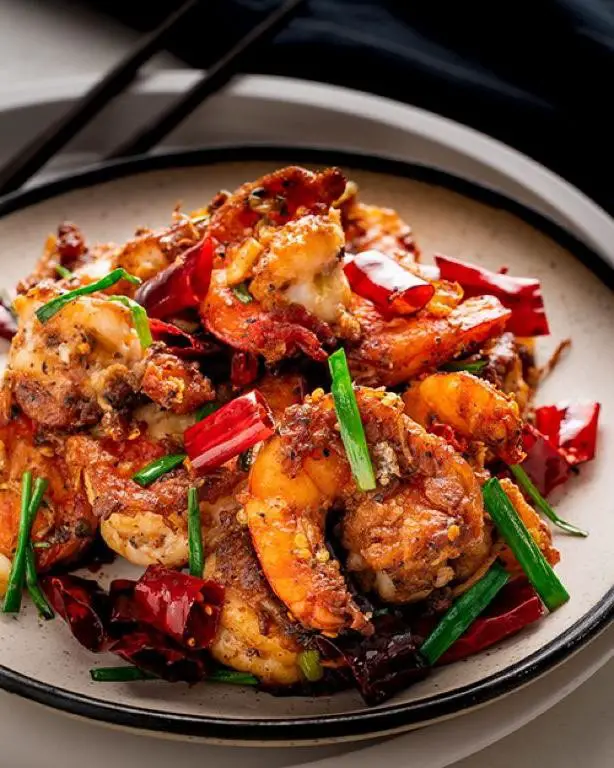
Guess what? You’re about to dive into making some seriously flavorful Chinese Sichuan Prawns that’ll knock your socks off. It’s all about that perfect balance of spicy, savory, and a hint of sweetness.
Ingredients
- 1 lb large prawns, peeled and deveined (I like to keep the tails on for presentation)
- 2 tbsp Sichuan peppercorns (trust me, they’re worth the hunt)
- 3 cloves garlic, minced (fresh is best, but hey, we’ve all been there)
- 1 tbsp ginger, grated (a little goes a long way)
- 2 tbsp soy sauce (I opt for low-sodium to control the saltiness)
- 1 tbsp hoisin sauce (the secret to that sweet depth)
- 1 tsp sugar (just a pinch to balance the heat)
- 2 tbsp vegetable oil (high smoke point is key here)
- 1/2 cup green onions, sliced (for that fresh crunch)
Instructions
- Heat the vegetable oil in a large pan over medium-high heat until shimmering.
- Add the Sichuan peppercorns and toast for about 30 seconds until fragrant. Tip: Don’t let them burn, or they’ll turn bitter.
- Toss in the garlic and ginger, stirring quickly for another 30 seconds to avoid burning.
- Add the prawns in a single layer, cooking for 2 minutes per side until they turn pink. Tip: Overcrowding the pan steams them, so cook in batches if needed.
- Pour in the soy sauce, hoisin sauce, and sugar, stirring to coat the prawns evenly. Cook for another minute until the sauce thickens slightly.
- Remove from heat and sprinkle with green onions. Tip: Letting it sit for a minute allows the flavors to meld beautifully.
Out of this world, right? The prawns are juicy with a kick that lingers, and the sauce clings just right. Serve it over steamed rice or with a side of crisp veggies to cut through the heat.
Malaysian Chili Crab
Kick off your culinary adventure with this Malaysian Chili Crab, a dish that’s as fun to make as it is to eat. You’ll love the bold flavors and the messy, hands-on experience.
Ingredients
- 2 lbs of fresh crab (I like to get mine live for the freshest taste, but pre-cooked works in a pinch)
- 1/4 cup of vegetable oil (extra virgin olive oil is my go-to for a richer flavor)
- 3 cloves of garlic, minced (fresh is best, but hey, we’ve all used the jarred stuff)
- 1 inch of ginger, grated (peel it with a spoon to save your fingers)
- 2 tbsp of chili paste (adjust based on how brave you’re feeling)
- 1/2 cup of ketchup (yes, ketchup—trust me on this)
- 1 tbsp of sugar (balances the heat perfectly)
- 1/2 cup of water (to help create that saucy goodness)
- 2 eggs, beaten (room temp eggs here blend smoother into the sauce)
- Salt to taste (I usually start with a pinch and adjust from there)
Instructions
- Heat the oil in a large wok or deep pan over medium-high heat until it shimmers.
- Add the garlic and ginger, stirring for about 30 seconds until fragrant—don’t let them burn!
- Toss in the chili paste, stirring quickly to mix it with the oil, garlic, and ginger.
- Add the crab pieces, stirring to coat them evenly with the spicy mixture.
- Pour in the ketchup, sugar, and water, bringing the sauce to a simmer.
- Cover and let it cook for about 10 minutes, stirring occasionally to ensure even cooking.
- Slowly drizzle in the beaten eggs, stirring constantly to create silky ribbons in the sauce.
- Season with salt, then give it one final stir before taking it off the heat.
This dish is all about the sauce—thick, spicy, and slightly sweet, clinging to every piece of crab. Try serving it with crusty bread to soak up every last drop, or over steamed rice for a hearty meal.
Indonesian Grilled Fish with Sambal
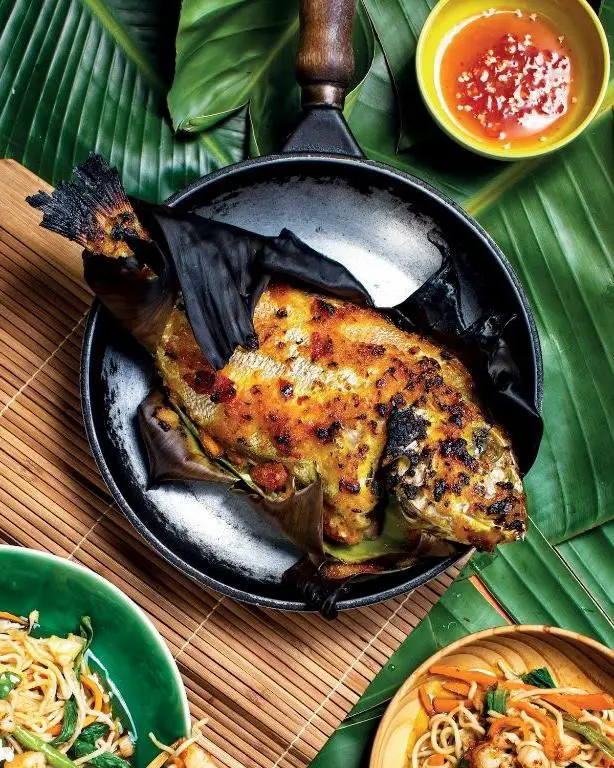
Mmm, have you ever tried Indonesian grilled fish with sambal? It’s a game-changer. The smoky fish paired with the spicy, tangy sambal is something you’ll crave after just one bite.
Ingredients
- 1 whole snapper (about 2 lbs), cleaned and scaled – I like snapper for its firm texture, but feel free to use any white fish you love.
- 2 tbsp extra virgin olive oil – my go-to for grilling because it adds a nice flavor.
- 1 tsp salt – just the right amount to season the fish without overpowering it.
- 1 cup sambal oelek – this spicy chili paste is the star of the dish, so don’t skimp!
- 2 cloves garlic, minced – because everything’s better with garlic.
- 1 tbsp lime juice – for that fresh, zesty kick.
- 1 tsp sugar – to balance the heat of the sambal.
Instructions
- Preheat your grill to medium-high heat, about 375°F. A well-heated grill ensures those beautiful grill marks.
- Rub the snapper inside and out with olive oil, then sprinkle with salt. This helps the skin get crispy.
- In a small bowl, mix sambal oelek, minced garlic, lime juice, and sugar. Taste and adjust if needed – but remember, it’s supposed to be spicy!
- Place the fish on the grill. Cook for about 5 minutes per side. Don’t rush flipping it; wait until it releases easily.
- Brush the sambal mixture over the fish during the last 2 minutes of cooking. This keeps the flavors vibrant and not burnt.
- Remove from grill and let it rest for a couple of minutes. This lets the juices redistribute.
Delight in the crispy skin and tender flesh of the fish, perfectly complemented by the fiery sambal. Serve it with steamed rice and a cold beer for the ultimate experience.
Filipino Garlic Butter Shrimp
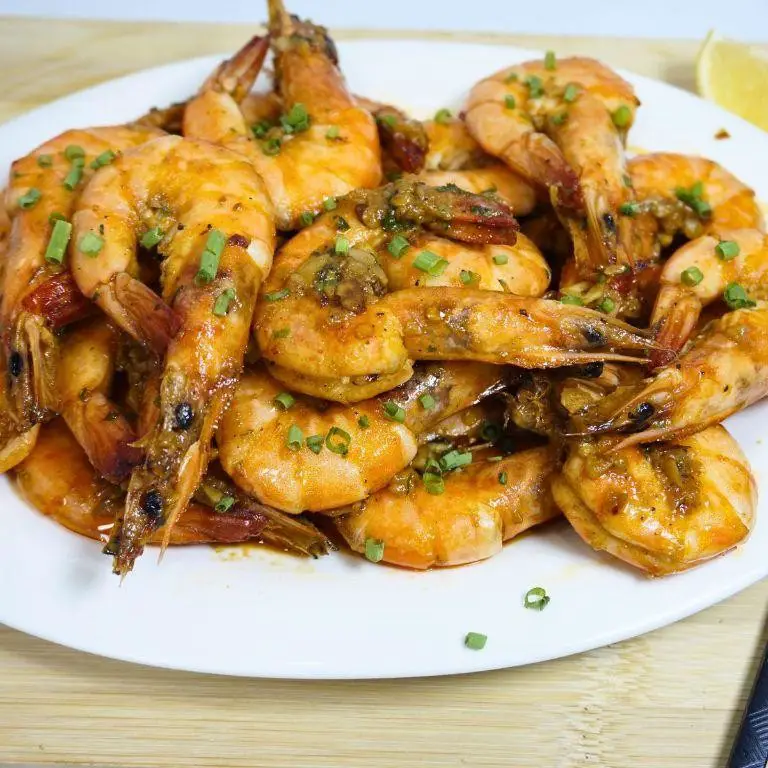
Zesty and bursting with flavor, this Filipino Garlic Butter Shrimp is your ticket to a quick, delicious meal that feels like a hug in a bowl. You’ll love how the garlic and butter come together to create something truly magical.
Ingredients
- 1 lb large shrimp, peeled and deveined (I like to leave the tails on for presentation)
- 4 tbsp unsalted butter (because salted can be too much with the shrimp)
- 5 cloves garlic, minced (the more, the merrier, I say)
- 1 tbsp olive oil (extra virgin is my go-to for that fruity note)
- 1/2 tsp red pepper flakes (adjust if you’re not into heat)
- Salt to taste (but really, just a pinch)
- 1/4 cup water (to help deglaze the pan)
- 1 tbsp lemon juice (freshly squeezed, please)
- 2 tbsp chopped parsley (for that fresh, herby finish)
Instructions
- Heat olive oil in a large skillet over medium-high heat until shimmering, about 1 minute.
- Add shrimp in a single layer and cook for 1 minute per side, just until they start to turn pink. Remove shrimp and set aside.
- In the same skillet, melt butter over medium heat. Tip: Don’t let it brown too much; you want that golden hue.
- Add minced garlic and red pepper flakes, sautéing for about 30 seconds until fragrant. Tip: Keep stirring to prevent the garlic from burning.
- Return shrimp to the skillet, tossing to coat in the garlic butter sauce. Cook for another 2 minutes.
- Pour in water and lemon juice, stirring to combine. Let it simmer for 1 minute to slightly reduce. Tip: This step marries all the flavors together beautifully.
- Season with a pinch of salt and sprinkle with chopped parsley before serving.
Garlicky, buttery, with a hint of spice, this shrimp dish is a flavor bomb. Serve it over steamed rice to soak up all that delicious sauce, or with crusty bread for dipping. Either way, it’s a win.
Singaporean Chili Lobster
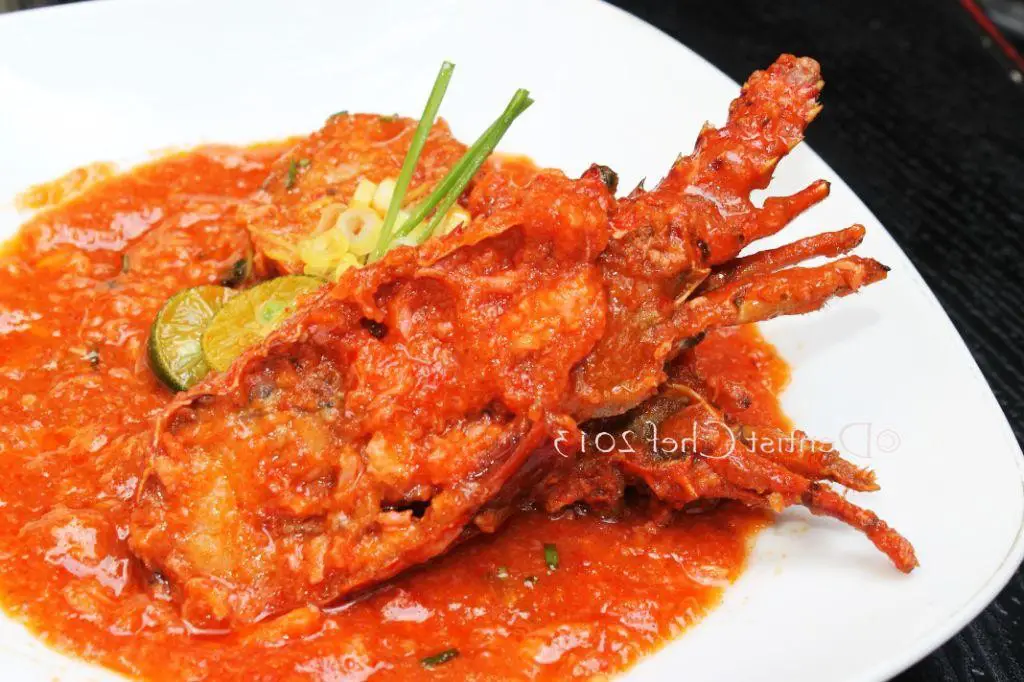
Think you’ve tried every lobster dish out there? Wait until you get a taste of Singaporean Chili Lobster—it’s a game-changer. This dish packs a punch with its sweet, spicy, and tangy flavors, making it a standout for any seafood lover.
Ingredients
- 2 live lobsters (about 1.5 lbs each) – trust me, fresh makes all the difference.
- 1/4 cup ketchup – the secret to that rich, tangy base.
- 2 tbsp sambal oelek – adjust if you’re not into too much heat.
- 1 tbsp soy sauce – I always go for low-sodium to control the saltiness.
- 1 tbsp sugar – balances the heat perfectly.
- 2 cloves garlic, minced – because what’s a stir-fry without garlic?
- 1 inch ginger, grated – adds a nice, warm kick.
- 1/2 cup chicken stock – homemade is best, but store-bought works in a pinch.
- 1 egg, beaten – room temp eggs blend in smoother.
- 2 tbsp cornstarch mixed with 2 tbsp water – for that glossy, thick sauce.
- 2 tbsp vegetable oil – extra virgin olive oil is my go-to, but any neutral oil works here.
Instructions
- Bring a large pot of water to a boil. Add the lobsters and cook for 5 minutes. Remove and let cool slightly before chopping into pieces.
- Heat oil in a large wok or pan over medium-high heat. Add garlic and ginger, stir for 30 seconds until fragrant.
- Toss in the lobster pieces. Stir-fry for 2 minutes until they start to turn pink.
- Mix in ketchup, sambal oelek, soy sauce, and sugar. Stir well to coat the lobster.
- Pour in chicken stock. Bring to a simmer and cook for 3 minutes.
- Slowly drizzle in the beaten egg while stirring to create ribbons.
- Add the cornstarch mixture. Stir until the sauce thickens, about 1 minute.
Best served immediately over steamed rice or with crusty bread to soak up all that delicious sauce. The lobster is succulent, and the sauce? Absolutely addictive with its perfect balance of sweet, spicy, and tangy.
Thai Basil Seafood Fried Rice
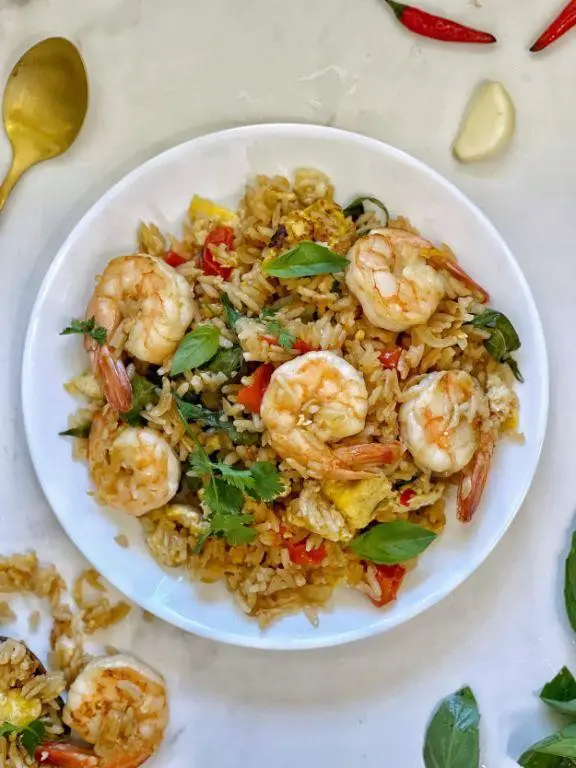
You know those nights when you’re craving something flavorful, quick, and a little bit exotic? Thai Basil Seafood Fried Rice is your answer. It’s a vibrant dish that brings the street food vibe right to your kitchen.
Ingredients
- 2 cups jasmine rice (day-old works best for that perfect fry)
- 1 tbsp extra virgin olive oil (my go-to for a subtle fruity note)
- 2 cloves garlic, minced (because more garlic is always better)
- 1/2 lb mixed seafood (shrimp and squid are my favorites here)
- 1 red bell pepper, diced (for that sweet crunch)
- 1/4 cup Thai basil leaves (the star of the show, don’t skip it)
- 2 tbsp fish sauce (trust me, it’s the secret weapon)
- 1 egg (I prefer room temp eggs here, they blend better)
- 1/2 tsp sugar (just a pinch to balance the flavors)
Instructions
- Heat the olive oil in a large wok or skillet over medium-high heat until shimmering, about 1 minute.
- Add the minced garlic and stir for 30 seconds until fragrant—don’t let it burn!
- Toss in the mixed seafood and cook for 2 minutes, just until they start to turn opaque.
- Push everything to one side, crack the egg into the empty space, and scramble it lightly before mixing it in with the seafood.
- Add the diced red bell pepper and stir-fry for another minute, keeping the veggies crisp.
- Throw in the day-old jasmine rice, breaking up any clumps with your spatula. Fry for 3 minutes, stirring constantly.
- Drizzle the fish sauce and sprinkle the sugar over the rice, mixing well to coat every grain.
- Finally, fold in the Thai basil leaves and cook for another 30 seconds until just wilted.
Fluffy, fragrant, and packed with umami, this fried rice is a symphony of textures and flavors. Serve it straight from the wok with a wedge of lime for an extra zing.
Vietnamese Seafood Pho
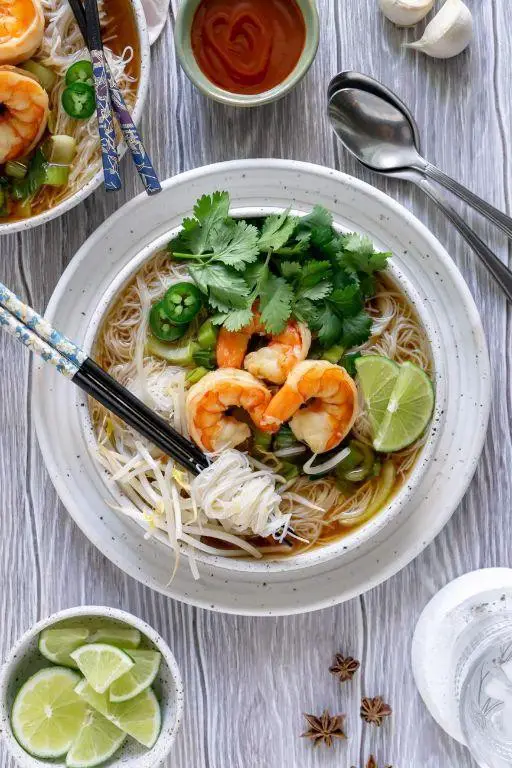
Ever craved a bowl of something warm, savory, and packed with flavors? Vietnamese Seafood Pho is your answer. It’s a comforting dish that brings the ocean to your bowl with a fragrant broth.
Ingredients
- 8 cups of water (I like to use filtered for the cleanest taste)
- 1 lb mixed seafood (shrimp and squid are my favorites for this)
- 8 oz rice noodles (the flat ones work best here)
- 2 tbsp fish sauce (don’t skip this—it’s the secret weapon)
- 1 tbsp sugar (just a touch to balance the flavors)
- 1 onion, sliced (I prefer yellow for sweetness)
- 3 cloves garlic, minced (fresh is always better)
- 1 inch ginger, sliced (peel it first for a smoother bite)
- 1 star anise (it adds a subtle licorice note)
- 1 lime, cut into wedges (for that fresh zing at the end)
- Fresh cilantro and basil (a handful each, because herbs make everything better)
Instructions
- Bring 8 cups of water to a boil in a large pot. This is your broth base.
- Add the onion, garlic, ginger, and star anise to the pot. Let it simmer for 10 minutes to infuse the flavors.
- Stir in the fish sauce and sugar. Taste and adjust if needed—it should be savory with a hint of sweetness.
- Add the mixed seafood. Cook for 3-4 minutes until just done. Overcooking makes it rubbery.
- While the seafood cooks, prepare the rice noodles according to package instructions. Drain and divide into bowls.
- Ladle the hot broth and seafood over the noodles. The heat will finish cooking the noodles perfectly.
- Garnish with lime wedges, cilantro, and basil. Squeeze lime over the top for brightness.
Vietnamese Seafood Pho is a symphony of textures—silky noodles, tender seafood, and a broth that’s deep yet light. Serve it with extra herbs on the side for those who love a fresh punch.
Korean Seafood Pancake

Vibrant and packed with flavors, the Korean Seafood Pancake is your go-to dish when you’re craving something crispy, savory, and utterly satisfying. It’s a crowd-pleaser that’s surprisingly easy to whip up, even on a busy weeknight.
Ingredients
- 1 cup all-purpose flour (I like to sift mine for extra fluffiness)
- 1 cup ice-cold water (trust me, the cold makes the batter crispier)
- 1 egg (room temperature blends better)
- 1/2 lb mixed seafood (shrimp and squid are my favorites)
- 2 green onions, chopped (for that fresh kick)
- 1/2 tsp salt (just enough to enhance the flavors)
- 3 tbsp vegetable oil (extra virgin olive oil works too, but I save it for dressings)
Instructions
- In a large bowl, whisk together the flour and ice-cold water until smooth. Tip: A few lumps are okay; overmixing makes the pancake tough.
- Beat in the egg and salt until just combined. The batter should be thin, like heavy cream.
- Gently fold in the mixed seafood and green onions. Tip: Don’t overcrowd the batter; you want each bite to have a bit of everything.
- Heat 2 tbsp of vegetable oil in a non-stick skillet over medium-high heat (350°F if you’re using a thermometer).
- Pour the batter into the skillet, spreading it evenly. Cook for 4-5 minutes until the edges are golden and crispy. Tip: Resist the urge to flip too early; patience ensures a perfect crust.
- Carefully flip the pancake and cook for another 4-5 minutes. Add the remaining oil if the skillet looks dry.
- Transfer to a cutting board, slice into wedges, and serve immediately.
The pancake is wonderfully crispy on the outside, tender on the inside, with bursts of seafood in every bite. Try dipping it in a mix of soy sauce and vinegar for an extra zing.
Japanese Unagi Don
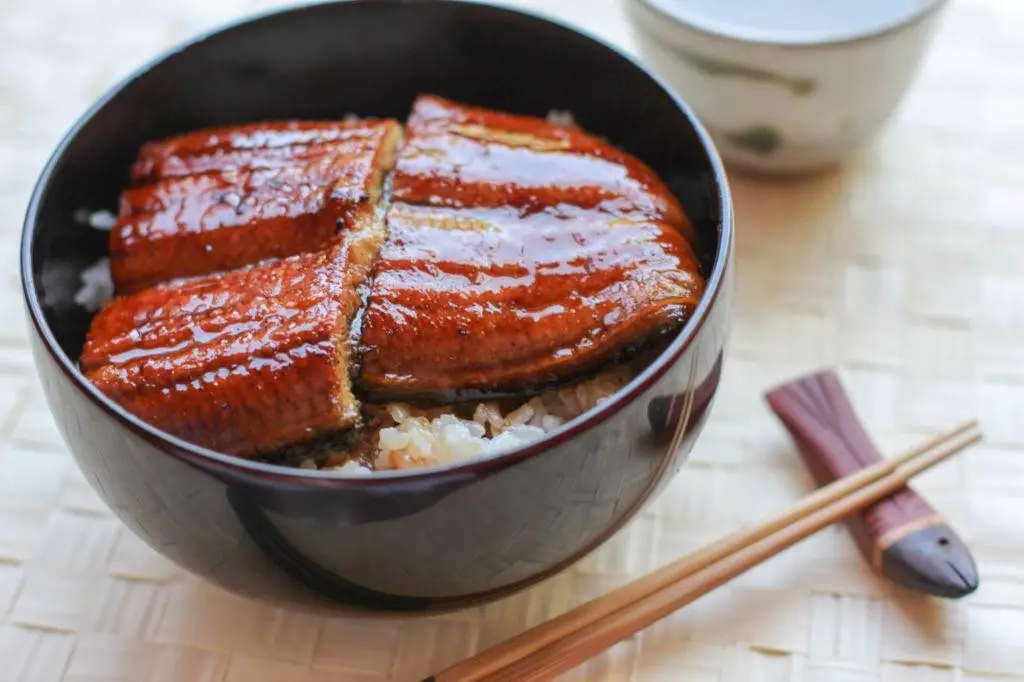
Kickstart your culinary adventure with this Japanese Unagi Don, a comforting bowl of grilled eel over steamed rice that’s both savory and slightly sweet. Perfect for when you’re craving something different but oh-so-satisfying.
Ingredients
- 1 cup sushi rice – rinse it until the water runs clear for the best texture.
- 1 1/4 cups water – because perfectly steamed rice starts with the right water ratio.
- 2 unagi fillets (about 7 oz each) – I like to get mine frozen from the Asian market; they’re already pre-grilled and sauced.
- 2 tbsp soy sauce – for that umami kick.
- 1 tbsp mirin – it adds a subtle sweetness that balances the soy sauce.
- 1 tbsp sugar – just a touch to enhance the eel’s natural flavors.
- 1 tsp sesame seeds – for a little crunch and nuttiness.
- 2 green onions, thinly sliced – they add a fresh contrast to the rich eel.
Instructions
- Rinse the sushi rice under cold water until the water runs clear, about 3-4 times. This removes excess starch for fluffier rice.
- Combine the rinsed rice and water in a rice cooker. Cook according to the manufacturer’s instructions. Tip: Let it sit for 10 minutes after cooking for perfect texture.
- While the rice cooks, preheat your oven to 350°F. Place the unagi fillets on a baking sheet lined with foil.
- Warm the unagi in the oven for 10 minutes. Tip: This revives the eel’s texture and makes the sauce glossy.
- In a small saucepan, mix the soy sauce, mirin, and sugar. Heat over low until the sugar dissolves, about 2 minutes. Tip: Don’t let it boil to keep the flavors bright.
- Slice the warmed unagi into bite-sized pieces. Drizzle with the soy sauce mixture.
- Divide the steamed rice between two bowls. Top with the unagi pieces.
- Sprinkle with sesame seeds and green onions.
Velvety unagi meets fluffy rice in every bite, with the sauce adding a sweet and savory depth. Try serving it with a side of pickled ginger for a refreshing contrast.
Chinese Steamed Fish with Ginger

Wondering how to bring a taste of Chinese cuisine into your kitchen? This steamed fish with ginger is a light, flavorful dish that’s surprisingly simple to make. You’ll love how the fresh ginger and scallions bring the fish to life.
Ingredients
- 1 whole white fish (about 1.5 lbs), cleaned and scaled – I find sea bass works wonderfully here.
- 2 inches fresh ginger, julienned – The fresher, the better for that zingy flavor.
- 3 scallions, cut into 2-inch lengths – Green parts only, for a mild oniony taste.
- 2 tbsp soy sauce – I always go for the low-sodium version to control the saltiness.
- 1 tbsp sesame oil – A drizzle of this adds a nutty depth.
- 1/2 cup water – For steaming, obviously.
Instructions
- Rinse the fish under cold water and pat dry with paper towels. This ensures the skin steams nicely without excess moisture.
- Place the fish on a heatproof plate that fits inside your steamer. Scatter half the ginger and scallions on top of the fish.
- Fill a wok or pot with the water and bring to a boil over high heat. Once boiling, place the steamer with the fish inside, cover, and steam for 8-10 minutes. Tip: The fish is done when the flesh flakes easily with a fork.
- While the fish steams, mix the soy sauce and sesame oil in a small bowl. This will be your simple yet flavorful sauce.
- Once the fish is cooked, carefully remove the plate from the steamer. Pour the sauce over the fish and garnish with the remaining ginger and scallions.
- Serve immediately. Tip: For an extra kick, add a few slices of fresh chili on top before serving.
Out of the steamer, the fish is tender and moist, with the ginger and scallions infusing every bite with freshness. Try serving it over a bed of steamed jasmine rice to soak up all the delicious sauce.
Malaysian Nyonya Fish Curry
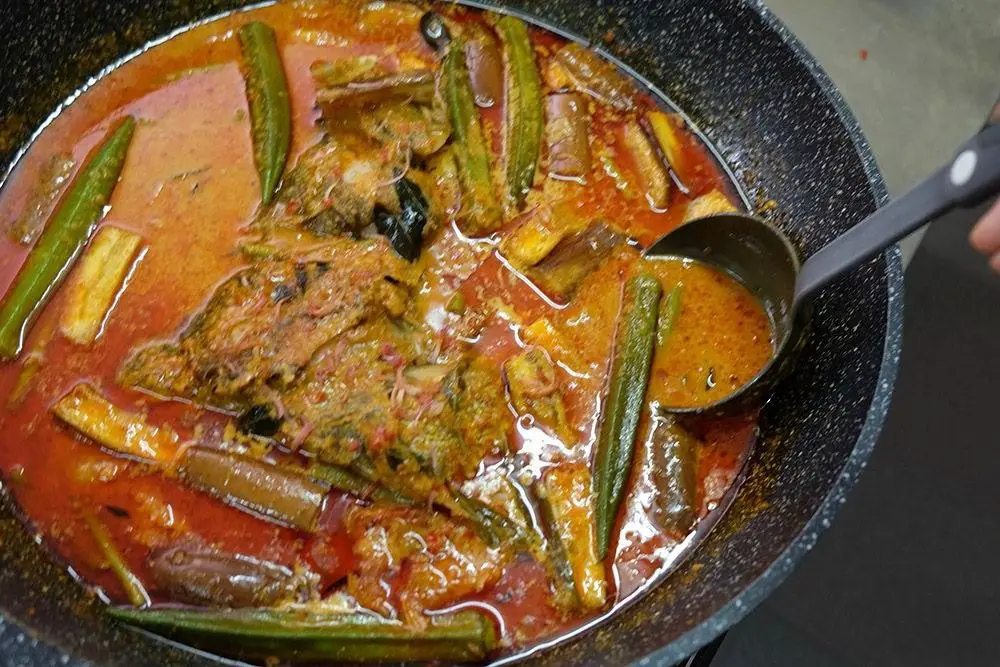
Malaysian Nyonya Fish Curry is a vibrant, aromatic dish that’ll transport your taste buds straight to the streets of Penang. You’ll love how the creamy coconut milk balances the spicy, tangy flavors.
Ingredients
- 1 lb white fish fillets (I like snapper for its firm texture)
- 1 can (13.5 oz) coconut milk (full-fat gives the best richness)
- 2 tbsp tamarind paste (it adds a lovely tang)
- 1 tbsp curry powder (your favorite brand will do)
- 1 tsp turmeric powder (for that golden hue)
- 2 cloves garlic, minced (fresh is always best)
- 1 inch ginger, grated (it really wakes up the dish)
- 1 red chili, sliced (adjust to your heat preference)
- 1 tbsp vegetable oil (I use coconut oil for extra flavor)
- Salt to taste (don’t skip this, it brings everything together)
Instructions
- Heat the oil in a large pan over medium heat until shimmering.
- Add the garlic, ginger, and chili, sautéing for 1 minute until fragrant.
- Stir in the curry powder and turmeric, cooking for another 30 seconds to release the spices’ aromas.
- Pour in the coconut milk and tamarind paste, bringing the mixture to a gentle simmer.
- Add the fish fillets, ensuring they’re submerged in the sauce, and cook for 5-7 minutes until the fish is opaque and flakes easily.
- Season with salt, then give it a final stir before removing from heat.
Velvety and rich, this curry pairs beautifully with steamed rice or crusty bread to soak up all the delicious sauce. The fish stays tender, and the spices create a symphony of flavors that’s hard to resist.
Indonesian Spicy Grilled Squid
Unbelievably easy to whip up, this Indonesian Spicy Grilled Squid is your ticket to a flavor-packed dinner that’ll have everyone asking for seconds. Perfect for those nights when you’re craving something exotic but don’t want to spend hours in the kitchen.
Ingredients
- 1 lb squid, cleaned and scored – makes it tender and ready to soak up all the flavors.
- 2 tbsp extra virgin olive oil – my go-to for its fruity notes.
- 3 cloves garlic, minced – because more garlic is always better.
- 1 tbsp chili paste – adjust based on how brave you’re feeling.
- 1 tbsp soy sauce – for that umami kick.
- 1 tsp brown sugar – balances the heat beautifully.
- 1 lime, juiced – fresh is key here.
- Salt to taste – but really, just a pinch.
Instructions
- Preheat your grill to medium-high, about 400°F. A hot grill gives those perfect char marks.
- In a bowl, mix olive oil, garlic, chili paste, soy sauce, brown sugar, lime juice, and salt. Tip: Let the marinade sit for 5 minutes to let the flavors marry.
- Add the squid to the marinade, tossing to coat evenly. Tip: Don’t marinate for more than 30 minutes or the lime juice will start to cook the squid.
- Grill the squid for 2-3 minutes per side. Tip: Keep an eye on it; squid cooks fast and can get rubbery if overdone.
- Remove from grill and let it rest for a minute before serving.
This dish is all about the contrast – tender squid with a smoky char, bathed in a spicy, tangy sauce. Try serving it over a bed of coconut rice to tame the heat and round out the meal.
Filipino Sinigang na Hipon
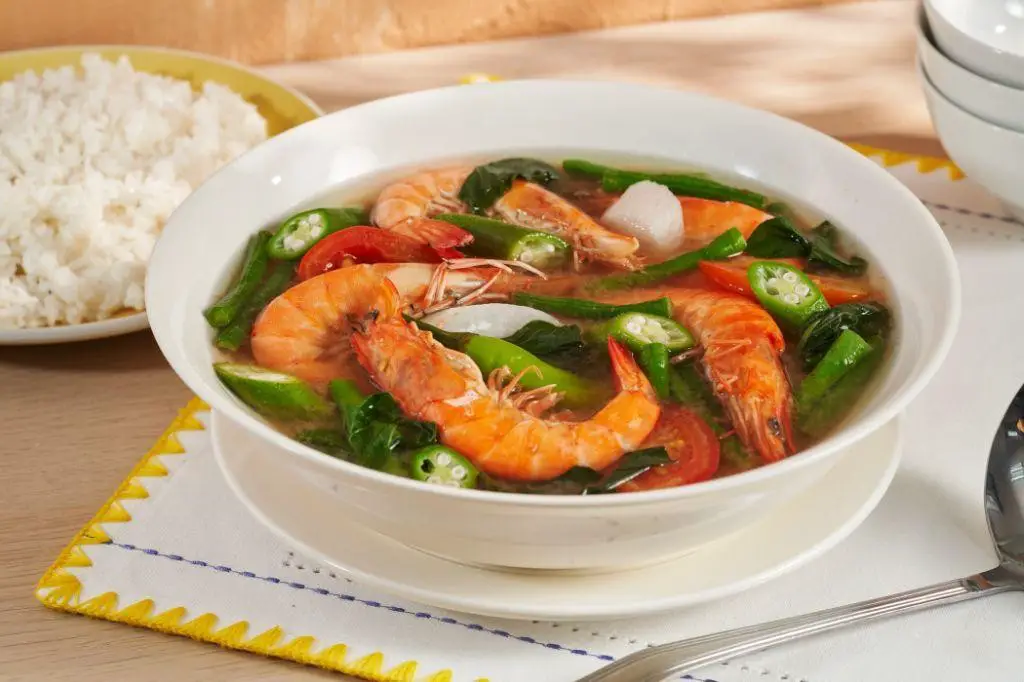
Rainy days call for something warm and tangy, and that’s exactly what Filipino Sinigang na Hipon brings to the table. This shrimp soup is a comforting bowl of sour broth, tender shrimp, and fresh veggies that’s surprisingly easy to whip up.
Ingredients
- 1 lb shrimp, heads on for extra flavor (trust me, it makes a difference)
- 6 cups water (filtered if you’re picky like me)
- 1 packet sinigang mix (I go for the tamarind one for that authentic sour punch)
- 1 medium tomato, quartered (because everything starts with tomatoes, right?)
- 1 small onion, sliced (white or yellow, whatever’s hanging out in your pantry)
- 1 cup daikon radish, sliced (adds a nice crunch and sweetness)
- 1 bunch water spinach (kangkong), cut into 2-inch pieces (the leaves soak up the broth so well)
- 2 green chilies (optional, but why not add a little heat?)
- Salt to taste (but really, the sinigang mix has you covered)
Instructions
- In a large pot, bring the water to a boil over high heat. This is your soup base, so no shortcuts here.
- Add the tomato and onion to the boiling water. Let them cook for about 3 minutes until they start to soften. You’ll know they’re ready when the tomato skins start to peel.
- Stir in the sinigang mix until fully dissolved. Taste the broth; it should be pleasantly sour. If it’s too mild, add a bit more mix.
- Add the daikon radish and cook for another 5 minutes. They should be slightly tender but still have a bite.
- Gently add the shrimp and cook until they turn pink, about 2-3 minutes. Overcooking is a sin here, so keep an eye out.
- Toss in the water spinach and green chilies, then turn off the heat. The residual heat will wilt the greens perfectly.
- Let the soup sit for a couple of minutes before serving. This lets the flavors mingle and get to know each other.
Now, nothing beats the first spoonful of this soup—the sour broth, the sweet shrimp, and the fresh veggies all come together in a harmony of flavors. Serve it steaming hot with a side of rice, and maybe an extra chili on the side for the brave ones.
Singaporean Black Pepper Crab
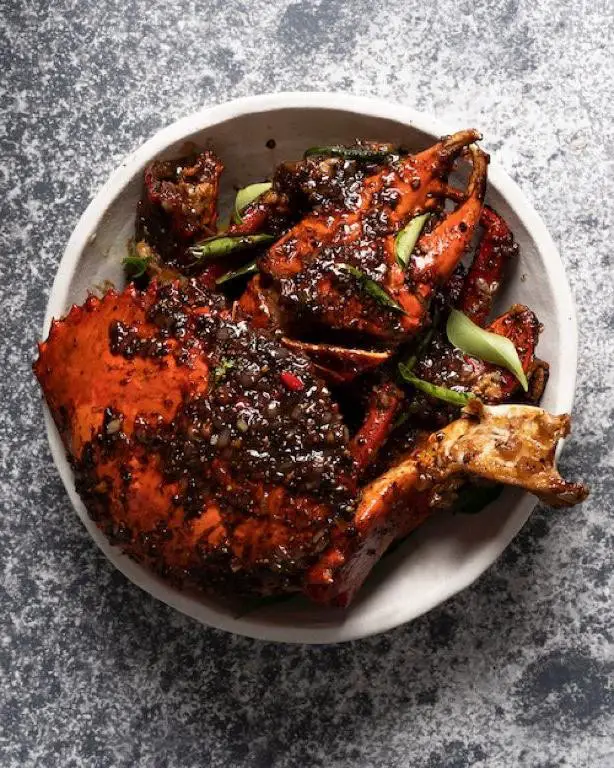
Ready to spice up your dinner routine? This Singaporean Black Pepper Crab is a game-changer, packing bold flavors that’ll have you licking your fingers clean.
Ingredients
- 2 live Dungeness crabs (about 2 lbs each) – trust me, fresh makes all the difference.
- 1/4 cup unsalted butter – because everything’s better with butter.
- 2 tbsp black peppercorns, coarsely crushed – for that signature kick.
- 4 cloves garlic, minced – the more, the merrier in my book.
- 1 inch ginger, julienned – adds a nice zing.
- 2 tbsp soy sauce – I always go for low-sodium to control the saltiness.
- 1 tbsp oyster sauce – the secret umami booster.
- 1 tsp sugar – just a pinch to balance the heat.
- 1/2 cup water – to help create that luscious sauce.
- 2 green onions, chopped – for a fresh finish.
Instructions
- Clean the crabs thoroughly under cold water, then chop into manageable pieces. Pro tip: Use kitchen shears for easier handling.
- Melt the butter in a large wok or deep skillet over medium heat. Watch it closely to avoid burning.
- Add the crushed peppercorns, garlic, and ginger. Stir for about 1 minute until fragrant – your kitchen should smell amazing by now.
- Toss in the crab pieces, stirring to coat them evenly with the spicy butter mixture. Cook for 2 minutes.
- Pour in the soy sauce, oyster sauce, sugar, and water. Stir well, then cover and simmer for 10 minutes. This is when the magic happens.
- Uncover, increase the heat to high, and cook for another 2 minutes to thicken the sauce slightly.
- Garnish with chopped green onions right before serving. Extra tip: Serve with crusty bread to soak up every last drop of sauce.
Hearty and aromatic, this dish brings the heat with a buttery, peppery sauce that clings to every bite. Try serving it over steamed rice for a comforting meal that’s anything but ordinary.
Conclusion
Nothing brings the vibrant flavors of Asia to your kitchen like these 18 spicy seafood recipes. Perfect for home cooks looking to spice up their meal rotation, each dish promises a delicious adventure. We’d love to hear which recipe becomes your favorite—drop us a comment below! And if you enjoyed this roundup, don’t forget to share the love on Pinterest. Happy cooking!

Michael Johnson is the founder of Pan Mastery, Inspired by his blacksmith grandfather’s legacy has a deep appreciation for hand-crafted pots and pans, he provides invaluable guides, reviews, and recipes to enhance your culinary journey.