Nothing says “Happy Birthday” quite like a homemade cake, and we’ve rounded up 18 of the most delicious birthday cake recipes to make your celebration extra special. Whether you’re a baking novice or a seasoned pro, these amazing cakes are sure to impress. From classic chocolate to innovative flavors, there’s a perfect cake here for every birthday wish. So, preheat your oven and let’s get baking!
Classic Vanilla Birthday Cake with Buttercream Frosting
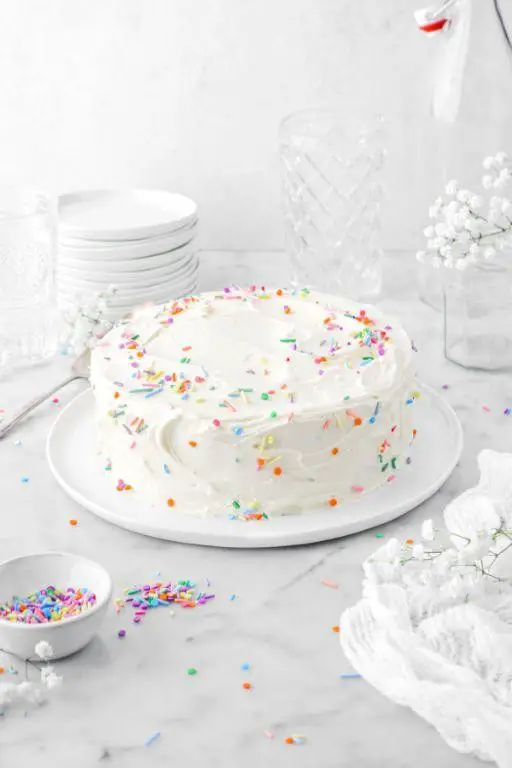
Gathering around the table for a celebration calls for something special, and nothing says ‘happy birthday’ quite like a Classic Vanilla Birthday Cake with Buttercream Frosting. This guide will walk you through each step to create a moist, fluffy cake topped with silky, sweet frosting, perfect for marking any milestone.
Ingredients
- 2 1/2 cups all-purpose flour, sifted for lightness
- 2 1/2 tsp baking powder, to ensure a perfect rise
- 1/2 tsp salt, to balance the sweetness
- 1 cup unsalted butter, softened to room temperature for easy creaming
- 2 cups granulated sugar, for that just-right sweetness
- 4 large eggs, farm-fresh for richness
- 1 tbsp pure vanilla extract, for aromatic depth
- 1 cup whole milk, at room temperature to blend smoothly
- 3 cups powdered sugar, sifted to avoid lumps in the frosting
- 1 cup unsalted butter, softened for creamy frosting
- 2 tsp pure vanilla extract, for frosting flavor
- 2-3 tbsp heavy cream, to adjust frosting consistency
Instructions
- Preheat your oven to 350°F (175°C) and grease two 9-inch round cake pans, lining the bottoms with parchment paper for easy removal.
- In a medium bowl, whisk together the sifted flour, baking powder, and salt until well combined.
- In a large bowl, beat the softened butter and granulated sugar on medium speed until light and fluffy, about 3 minutes. Tip: Scrape down the sides of the bowl to ensure even mixing.
- Add the eggs one at a time to the butter mixture, beating well after each addition, then stir in the vanilla extract.
- Alternately add the flour mixture and milk to the butter mixture, beginning and ending with the flour mixture, mixing just until combined. Tip: Overmixing can lead to a dense cake.
- Divide the batter evenly between the prepared pans and smooth the tops with a spatula. Bake for 25-30 minutes, or until a toothpick inserted into the center comes out clean.
- Let the cakes cool in the pans for 10 minutes, then turn out onto wire racks to cool completely. Tip: Cooling the cakes completely prevents the frosting from melting.
- For the frosting, beat the softened butter on medium speed until creamy, about 2 minutes. Gradually add the powdered sugar, then the vanilla extract, beating until smooth. Add heavy cream as needed to reach your desired consistency.
- Place one cake layer on a serving plate, spread with frosting, then top with the second layer. Frost the top and sides of the cake with the remaining frosting.
Light and fluffy with a rich vanilla flavor, this cake is a crowd-pleaser. For a festive touch, sprinkle with colorful sprinkles or top with fresh berries just before serving.
Chocolate Fudge Birthday Cake with Ganache
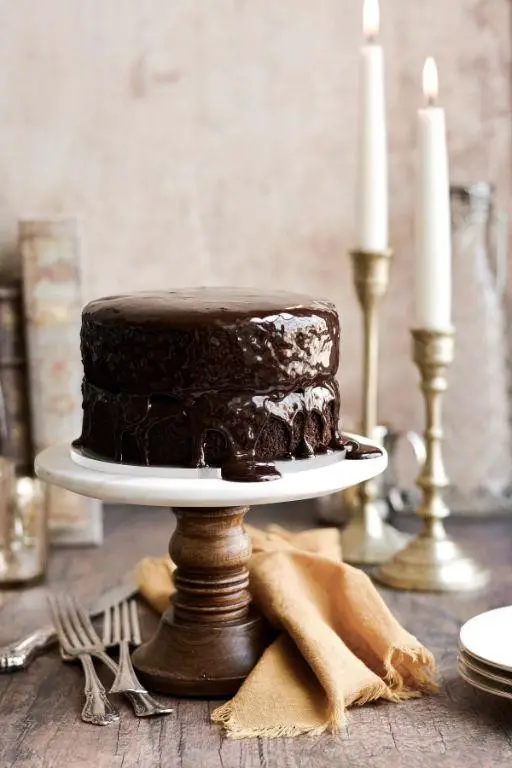
Creating a Chocolate Fudge Birthday Cake with Ganache is a delightful way to celebrate any occasion. Carefully follow these steps to ensure a moist, rich cake that’s sure to impress.
Ingredients
- 1 3/4 cups all-purpose flour, sifted for lightness
- 2 cups granulated sugar, for a sweet base
- 3/4 cup unsweetened cocoa powder, rich and dark
- 2 tsp baking soda, to ensure a perfect rise
- 1 tsp baking powder, for added fluffiness
- 1 tsp salt, to balance the sweetness
- 2 large farm-fresh eggs, at room temperature
- 1 cup buttermilk, for tangy moisture
- 1/2 cup vegetable oil, for a tender crumb
- 2 tsp pure vanilla extract, for aromatic depth
- 1 cup boiling water, to intensify the chocolate flavor
- 1 cup heavy cream, for silky ganache
- 8 oz high-quality dark chocolate, finely chopped for smooth melting
Instructions
- Preheat your oven to 350°F (175°C) and grease two 9-inch round cake pans. Line the bottoms with parchment paper for easy removal.
- In a large bowl, whisk together the sifted flour, sugar, cocoa powder, baking soda, baking powder, and salt until well combined.
- Add the eggs, buttermilk, oil, and vanilla extract to the dry ingredients. Beat on medium speed for 2 minutes until the batter is smooth.
- Gradually stir in the boiling water with a spatula. The batter will be thin; this is normal for a moist cake.
- Divide the batter evenly between the prepared pans. Bake for 30-35 minutes, or until a toothpick inserted into the center comes out clean.
- Allow the cakes to cool in the pans for 10 minutes, then transfer to a wire rack to cool completely.
- For the ganache, heat the heavy cream in a small saucepan over medium heat until it just begins to simmer. Remove from heat and add the chopped chocolate. Let it sit for 2 minutes, then stir until smooth.
- Once the cakes are cool, spread a layer of ganache on top of one cake layer, place the second layer on top, and cover the entire cake with the remaining ganache.
Decadent layers of moist chocolate cake enveloped in a glossy ganache make this dessert a showstopper. Serve with a scoop of vanilla ice cream for an irresistible contrast of temperatures and flavors.
Red Velvet Birthday Cake with Cream Cheese Frosting
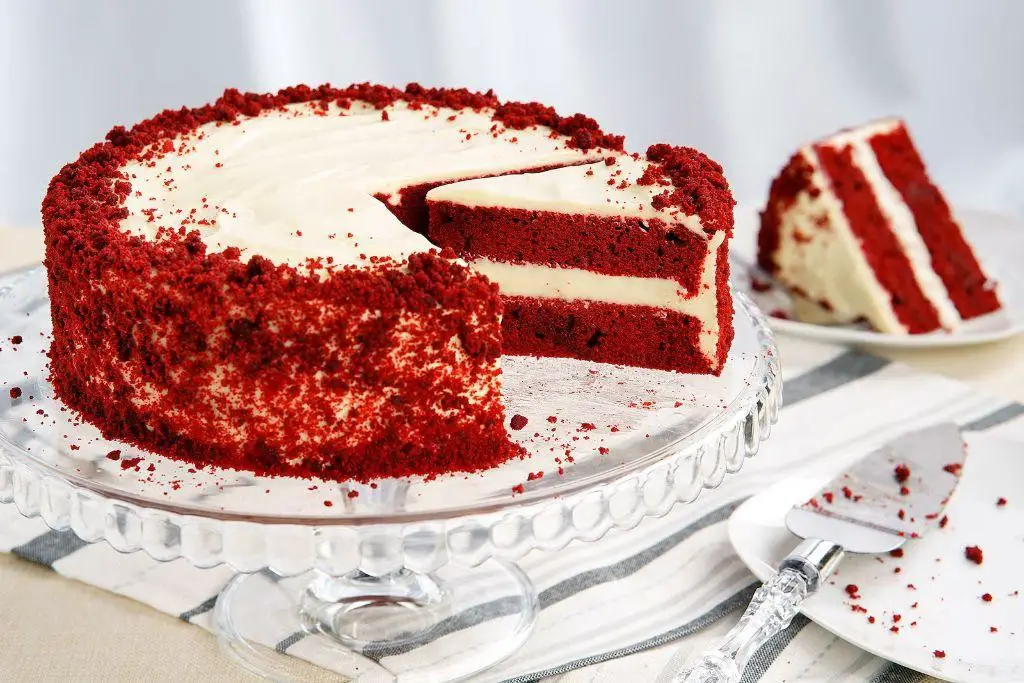
Every baker dreams of creating the perfect red velvet cake, a classic that combines a tender crumb with a striking color, all crowned with luscious cream cheese frosting. This guide will walk you through each step to ensure your cake is as delightful to make as it is to eat.
Ingredients
- 2 1/2 cups of sifted cake flour, for a light and airy texture
- 1 teaspoon of baking soda, to help the cake rise
- 1 teaspoon of fine sea salt, to balance the sweetness
- 2 tablespoons of unsweetened cocoa powder, for a hint of chocolate
- 1 1/2 cups of granulated sugar, for the perfect sweetness
- 1 cup of buttermilk, at room temperature, for moisture and tang
- 2 large farm-fresh eggs, at room temperature, for richness
- 1 1/2 cups of vegetable oil, for a moist crumb
- 2 teaspoons of pure vanilla extract, for depth of flavor
- 1 ounce of red food coloring, for that signature vibrant hue
- 1 teaspoon of distilled white vinegar, to enhance the red color
- 8 ounces of full-fat cream cheese, softened, for the frosting
- 1/2 cup of unsalted butter, softened, for a smooth frosting
- 4 cups of confectioners’ sugar, sifted, for sweetness and structure
- 1 teaspoon of pure vanilla extract, for the frosting
Instructions
- Preheat your oven to 350°F (175°C). Grease and flour two 9-inch round cake pans, ensuring even coverage to prevent sticking.
- In a medium bowl, whisk together 2 1/2 cups of sifted cake flour, 1 teaspoon of baking soda, 1 teaspoon of fine sea salt, and 2 tablespoons of unsweetened cocoa powder until well combined.
- In a large bowl, beat 1 1/2 cups of granulated sugar, 1 cup of buttermilk, 2 large eggs, 1 1/2 cups of vegetable oil, 2 teaspoons of pure vanilla extract, and 1 ounce of red food coloring on medium speed until smooth, about 2 minutes.
- Gradually add the dry ingredients to the wet ingredients, mixing on low speed until just incorporated. Avoid overmixing to keep the cake tender.
- Stir in 1 teaspoon of distilled white vinegar, which will react with the baking soda to enhance the cake’s red color.
- Divide the batter evenly between the prepared pans. Bake for 25-30 minutes, or until a toothpick inserted into the center comes out clean.
- Allow the cakes to cool in the pans for 10 minutes, then transfer to a wire rack to cool completely.
- For the frosting, beat 8 ounces of softened cream cheese and 1/2 cup of softened unsalted butter on medium speed until creamy, about 2 minutes.
- Gradually add 4 cups of sifted confectioners’ sugar and 1 teaspoon of pure vanilla extract, beating until the frosting is smooth and spreadable.
- Once the cakes are completely cool, frost the top of one cake layer, place the second layer on top, and frost the top and sides of the entire cake.
Zesty and vibrant, this red velvet cake boasts a moist, velvety texture with a subtle cocoa flavor, perfectly complemented by the tangy cream cheese frosting. Serve it adorned with fresh berries or a sprinkle of edible gold dust for an extra special touch.
Lemon Blueberry Birthday Cake with Lemon Glaze
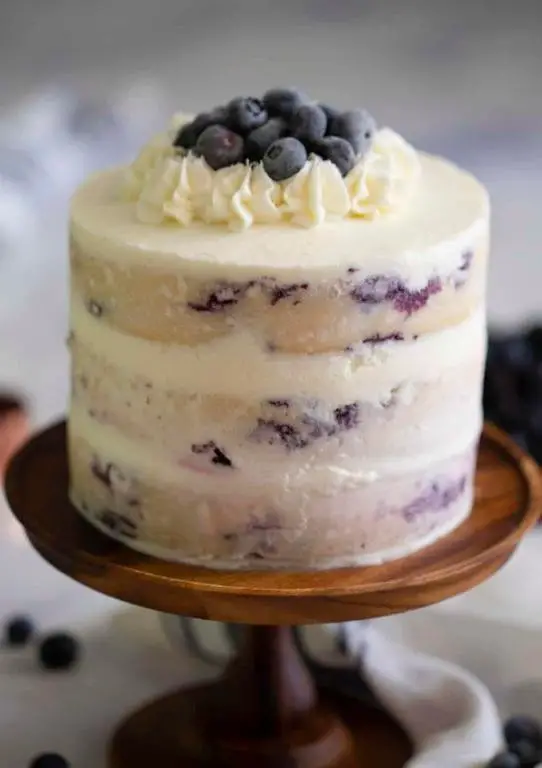
Finally, a cake that combines the zesty freshness of lemons with the sweet burst of blueberries, perfect for celebrating any occasion. This Lemon Blueberry Birthday Cake with Lemon Glaze is not just a treat for the taste buds but also a joy to make, especially for beginners. Follow these steps to create a dessert that’s as delightful to look at as it is to eat.
Ingredients
– 2 cups all-purpose flour, sifted for lightness
– 1 cup granulated sugar, for a sweet base
– 1/2 cup unsalted butter, softened to room temperature
– 2 large farm-fresh eggs, at room temperature
– 1 cup buttermilk, for moisture and tang
– 1 tbsp lemon zest, freshly grated for vibrant flavor
– 1/4 cup lemon juice, freshly squeezed for that zesty kick
– 1 cup fresh blueberries, washed and dried
– 1/2 tsp baking powder, for the perfect rise
– 1/2 tsp baking soda, to balance the acidity
– 1/4 tsp salt, to enhance all flavors
– For the glaze: 1 cup powdered sugar, sifted, and 2 tbsp lemon juice, freshly squeezed
Instructions
1. Preheat your oven to 350°F (175°C) and grease a 9-inch round cake pan.
2. In a large bowl, cream together the softened butter and granulated sugar until light and fluffy.
3. Beat in the eggs one at a time, ensuring each is fully incorporated before adding the next.
4. Mix in the lemon zest and juice, blending well to distribute the flavors evenly.
5. Alternately add the sifted flour mixture and buttermilk to the butter mixture, starting and ending with the flour.
6. Gently fold in the blueberries, being careful not to crush them.
7. Pour the batter into the prepared pan and bake for 25-30 minutes, or until a toothpick inserted into the center comes out clean.
8. While the cake cools, whisk together the powdered sugar and lemon juice for the glaze until smooth.
9. Drizzle the glaze over the cooled cake, allowing it to drip down the sides for a beautiful finish.
10. Let the glaze set for about 10 minutes before slicing.
Lemon Blueberry Birthday Cake with Lemon Glaze offers a moist crumb, punctuated by juicy blueberries and a tangy lemon glaze that ties everything together. Serve it as the centerpiece of your dessert table or with a scoop of vanilla ice cream for an extra indulgent treat.
Strawberry Shortcake Birthday Cake

Baking a Strawberry Shortcake Birthday Cake is a delightful way to celebrate any occasion, combining the sweetness of strawberries with the lightness of cake. Follow these steps to create a dessert that’s as beautiful as it is delicious.
Ingredients
- 2 cups all-purpose flour, sifted for lightness
- 1/2 cup granulated sugar, fine and sparkling
- 3 tsp baking powder, for a fluffy rise
- 1/2 tsp salt, to enhance flavors
- 1/2 cup unsalted butter, cold and cubed
- 2/3 cup whole milk, creamy and rich
- 1 tsp pure vanilla extract, aromatic and sweet
- 2 cups fresh strawberries, ripe and juicy, sliced
- 1 cup heavy whipping cream, cold for perfect peaks
- 2 tbsp powdered sugar, for a smooth sweetness
Instructions
- Preheat your oven to 425°F (220°C) to ensure it’s ready for baking.
- In a large bowl, whisk together the sifted flour, granulated sugar, baking powder, and salt until well combined.
- Add the cold, cubed butter to the dry ingredients. Use your fingertips to rub the butter into the flour mixture until it resembles coarse crumbs.
- Pour in the whole milk and vanilla extract, stirring just until the dough comes together. Avoid overmixing to keep the cake tender.
- Turn the dough onto a lightly floured surface and gently pat it into a 1-inch thick circle. Use a biscuit cutter to cut out rounds.
- Place the rounds on a baking sheet lined with parchment paper, leaving space between each for expansion.
- Bake for 12-15 minutes, or until the shortcakes are golden brown and a toothpick inserted comes out clean.
- While the shortcakes cool, whip the heavy whipping cream and powdered sugar together until stiff peaks form.
- Slice the cooled shortcakes in half horizontally. Layer the bottom halves with whipped cream and sliced strawberries, then cover with the top halves.
- Serve immediately, or chill for up to 2 hours before serving for a firmer texture.
Your Strawberry Shortcake Birthday Cake will boast layers of tender, buttery shortcake, lush whipped cream, and vibrant strawberries. For an extra festive touch, garnish with whole strawberries and a dusting of powdered sugar right before serving.
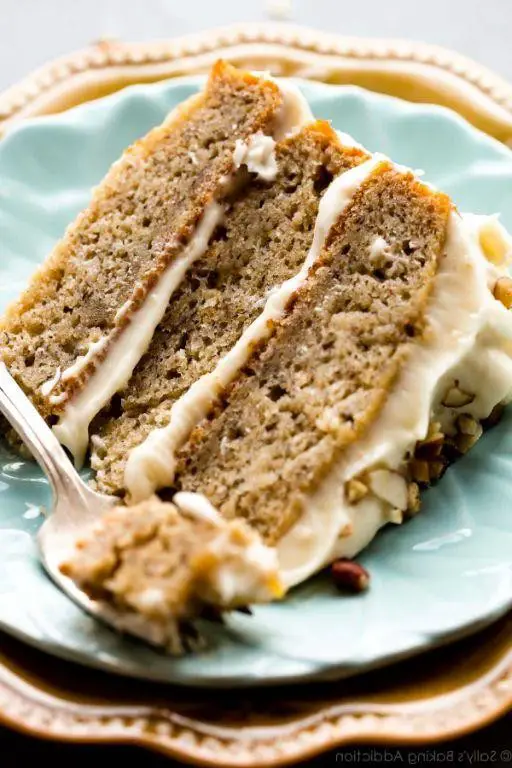
Carrot Cake Birthday Cake with Cream Cheese Frosting

You’re about to embark on a delightful baking journey that will lead you to create a moist, flavorful carrot cake topped with luscious cream cheese frosting. This recipe is perfect for celebrating special occasions or simply indulging in a sweet treat.
Ingredients
- 2 cups of finely grated, fresh carrots
- 1 1/2 cups of granulated sugar, for a sweet base
- 1 cup of vegetable oil, to ensure moistness
- 4 large farm-fresh eggs, at room temperature
- 2 cups of all-purpose flour, sifted for lightness
- 2 tsp of baking soda, for the perfect rise
- 2 tsp of ground cinnamon, for warm spice notes
- 1/2 tsp of salt, to balance the sweetness
- 1 tsp of pure vanilla extract, for aromatic depth
- 8 oz of cream cheese, softened for smooth frosting
- 1/2 cup of unsalted butter, softened to room temperature
- 4 cups of powdered sugar, sifted for silky frosting
- 1 tsp of vanilla extract, for frosting flavor
Instructions
- Preheat your oven to 350°F (175°C) and grease two 9-inch round cake pans, lining the bottoms with parchment paper for easy removal.
- In a large bowl, whisk together the granulated sugar and vegetable oil until well combined, then beat in the eggs one at a time, ensuring each is fully incorporated before adding the next.
- Stir in the grated carrots and vanilla extract, mixing until the carrots are evenly distributed throughout the batter.
- In a separate bowl, sift together the flour, baking soda, cinnamon, and salt, then gradually fold these dry ingredients into the wet mixture until just combined, being careful not to overmix.
- Divide the batter evenly between the prepared pans and bake for 25-30 minutes, or until a toothpick inserted into the center comes out clean.
- Allow the cakes to cool in the pans for 10 minutes, then transfer them to a wire rack to cool completely before frosting.
- For the frosting, beat the softened cream cheese and butter together on medium speed until smooth and creamy, about 2 minutes.
- Gradually add the powdered sugar, one cup at a time, beating well after each addition, then mix in the vanilla extract until the frosting is fluffy and spreadable.
- Once the cakes are completely cool, spread a layer of frosting on top of one cake layer, place the second layer on top, and frost the top and sides of the cake with the remaining frosting.
Moist layers of spiced carrot cake paired with creamy, tangy frosting create a harmonious balance of flavors and textures. For an extra touch, garnish with chopped walnuts or a sprinkle of cinnamon before serving.
Funfetti Birthday Cake with Vanilla Frosting
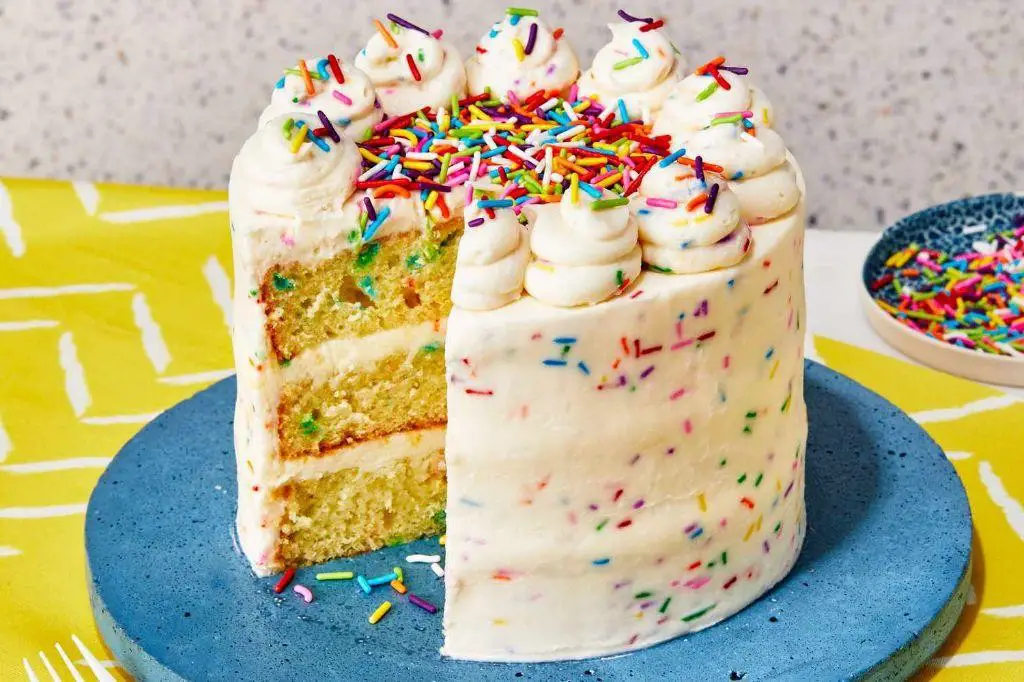
Starting with the basics, this Funfetti Birthday Cake with Vanilla Frosting is a vibrant, joyful dessert that’s perfect for celebrating any occasion. Its simple preparation and delightful appearance make it a favorite among beginners and seasoned bakers alike.
Ingredients
- 1 1/2 cups all-purpose flour, sifted for lightness
- 1 cup granulated sugar, fine and sparkling
- 1/2 cup unsalted butter, softened to room temperature
- 2 large eggs, farm-fresh and at room temperature
- 1/2 cup whole milk, creamy and rich
- 1 tsp pure vanilla extract, aromatic and sweet
- 1 1/2 tsp baking powder, for a fluffy rise
- 1/4 tsp salt, to balance the sweetness
- 1/2 cup rainbow sprinkles, vibrant and colorful
- 2 cups powdered sugar, for the frosting
- 1/2 cup unsalted butter, for the frosting
- 2 tbsp whole milk, for the frosting
- 1 tsp pure vanilla extract, for the frosting
Instructions
- Preheat your oven to 350°F (175°C) and grease two 8-inch round cake pans with butter, then dust lightly with flour.
- In a large mixing bowl, cream together 1/2 cup softened butter and granulated sugar until light and fluffy, about 3 minutes.
- Beat in the eggs one at a time, ensuring each is fully incorporated before adding the next, to create a smooth batter.
- Stir in the vanilla extract, blending it thoroughly into the mixture for a fragrant aroma.
- Alternately add the sifted flour mixture and milk to the batter, starting and ending with the flour, to achieve a uniform consistency.
- Gently fold in the rainbow sprinkles with a spatula, being careful not to overmix to keep the colors vibrant.
- Divide the batter evenly between the prepared pans and bake for 25-30 minutes, or until a toothpick inserted into the center comes out clean.
- While the cakes cool, prepare the vanilla frosting by beating together 1/2 cup butter, powdered sugar, milk, and vanilla extract until smooth and spreadable.
- Once the cakes are completely cool, spread a layer of frosting on top of one cake, place the second cake on top, and frost the entire cake evenly.
Delight in the soft, moist texture of the cake paired with the creamy, sweet vanilla frosting, making each bite a celebration. For an extra festive touch, decorate the top with additional sprinkles or serve with a scoop of vanilla ice cream on the side.
Black Forest Birthday Cake
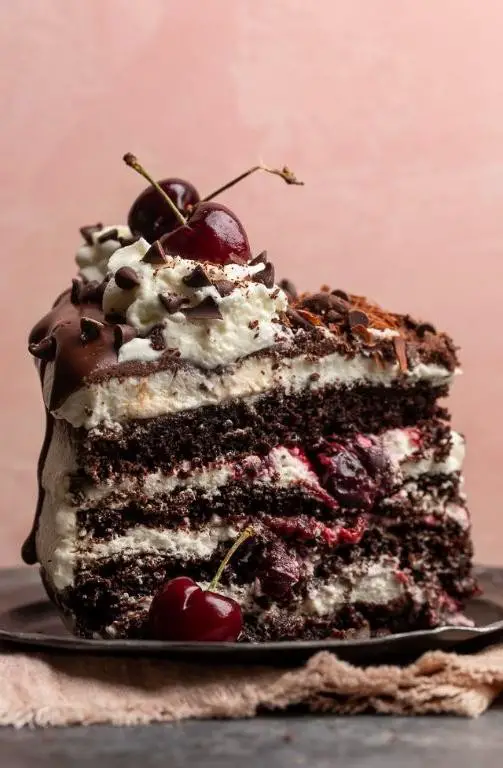
Just in time for summer celebrations, this Black Forest Birthday Cake combines the rich flavors of chocolate and cherries with a light, airy texture that’s sure to impress. Follow these steps to create a dessert that’s as beautiful as it is delicious.
Ingredients
- 1 3/4 cups all-purpose flour, sifted for lightness
- 3/4 cup unsweetened cocoa powder, rich and dark
- 2 cups granulated sugar, fine and evenly measured
- 1 1/2 tsp baking powder, for a perfect rise
- 1 1/2 tsp baking soda, to ensure fluffiness
- 1 tsp salt, to balance the sweetness
- 2 large eggs, farm-fresh and at room temperature
- 1 cup whole milk, creamy and full-fat
- 1/2 cup vegetable oil, light and neutral
- 2 tsp pure vanilla extract, for aromatic depth
- 1 cup boiling water, to intensify the chocolate flavor
- 2 cups heavy whipping cream, cold and whipped to stiff peaks
- 1 can (21 oz) cherry pie filling, lush and vibrant
- 1/2 cup dark chocolate shavings, for a decorative finish
Instructions
- Preheat your oven to 350°F (175°C) and grease two 9-inch round cake pans, lining the bottoms with parchment paper for easy removal.
- In a large mixing bowl, whisk together the flour, cocoa powder, sugar, baking powder, baking soda, and salt until well combined.
- Add the eggs, milk, oil, and vanilla extract to the dry ingredients, beating on medium speed for 2 minutes until the batter is smooth.
- Carefully stir in the boiling water with a spatula; the batter will be thin, which is perfect for a moist cake.
- Divide the batter evenly between the prepared pans and bake for 30-35 minutes, or until a toothpick inserted into the center comes out clean.
- Allow the cakes to cool in the pans for 10 minutes, then transfer to a wire rack to cool completely, ensuring they’re at room temperature before frosting.
- Whip the heavy cream until stiff peaks form, then spread a layer over the first cake, top with half the cherry pie filling, and place the second cake on top.
- Frost the entire cake with the remaining whipped cream, drizzle with the rest of the cherry pie filling, and sprinkle with dark chocolate shavings for a stunning finish.
Creating this Black Forest Birthday Cake is a rewarding process that results in a dessert with a moist, chocolatey base, a creamy whipped topping, and a burst of cherry flavor in every bite. Serve it chilled for a refreshing twist on this classic dessert.
Tiramisu Birthday Cake
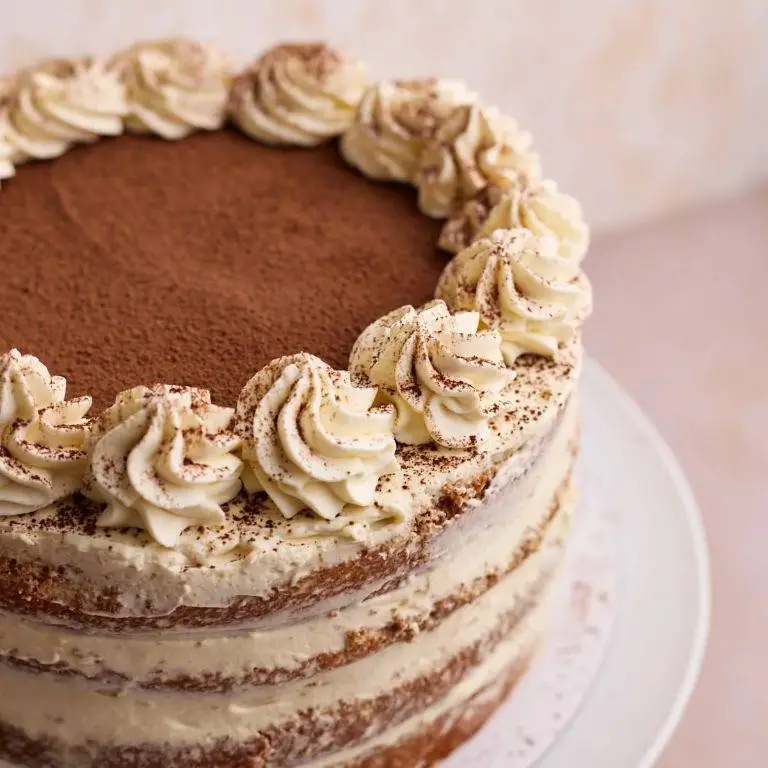
Baking a Tiramisu Birthday Cake is a delightful way to celebrate any occasion, combining the classic flavors of tiramisu with the festive appeal of a birthday cake. This guide will walk you through creating this decadent dessert, ensuring a perfect result every time.
Ingredients
- 1 1/2 cups of finely ground espresso powder
- 1/2 cup of Marsala wine, for a rich depth of flavor
- 6 large farm-fresh eggs, separated
- 3/4 cup of granulated sugar, for a sweet balance
- 16 oz of mascarpone cheese, creamy and smooth
- 24 ladyfingers, crisp and light
- 1/4 cup of cocoa powder, for dusting
Instructions
- Preheat your oven to 350°F (175°C) to prepare for baking the ladyfingers if making from scratch.
- In a small bowl, combine the espresso powder with 1 cup of hot water and the Marsala wine, stirring until the espresso is fully dissolved. Set aside to cool.
- Beat the egg yolks with the sugar in a large bowl until the mixture is pale and thick, about 5 minutes. Tip: Ensure your eggs are at room temperature for maximum volume.
- Gently fold in the mascarpone cheese into the yolk mixture until just combined, being careful not to overmix. Tip: Overmixing can cause the mixture to become runny.
- In a separate bowl, beat the egg whites until stiff peaks form, then fold them into the mascarpone mixture to lighten it.
- Quickly dip each ladyfinger into the espresso mixture, ensuring they are moist but not soggy, and layer them in the bottom of a 9-inch springform pan.
- Spread half of the mascarpone mixture over the ladyfingers, then repeat the layers, ending with a mascarpone layer.
- Chill the cake in the refrigerator for at least 4 hours, or overnight, to set. Tip: Chilling overnight enhances the flavors.
- Before serving, dust the top of the cake with cocoa powder for a beautiful finish.
With its creamy texture and rich coffee flavor, this Tiramisu Birthday Cake is sure to impress. Serve it chilled, with a sprinkle of cocoa powder or a side of fresh berries for an extra touch of elegance.
Peanut Butter Chocolate Birthday Cake
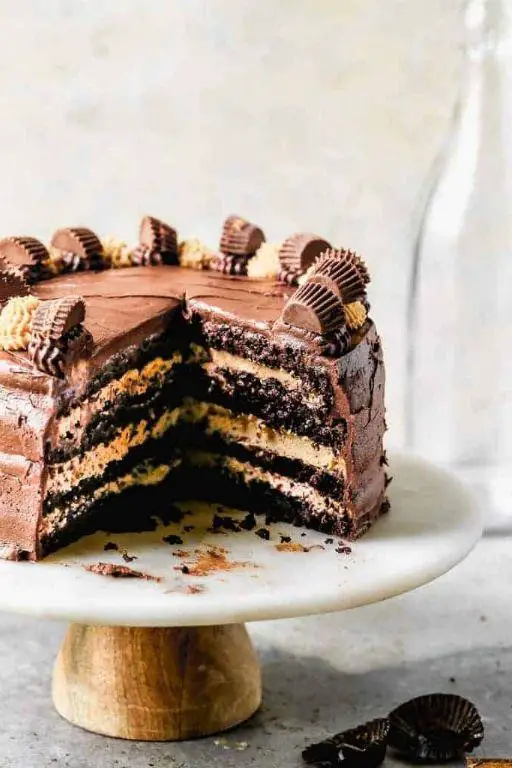
Happiness is homemade, and what better way to celebrate than with a Peanut Butter Chocolate Birthday Cake? This decadent dessert combines the rich, nutty flavor of peanut butter with the deep, luxurious taste of chocolate, creating a perfect harmony of flavors that’s sure to impress. Follow these steps to create a cake that’s as delightful to make as it is to eat.
Ingredients
– 1 3/4 cups all-purpose flour, sifted for lightness
– 3/4 cup unsweetened cocoa powder, rich and dark
– 1 1/2 teaspoons baking powder, for a fluffy rise
– 1 teaspoon baking soda, to ensure perfect texture
– 1/2 teaspoon salt, to enhance flavors
– 2 large eggs, farm-fresh and room temperature
– 1 cup whole milk, creamy and full-bodied
– 1/2 cup vegetable oil, for moisture
– 2 teaspoons pure vanilla extract, aromatic and sweet
– 1 cup boiling water, to intensify the chocolate flavor
– 1 cup creamy peanut butter, smooth and velvety
– 1/2 cup unsalted butter, softened to room temperature
– 4 cups powdered sugar, for a smooth frosting
– 1/3 cup heavy cream, for a luscious consistency
Instructions
1. Preheat your oven to 350°F (175°C) and grease two 9-inch round cake pans, lining the bottoms with parchment paper for easy removal.
2. In a large bowl, whisk together the sifted flour, cocoa powder, baking powder, baking soda, and salt until well combined.
3. Add the eggs, milk, oil, and vanilla extract to the dry ingredients, beating on medium speed until the batter is smooth, about 2 minutes.
4. Carefully stir in the boiling water until the batter is thin but uniform. Tip: The hot water blooms the cocoa, deepening the chocolate flavor.
5. Divide the batter evenly between the prepared pans and bake for 30-35 minutes, or until a toothpick inserted into the center comes out clean.
6. Let the cakes cool in the pans for 10 minutes, then transfer to a wire rack to cool completely. Tip: Cooling the cakes completely prevents the frosting from melting.
7. For the frosting, beat the peanut butter and softened butter together until creamy. Gradually add the powdered sugar, then the heavy cream, beating until the frosting is light and fluffy. Tip: If the frosting is too thick, add a little more cream; if too thin, add more powdered sugar.
8. Place one cake layer on your serving plate, spread a generous amount of frosting on top, then place the second layer and frost the top and sides.
Vivid layers of moist chocolate cake and creamy peanut butter frosting make this cake a showstopper. Serve it at room temperature to enjoy the full spectrum of flavors, or garnish with chocolate shavings for an extra touch of elegance.
Coconut Lime Birthday Cake

Out of all the desserts to celebrate a special occasion, a Coconut Lime Birthday Cake stands out with its tropical flair and refreshing zest. This guide will walk you through creating this delightful cake, ensuring even beginners can achieve a bakery-worthy result.
Ingredients
- 1 1/2 cups all-purpose flour, sifted for lightness
- 1 cup granulated sugar, fine and sparkling
- 1/2 cup unsalted butter, softened to room temperature
- 3 large farm-fresh eggs, at room temperature
- 1/2 cup coconut milk, rich and creamy
- 2 tbsp fresh lime juice, vibrant and tangy
- 1 tbsp lime zest, finely grated for intense flavor
- 1 tsp pure vanilla extract, aromatic and sweet
- 1 1/2 tsp baking powder, for a perfect rise
- 1/4 tsp salt, to balance the sweetness
Instructions
- Preheat your oven to 350°F (175°C) and grease a 9-inch round cake pan, ensuring even baking.
- In a large mixing bowl, cream together the softened butter and granulated sugar until light and fluffy, about 3 minutes.
- Beat in the eggs one at a time, ensuring each is fully incorporated before adding the next, to create a smooth batter.
- Stir in the vanilla extract, lime juice, and lime zest, mixing well to distribute the flavors evenly.
- Alternately add the sifted flour mixture and coconut milk to the batter, beginning and ending with the flour, to keep the batter well-balanced.
- Pour the batter into the prepared cake pan and smooth the top with a spatula for an even bake.
- Bake for 25-30 minutes, or until a toothpick inserted into the center comes out clean, indicating the cake is perfectly done.
- Allow the cake to cool in the pan for 10 minutes, then transfer to a wire rack to cool completely, ensuring it sets properly.
Combining the moist texture from coconut milk with the bright acidity of lime, this cake is a symphony of flavors. Serve it adorned with lime slices and toasted coconut flakes for an extra tropical touch.
Banana Birthday Cake with Cream Cheese Frosting
Start by gathering all your ingredients to ensure a smooth baking process. This banana birthday cake is a delightful treat that combines the moistness of ripe bananas with the tangy sweetness of cream cheese frosting, perfect for any celebration.
Ingredients
- 2 cups all-purpose flour, sifted for lightness
- 1 tsp baking soda, for rise
- 1/4 tsp salt, to enhance flavors
- 1/2 cup unsalted butter, softened to room temperature
- 1 cup granulated sugar, for sweetness
- 2 large farm-fresh eggs, at room temperature
- 1 tsp pure vanilla extract, for aroma
- 3 ripe bananas, mashed for moisture
- 1/2 cup buttermilk, to tenderize the crumb
- 8 oz cream cheese, softened for smooth frosting
- 1/2 cup unsalted butter, softened for frosting
- 4 cups powdered sugar, sifted for lump-free frosting
- 1 tsp pure vanilla extract, for frosting flavor
Instructions
- Preheat your oven to 350°F (175°C) and grease two 9-inch round cake pans.
- In a medium bowl, whisk together the sifted flour, baking soda, and salt.
- In a large bowl, cream the softened butter and granulated sugar until light and fluffy, about 3 minutes.
- Beat in the eggs one at a time, then stir in the vanilla extract.
- Alternately add the flour mixture and buttermilk to the butter mixture, starting and ending with the flour mixture.
- Fold in the mashed bananas until just combined.
- Divide the batter evenly between the prepared pans and bake for 25-30 minutes, or until a toothpick inserted into the center comes out clean.
- Let the cakes cool in the pans for 10 minutes, then transfer to a wire rack to cool completely.
- For the frosting, beat the softened cream cheese and butter together until smooth.
- Gradually add the sifted powdered sugar and vanilla extract, beating until the frosting is creamy and spreadable.
- Once the cakes are cool, frost the top of one cake layer, place the second layer on top, and frost the top and sides of the entire cake.
Last but not least, this banana birthday cake boasts a moist, tender crumb with a perfect balance of banana flavor and creamy frosting. For an extra special touch, garnish with banana slices or a sprinkle of cinnamon before serving.
Pineapple Upside-Down Birthday Cake
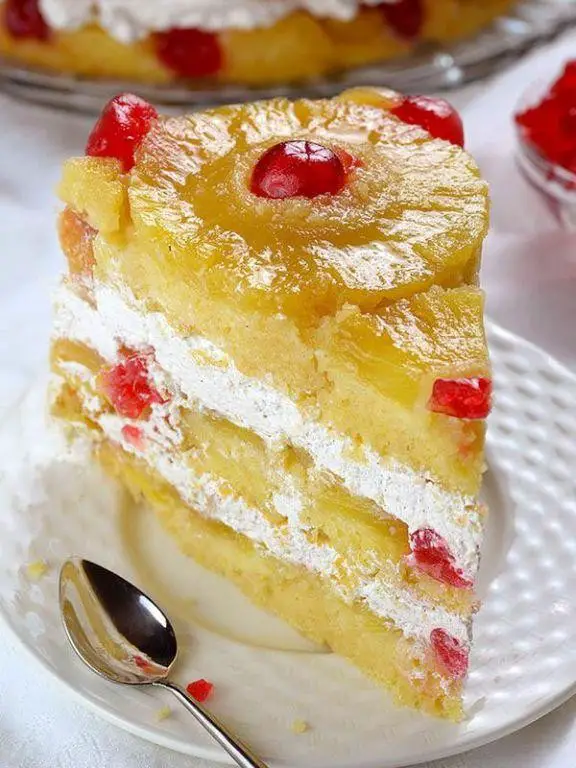
Ready to dive into the delightful world of baking with a twist? Today, we’re exploring how to create a Pineapple Upside-Down Birthday Cake that’s as fun to make as it is to eat. This recipe combines the tropical sweetness of pineapple with the rich, buttery goodness of cake, flipped for a stunning presentation.
Ingredients
- 1/2 cup unsalted butter, melted and slightly cooled
- 1 cup packed light brown sugar, for a deep caramel flavor
- 1 can (20 oz) pineapple slices in juice, drained but juice reserved
- 10 maraschino cherries, drained and patted dry
- 1 1/2 cups all-purpose flour, sifted for lightness
- 2 tsp baking powder, for the perfect rise
- 1/4 tsp salt, to enhance flavors
- 3/4 cup granulated sugar, for sweetness
- 2 large eggs, at room temperature for better incorporation
- 1 tsp pure vanilla extract, for aromatic depth
- 1/2 cup whole milk, at room temperature
- 1/4 cup reserved pineapple juice, for added moisture and flavor
Instructions
- Preheat your oven to 350°F (175°C). Grease a 9-inch round cake pan with some of the melted butter.
- Sprinkle the brown sugar evenly over the bottom of the pan. Arrange the pineapple slices in a single layer over the sugar, placing a cherry in the center of each slice.
- In a medium bowl, whisk together the flour, baking powder, and salt. Set aside.
- In a large bowl, beat the remaining melted butter and granulated sugar until light and fluffy. Tip: Ensure your butter is not too hot to avoid cooking the eggs.
- Add the eggs one at a time, beating well after each addition. Stir in the vanilla extract.
- Alternately add the flour mixture and milk to the butter mixture, beginning and ending with the flour. Stir in the reserved pineapple juice until just combined. Tip: Do not overmix to keep the cake tender.
- Pour the batter over the pineapple slices in the pan, spreading evenly.
- Bake for 40-45 minutes, or until a toothpick inserted into the center comes out clean. Tip: The cake should be golden and pull away slightly from the sides of the pan.
- Let the cake cool in the pan for 10 minutes, then invert onto a serving plate. Serve warm or at room temperature.
Out of the oven, this cake boasts a moist crumb with a caramelized pineapple topping that’s irresistibly glossy. The contrast between the sweet, juicy fruit and the tender cake is a celebration in every bite. For a festive touch, serve with a dollop of whipped cream or a scoop of vanilla ice cream.
Espresso Chocolate Chip Birthday Cake
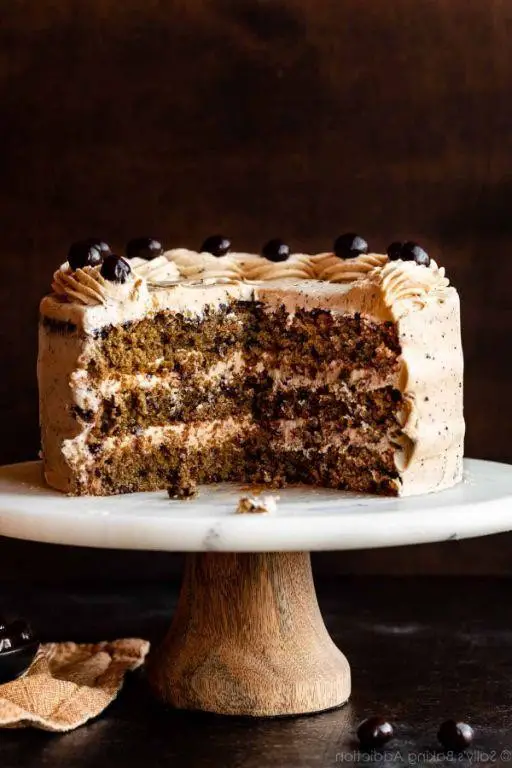
This espresso chocolate chip birthday cake is a delightful twist on the classic, combining the rich flavors of coffee and chocolate for a truly special treat. Today, we’ll walk through each step to ensure your cake turns out perfectly moist and flavorful, just like a professional baker would make.
Ingredients
- 1 1/2 cups all-purpose flour, sifted for lightness
- 1/2 cup unsweetened cocoa powder, rich and dark
- 1 tsp baking soda, for the perfect rise
- 1/2 tsp salt, to enhance flavors
- 1 cup granulated sugar, for sweetness
- 1/2 cup packed brown sugar, for depth
- 1/2 cup vegetable oil, for moisture
- 2 large eggs, farm-fresh and room temperature
- 2 tsp pure vanilla extract, for aroma
- 1 cup strong brewed espresso, cooled, for a bold coffee flavor
- 1/2 cup sour cream, for tenderness
- 1 cup semi-sweet chocolate chips, for melty pockets
Instructions
- Preheat your oven to 350°F (175°C) and grease a 9-inch round cake pan, lining the bottom with parchment paper for easy removal.
- In a large bowl, whisk together the sifted flour, cocoa powder, baking soda, and salt until well combined.
- In another bowl, beat the granulated sugar, brown sugar, and vegetable oil together until smooth. Tip: Ensure the sugars are fully dissolved for a uniform texture.
- Add the eggs one at a time to the sugar mixture, beating well after each addition, then stir in the vanilla extract.
- Alternately add the dry ingredients and the espresso to the wet ingredients, beginning and ending with the dry ingredients. Mix until just combined. Tip: Overmixing can lead to a dense cake.
- Fold in the sour cream until the batter is smooth, then gently stir in the chocolate chips.
- Pour the batter into the prepared pan and bake for 30-35 minutes, or until a toothpick inserted into the center comes out clean. Tip: The cake should spring back when lightly touched.
- Allow the cake to cool in the pan for 10 minutes, then transfer to a wire rack to cool completely.
A slice of this cake reveals a moist, tender crumb speckled with melty chocolate chips, all wrapped in the warm, comforting aroma of espresso. Serve it with a dollop of whipped cream or a scoop of vanilla ice cream for an extra special birthday treat.
Almond Joy Birthday Cake

Let’s dive into creating a decadent Almond Joy Birthday Cake that’s as fun to make as it is to eat. This recipe combines the beloved flavors of coconut, almonds, and chocolate into a moist, celebratory cake that’s sure to impress.
Ingredients
- 1 1/2 cups all-purpose flour, sifted for lightness
- 1 cup granulated sugar, for a sweet base
- 1/2 cup unsweetened cocoa powder, rich and dark
- 1 tsp baking soda, to ensure a fluffy texture
- 1/2 tsp salt, to balance the sweetness
- 1 cup water, at room temperature
- 1/3 cup vegetable oil, for moisture
- 1 tbsp white vinegar, for a slight tang
- 1 tsp pure vanilla extract, for depth of flavor
- 1 cup sweetened shredded coconut, for tropical sweetness
- 1/2 cup sliced almonds, toasted for crunch
- 1 cup semi-sweet chocolate chips, melted for a glossy finish
Instructions
- Preheat your oven to 350°F (175°C) and grease a 9-inch round cake pan to prevent sticking.
- In a large mixing bowl, whisk together the sifted flour, granulated sugar, cocoa powder, baking soda, and salt until well combined.
- Add the water, vegetable oil, vinegar, and vanilla extract to the dry ingredients. Mix until the batter is smooth and free of lumps.
- Fold in the sweetened shredded coconut and toasted sliced almonds gently to distribute evenly throughout the batter.
- Pour the batter into the prepared cake pan and smooth the top with a spatula for an even bake.
- Bake for 30-35 minutes, or until a toothpick inserted into the center comes out clean. Tip: Avoid opening the oven door too early to prevent the cake from sinking.
- Allow the cake to cool in the pan for 10 minutes, then transfer to a wire rack to cool completely. Tip: This step ensures the cake sets properly and eases removal from the pan.
- Once cooled, drizzle the melted semi-sweet chocolate chips over the top of the cake for a decadent finish. Tip: For a smoother drizzle, let the melted chocolate cool slightly before applying.
Out of the oven, this Almond Joy Birthday Cake boasts a moist crumb, studded with chewy coconut and crunchy almonds, all enveloped in a rich chocolate glaze. Serve it at room temperature to highlight the contrasting textures, or pair with a scoop of vanilla ice cream for an indulgent dessert experience.
White Chocolate Raspberry Birthday Cake
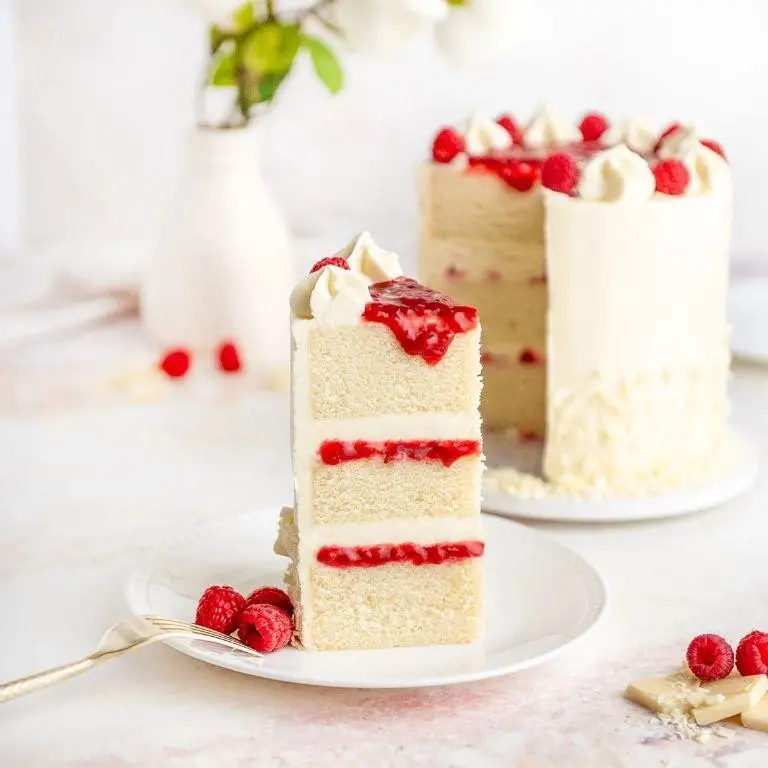
Start by preheating your oven to 350°F to ensure it’s perfectly ready for baking. This White Chocolate Raspberry Birthday Cake combines the creamy sweetness of white chocolate with the tart freshness of raspberries, creating a delightful balance that’s sure to impress.
Ingredients
- 1 1/2 cups all-purpose flour, sifted for lightness
- 1 cup granulated sugar, for a sweet base
- 1/2 cup unsalted butter, softened to room temperature
- 2 large farm-fresh eggs, at room temperature
- 1 tsp pure vanilla extract, for aromatic depth
- 1/2 cup whole milk, to moisten the batter
- 1 1/2 tsp baking powder, for the perfect rise
- 1/4 tsp salt, to enhance flavors
- 1 cup fresh raspberries, gently rinsed and patted dry
- 1/2 cup white chocolate chips, melted until smooth
Instructions
- Preheat your oven to 350°F and grease a 9-inch round cake pan, lining the bottom with parchment paper for easy removal.
- In a large mixing bowl, cream together the softened unsalted butter and granulated sugar until light and fluffy, about 3 minutes.
- Beat in the farm-fresh eggs one at a time, followed by the pure vanilla extract, ensuring each is fully incorporated before adding the next.
- Alternately add the sifted all-purpose flour and whole milk to the butter mixture, starting and ending with the flour, to create a smooth batter.
- Gently fold in the fresh raspberries and melted white chocolate chips, being careful not to overmix and crush the berries.
- Pour the batter into the prepared cake pan and bake for 25-30 minutes, or until a toothpick inserted into the center comes out clean.
- Allow the cake to cool in the pan for 10 minutes before transferring to a wire rack to cool completely.
Ultimate in flavor and texture, this cake boasts a moist crumb with bursts of juicy raspberries and ribbons of creamy white chocolate. Serve it with a dusting of powdered sugar or a dollop of whipped cream for an extra special touch.
S’mores Birthday Cake
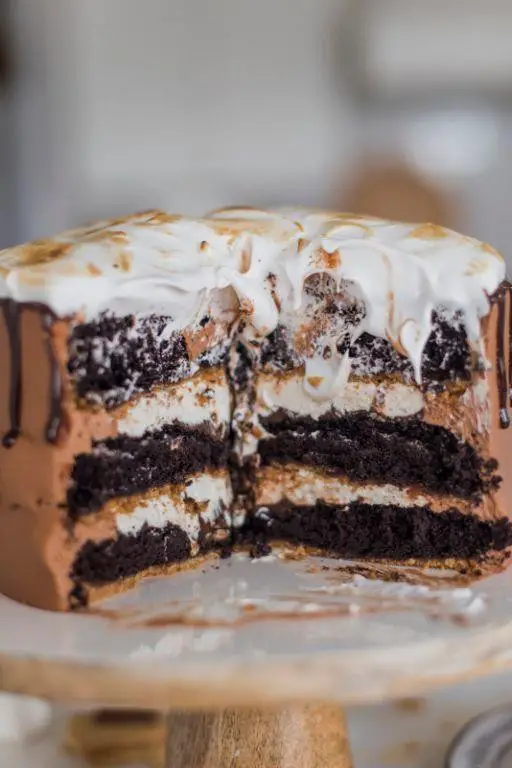
Here’s how to create a decadent S’mores Birthday Cake that combines the nostalgic flavors of campfire s’mores with the celebratory grandeur of a birthday cake. Follow these steps carefully to ensure a deliciously moist cake with a perfectly toasted marshmallow topping.
Ingredients
- 1 1/2 cups all-purpose flour, sifted for lightness
- 3/4 cup granulated sugar, for a sweet base
- 1/2 cup unsweetened cocoa powder, rich and dark
- 1 tsp baking soda, to ensure a fluffy texture
- 1/2 tsp salt, to balance the sweetness
- 1 cup water, at room temperature
- 1/3 cup vegetable oil, for moisture
- 1 tbsp white vinegar, for a slight tang
- 1 tsp pure vanilla extract, for depth of flavor
- 2 cups mini marshmallows, for a gooey topping
- 1/2 cup graham cracker crumbs, for a crunchy contrast
- 1/2 cup semi-sweet chocolate chips, melted for drizzle
Instructions
- Preheat your oven to 350°F (175°C) and grease an 8-inch round cake pan to prevent sticking.
- In a large mixing bowl, whisk together the sifted flour, granulated sugar, cocoa powder, baking soda, and salt until well combined.
- Add the water, vegetable oil, vinegar, and vanilla extract to the dry ingredients. Mix until the batter is smooth and free of lumps.
- Pour the batter into the prepared cake pan and bake for 30-35 minutes, or until a toothpick inserted into the center comes out clean.
- Remove the cake from the oven and immediately sprinkle the mini marshmallows evenly over the top. Return to the oven for 2-3 minutes, just until the marshmallows are slightly toasted.
- Let the cake cool for 10 minutes, then sprinkle with graham cracker crumbs and drizzle with melted chocolate chips.
- Allow the cake to cool completely before slicing to ensure clean cuts.
With its moist chocolate base, gooey marshmallow layer, and crunchy graham cracker topping, this S’mores Birthday Cake is a showstopper. Serve it with a scoop of vanilla ice cream to complement the warm, toasted flavors.
Cookies and Cream Birthday Cake
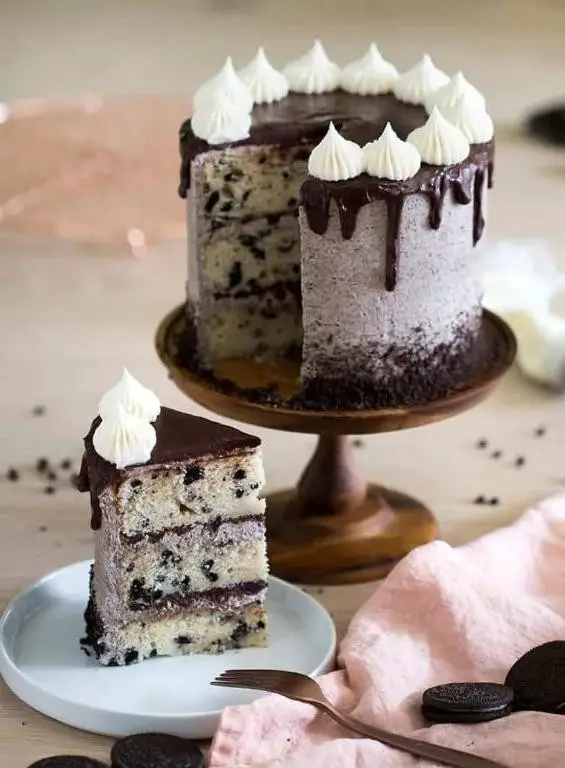
Kickstart your baking adventure with this irresistible Cookies and Cream Birthday Cake, a perfect blend of crunchy, creamy, and utterly delicious layers that promise to be the star of any celebration.
Ingredients
- 2 cups all-purpose flour, sifted for lightness
- 1 3/4 cups granulated sugar, fine and sparkling
- 3/4 cup unsweetened cocoa powder, rich and dark
- 2 tsp baking soda, fresh and potent
- 1 tsp baking powder, aluminum-free
- 1 tsp salt, finely ground
- 2 large eggs, room temperature and farm-fresh
- 1 cup buttermilk, creamy and tangy
- 1 cup strong brewed coffee, hot and aromatic
- 1/2 cup vegetable oil, neutral and light
- 2 tsp pure vanilla extract, fragrant and sweet
- 1 1/2 cups heavy cream, cold and whipped to stiff peaks
- 1 1/2 cups crushed chocolate sandwich cookies, crunchy and sweet
Instructions
- Preheat your oven to 350°F (175°C) and grease two 9-inch round cake pans, lining the bottoms with parchment paper for easy removal.
- In a large mixing bowl, whisk together the sifted flour, granulated sugar, cocoa powder, baking soda, baking powder, and salt until fully combined.
- Add the eggs, buttermilk, hot coffee, vegetable oil, and vanilla extract to the dry ingredients. Mix on medium speed for 2 minutes until the batter is smooth and glossy. Tip: The hot coffee enhances the chocolate flavor, so don’t skip it.
- Divide the batter evenly between the prepared pans. Bake for 30-35 minutes, or until a toothpick inserted into the center comes out clean. Tip: Rotate the pans halfway through baking for even cooking.
- Allow the cakes to cool in the pans for 10 minutes, then transfer to a wire rack to cool completely.
- While the cakes cool, whip the heavy cream to stiff peaks. Gently fold in the crushed cookies, reserving some for garnish.
- Place one cake layer on your serving plate. Spread half of the whipped cream mixture over the top. Place the second layer on top and cover with the remaining cream. Sprinkle the reserved crushed cookies over the top. Tip: For cleaner slices, chill the cake for 30 minutes before serving.
Just imagine slicing into this cake to reveal its moist, chocolatey layers interspersed with crunchy cookie bits and fluffy cream. Serve it with a drizzle of chocolate sauce or a scoop of vanilla ice cream for an extra indulgent treat.
Conclusion
Unleash your inner baker with these 18 delightful birthday cake recipes that promise to make any celebration extra special. Whether you’re a novice or a seasoned pro, there’s something here for everyone. We’d love to hear which recipes you try and adore—don’t forget to leave a comment and share your favorites on Pinterest. Happy baking!

Michael Johnson is the founder of Pan Mastery, Inspired by his blacksmith grandfather’s legacy has a deep appreciation for hand-crafted pots and pans, he provides invaluable guides, reviews, and recipes to enhance your culinary journey.