Got a bounty of fresh produce you’re itching to preserve? Dive into the zesty world of citric acid with our roundup of 18 vibrant recipes that’ll keep your pantry stocked with the tangy flavors of summer all year round. From pickles to jams, these easy-to-follow ideas are perfect for North American home cooks looking to add a punch of preservation to their culinary repertoire. Let’s get preserving!
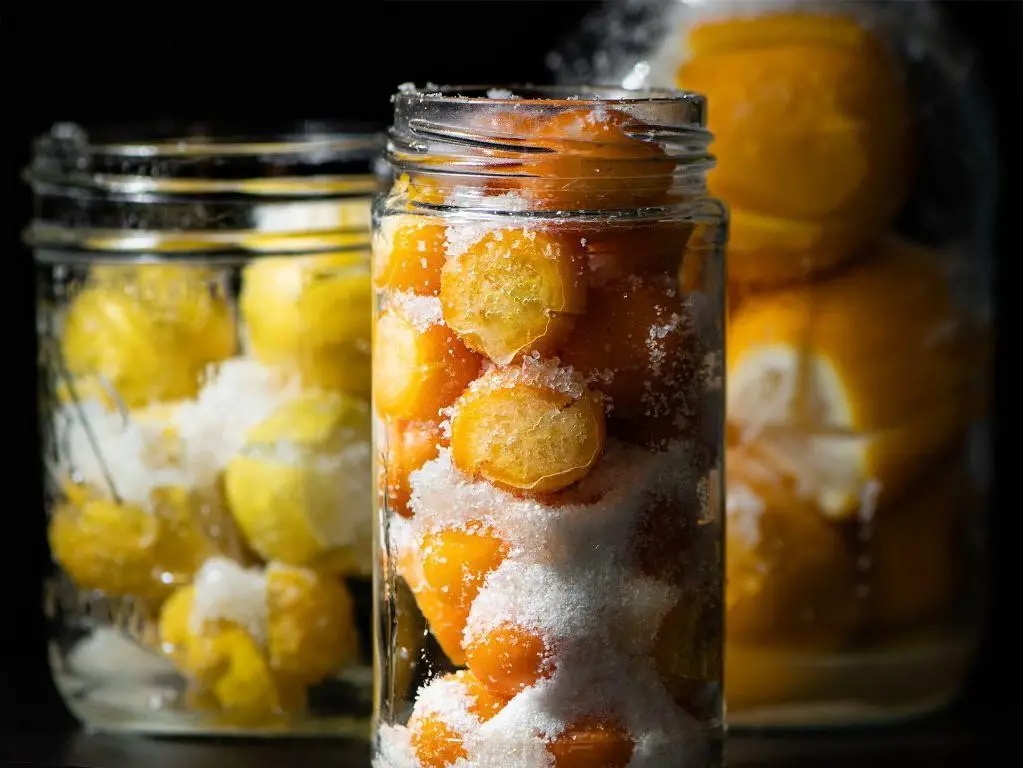
Lemon and Citric Acid Preserved Lemons
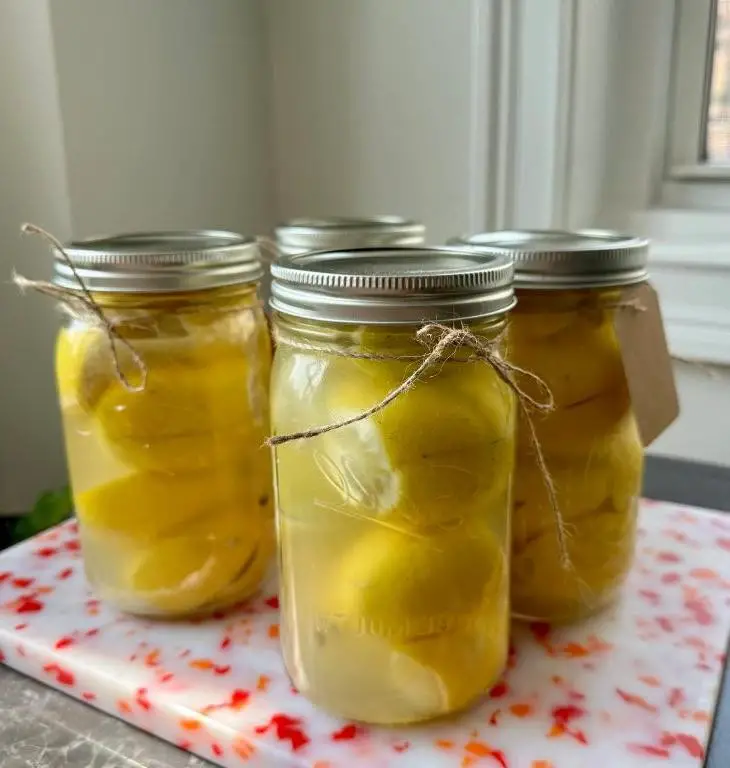
Wondering how to add a burst of sunshine to your dishes? Lemon and Citric Acid Preserved Lemons are a game-changer, offering a tangy, complex flavor that elevates everything from salads to stews with minimal effort.
Ingredients
- a handful of organic lemons (about 5), scrubbed clean
- a generous 1/4 cup of sea salt
- a teaspoon of citric acid
- a splash of lemon juice, if needed
- a couple of bay leaves (optional, for aroma)
Instructions
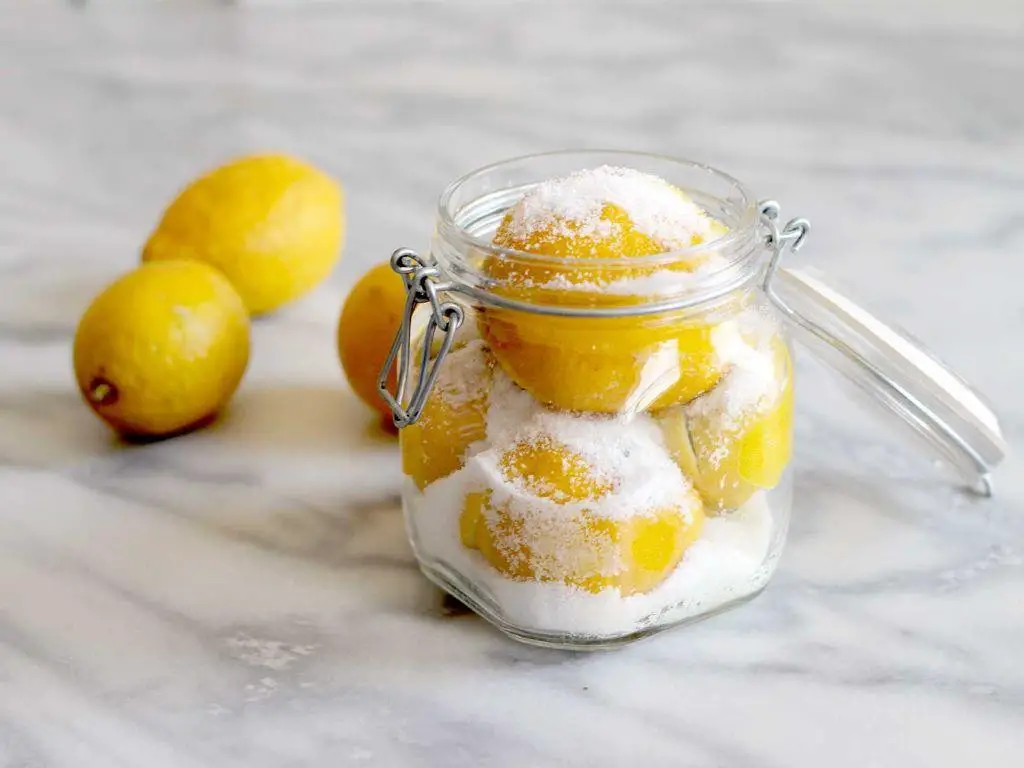
- Slice the lemons into quarters, stopping about 1/2 inch from the bottom so they remain attached at the base.
- Gently open each lemon and pack the inside with sea salt, using about a tablespoon per lemon.
- Press the lemons into a clean, sterilized jar, adding the citric acid and bay leaves between layers for even distribution.
- If the lemons aren’t completely submerged in their own juice after packing, add a splash of fresh lemon juice to cover them.
- Seal the jar tightly and let it sit at room temperature for 3 days, shaking gently once a day to help dissolve the salt.
- After 3 days, transfer the jar to the refrigerator and let the lemons cure for at least 3 weeks before using, shaking occasionally.
- Tip: For the best flavor, use organic lemons since you’ll be eating the peel. Tip: Ensure all utensils and jars are sterilized to prevent mold. Tip: The longer the lemons cure, the more complex their flavor becomes.
Glistening with a jewel-like quality, these preserved lemons will have a soft, almost jam-like texture and a deeply aromatic, salty-sour flavor. Try finely chopping the rind to mix into grain salads or blending into dressings for an instant flavor boost.
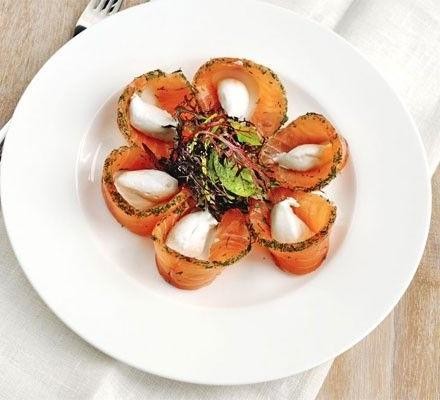
Citric Acid Cured Gravlax

Venture into the realm of refined curing with this Citric Acid Cured Gravlax, a dish that marries the simplicity of traditional techniques with a modern twist. Its delicate balance of flavors and textures makes it a standout choice for those seeking to elevate their culinary repertoire.
Ingredients
- 1 lb fresh salmon fillet, skin on
- 1/4 cup kosher salt
- 1/4 cup granulated sugar
- 1 tbsp citric acid
- a couple of sprigs of fresh dill, roughly chopped
- a splash of vodka (optional, for that extra smoothness)
Instructions
- In a small bowl, mix together the kosher salt, sugar, and citric acid until well combined.
- Place the salmon fillet skin-side down on a large piece of plastic wrap. Evenly sprinkle the salt mixture over the flesh side of the salmon, covering it completely.
- Scatter the chopped dill over the salt mixture, then drizzle with vodka if using. The alcohol helps in the curing process and adds a subtle depth of flavor.
- Wrap the salmon tightly in the plastic wrap, then place it in a shallow dish. Refrigerate for 48 hours, flipping the salmon every 12 hours to ensure even curing.
- After 48 hours, unwrap the salmon and rinse off the cure under cold water. Pat dry with paper towels.
- Using a sharp knife, slice the gravlax thinly against the grain at a slight angle for the perfect texture.
Citric acid adds a bright, tangy note to the gravlax, complementing the richness of the salmon beautifully. Serve it atop a crisp baguette with a dollop of crème fraîche and a sprinkle of fresh dill for an elegant appetizer that’s sure to impress.
Homemade Citric Acid Pickles
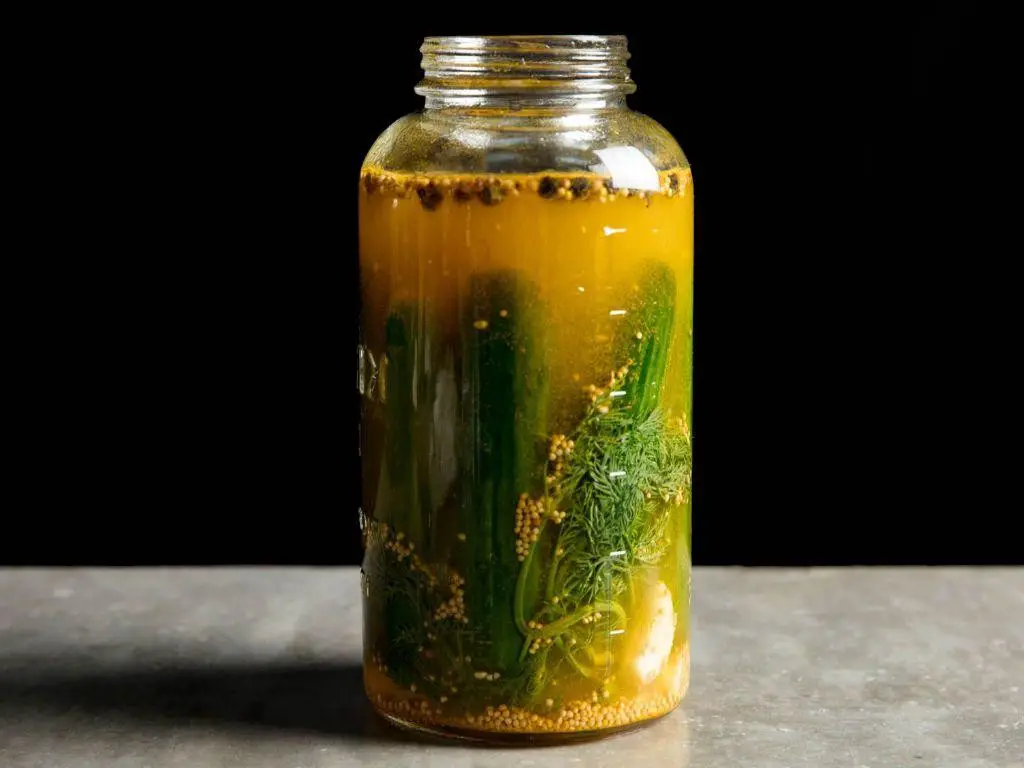
Amidst the bustling rhythm of modern life, there’s something profoundly satisfying about crafting your own pickles with homemade citric acid, a method that promises both a crisp texture and a vibrant tang. This recipe, a nod to traditional pickling with a contemporary twist, is perfect for those seeking to elevate their culinary repertoire with a touch of elegance.
Ingredients
- 2 cups of distilled water
- 1/4 cup of citric acid
- 1 tbsp of kosher salt
- a couple of cloves of garlic, smashed
- a splash of white vinegar
- 1 tsp of sugar
- a handful of fresh dill
- 2 cups of cucumber slices, about 1/4 inch thick
Instructions
- In a medium saucepan, combine the distilled water, citric acid, kosher salt, and sugar. Bring the mixture to a boil over medium-high heat, stirring occasionally until everything dissolves completely.
- Remove the saucepan from the heat and add the white vinegar and smashed garlic cloves, letting the flavors meld for about 5 minutes.
- Place the cucumber slices and fresh dill into a clean, large mason jar, packing them in snugly but not too tightly.
- Pour the warm brine over the cucumbers in the jar, ensuring they are completely submerged. Let the jar cool to room temperature before sealing it with a lid.
- Refrigerate the pickles for at least 48 hours before tasting, allowing the flavors to develop fully. For best results, wait a full week.
Once opened, these pickles reveal a perfect balance of crispness and acidity, with the garlic and dill adding layers of flavor. Try serving them alongside a charcuterie board or as a zesty addition to your favorite sandwich for an extra crunch.
Citric Acid Marinated Olives
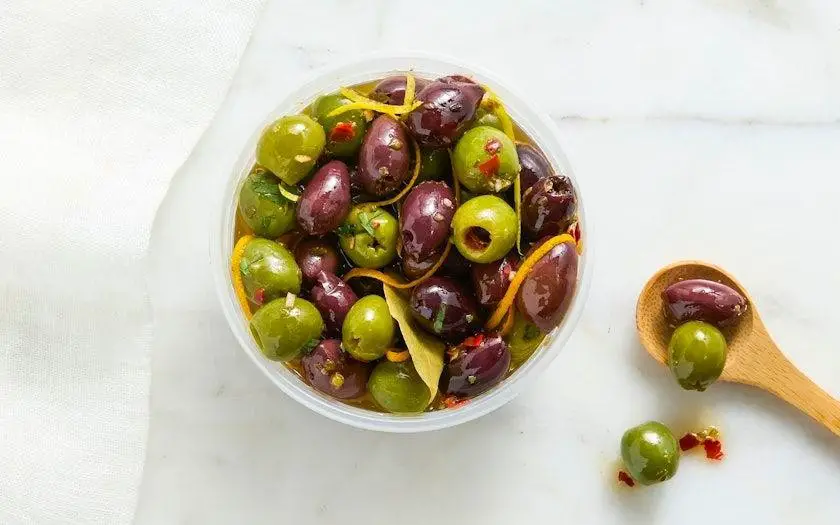
Elevate your appetizer game with these citric acid marinated olives, a sophisticated twist on the classic that brings a bright, tangy depth to every bite. Perfect for entertaining or a refined snack, these olives are marinated to perfection, offering a burst of flavor that’s both unexpected and utterly delightful.
Ingredients
- 2 cups of mixed olives
- A splash of extra virgin olive oil
- A couple of garlic cloves, thinly sliced
- 1 tbsp of citric acid
- A pinch of red pepper flakes
- A few sprigs of fresh thyme
Instructions
- In a medium bowl, combine the olives, garlic slices, and fresh thyme sprigs.
- Sprinkle the citric acid over the olive mixture, ensuring it’s evenly distributed for a balanced tanginess.
- Add a splash of extra virgin olive oil and a pinch of red pepper flakes, then gently toss to coat all the olives.
- Let the mixture marinate at room temperature for at least 2 hours, stirring occasionally to enhance the flavors.
- For the best taste, refrigerate the marinated olives overnight, allowing the citric acid to fully infuse into the olives.
- Before serving, bring the olives to room temperature to maximize their aromatic qualities.
Remarkably versatile, these citric acid marinated olives boast a vibrant flavor profile that’s both tangy and slightly spicy, with a texture that’s irresistibly plump. Serve them alongside a crisp white wine or as part of a charcuterie board for an elegant touch that’s sure to impress.
Preserved Citrus with Citric Acid
Keen to elevate your culinary creations with a touch of sophistication? Preserved citrus with citric acid offers a vibrant, tangy twist to dishes, marrying the bright acidity of citrus with the depth of preservation. This method not only extends the life of your citrus but also intensifies its flavor, making it a versatile ingredient in your kitchen arsenal.
Ingredients
- 4 cups of citrus fruits (lemons, limes, or oranges), thinly sliced
- 1 cup of granulated sugar
- 2 tablespoons of citric acid
- A splash of water
- A couple of sterilized jars with lids
Instructions
- Begin by thoroughly washing your citrus fruits under cold water to remove any dirt or wax.
- Slice the citrus into thin rounds, about 1/4 inch thick, removing any seeds as you go for a smoother texture.
- In a medium saucepan, combine the sugar, citric acid, and a splash of water over medium heat, stirring until the sugar completely dissolves to create a simple syrup.
- Layer the citrus slices in the sterilized jars, then pour the warm syrup over them, ensuring all slices are fully submerged to prevent mold growth.
- Seal the jars tightly and store them in a cool, dark place for at least 2 weeks to allow the flavors to meld and intensify, shaking gently every few days to redistribute the syrup.
- After the preserving period, your citrus is ready to use. For best results, store the opened jar in the refrigerator to maintain freshness.
Unlock the potential of your preserved citrus by incorporating it into salads, cocktails, or as a garnish for desserts. The slices boast a perfect balance of sweet and sour, with a slightly chewy texture that adds complexity to any dish. Try layering them over a creamy cheesecake or muddling into a refreshing summer drink for an instant flavor upgrade.
Citric Acid Fermented Hot Sauce
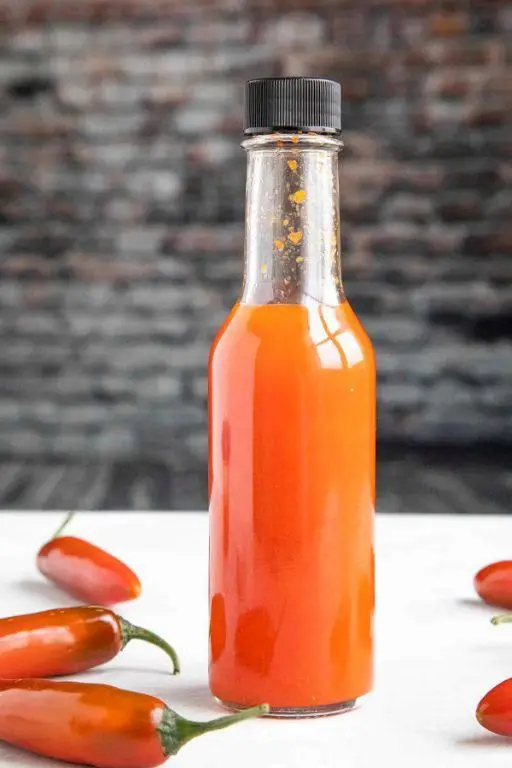
Our culinary journey today takes us into the vibrant world of fermentation with a Citric Acid Fermented Hot Sauce that promises to elevate your dishes with its complex flavors and fiery kick. This sauce is a testament to the beauty of patience, as time works its magic to transform simple ingredients into something extraordinary.
Ingredients
- A couple of cups of chopped mixed hot peppers (like habanero and jalapeño)
- A splash of apple cider vinegar
- A tablespoon of citric acid
- A teaspoon of sea salt
- A cup of filtered water
- A clove of garlic, minced
Instructions
- Start by sterilizing a quart-sized mason jar and its lid by boiling them in water for 10 minutes, then let them air dry. This ensures your fermentation starts off on the right foot.
- Combine the chopped peppers, minced garlic, citric acid, and sea salt in the jar. Pack them down lightly to remove any air pockets.
- Pour the filtered water over the mixture until everything is submerged, leaving about an inch of space at the top. A small fermentation weight can help keep the peppers under the brine.
- Seal the jar with the lid, but not too tightly—you want gases to escape during fermentation. Store it in a cool, dark place for about 2 weeks, checking daily to release any built-up pressure.
- After fermentation, strain the liquid into a clean bowl, reserving the peppers. Blend the peppers with a splash of apple cider vinegar until smooth, then mix back with the liquid for a cohesive sauce.
- Transfer the sauce back into the sterilized jar and let it sit for another 3 days to develop deeper flavors before using.
Remarkably versatile, this hot sauce boasts a tangy depth from the fermentation, with a heat that builds gradually. Try drizzling it over grilled meats or stirring into mayonnaise for a spicy sandwich spread that’s anything but ordinary.
Citric Acid Candied Orange Peels
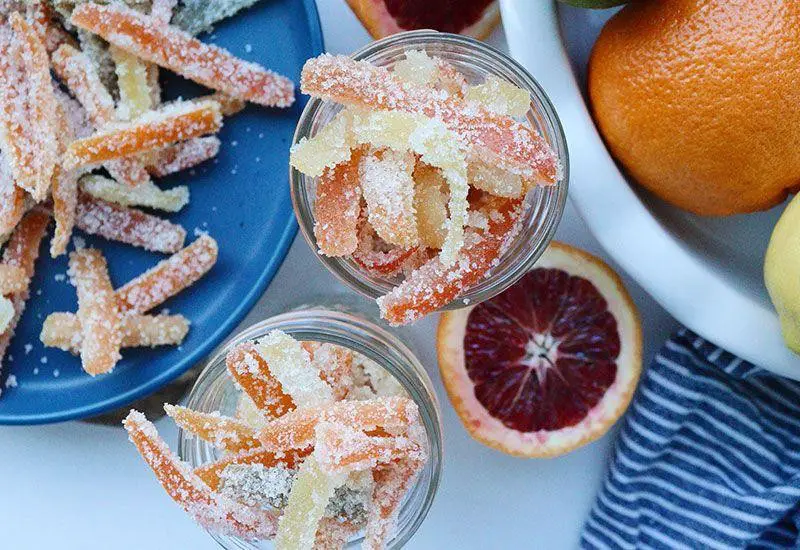
Vibrant and versatile, these Citric Acid Candied Orange Peels transform the humble citrus rind into a dazzling confectionery delight, perfect for adding a burst of sunshine to your desserts or enjoying as a sophisticated standalone treat.
Ingredients
- 4 large oranges, just the peels
- 2 cups of granulated sugar
- 1 cup of water
- A splash of fresh lemon juice
- A couple of tablespoons of citric acid
- A pinch of salt
Instructions
- Start by thoroughly washing the oranges to remove any wax or residue. Pat them dry with a clean towel.
- Carefully peel the oranges, trying to keep the peels in large pieces. Use a sharp knife to remove as much of the white pith as possible for a less bitter taste.
- Slice the peels into thin strips, about 1/4 inch wide. This size ensures they candy evenly and are pleasant to eat.
- In a medium saucepan, combine the water, sugar, lemon juice, and a pinch of salt. Bring to a simmer over medium heat, stirring until the sugar completely dissolves.
- Add the orange peels to the syrup, reducing the heat to low. Let them simmer gently for about 45 minutes, or until the peels become translucent and the syrup thickens slightly.
- Remove the peels from the syrup with a slotted spoon, allowing any excess syrup to drip off. Spread them out on a wire rack set over a baking sheet to cool slightly.
- While still tacky, toss the peels in citric acid until evenly coated. This step adds a delightful tang that balances the sweetness.
- Let the peels dry completely at room temperature for about 24 hours, or until they’re no longer sticky to the touch. For quicker drying, you can place them in an oven set to the lowest temperature for a couple of hours, but keep an eye on them to prevent over-drying.
Amazingly, these candied orange peels offer a chewy texture with a bright, citrusy flavor that’s both sweet and tangy. Try dipping half of each piece in dark chocolate for an elegant contrast, or chop them up to sprinkle over ice cream or yogurt for a refreshing twist.
Citric Acid Pickled Jalapenos
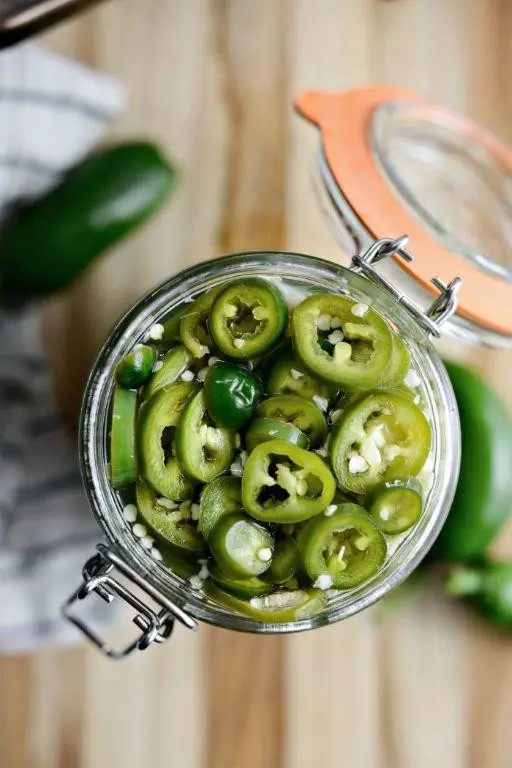
Zesty and vibrant, these citric acid pickled jalapenos bring a tangy kick to any dish, perfectly balancing heat with a bright, acidic punch. Ideal for elevating tacos, sandwiches, or even a simple bowl of nachos, they’re a must-have in your condiment repertoire.
Ingredients
- a pound of fresh jalapenos, thinly sliced
- 2 cups of water
- 1 cup of white vinegar
- a tablespoon of citric acid
- a couple of garlic cloves, smashed
- a teaspoon of sugar
- a splash of olive oil
Instructions
- Start by sterilizing a quart-sized mason jar and its lid in boiling water for 10 minutes, then let them air dry on a clean towel.
- In a medium saucepan, combine the water, white vinegar, citric acid, smashed garlic cloves, and sugar. Bring the mixture to a boil over medium-high heat, stirring occasionally to dissolve the sugar and citric acid completely.
- Add the sliced jalapenos to the boiling mixture, reduce the heat to low, and let them simmer for about 5 minutes until they just start to soften but still retain some crunch.
- Carefully transfer the jalapenos and the liquid into the sterilized mason jar, ensuring the jalapenos are fully submerged. Add a splash of olive oil on top to help preserve their vibrant color.
- Seal the jar tightly and let it cool to room temperature before refrigerating. For best flavor, let the jalapenos pickle for at least 24 hours before serving.
Delightfully crisp with a fiery yet tangy flavor, these pickled jalapenos are a game-changer. Try them atop a creamy avocado toast or mixed into a zesty potato salad for an unexpected twist.
Citric Acid Preserved Strawberries
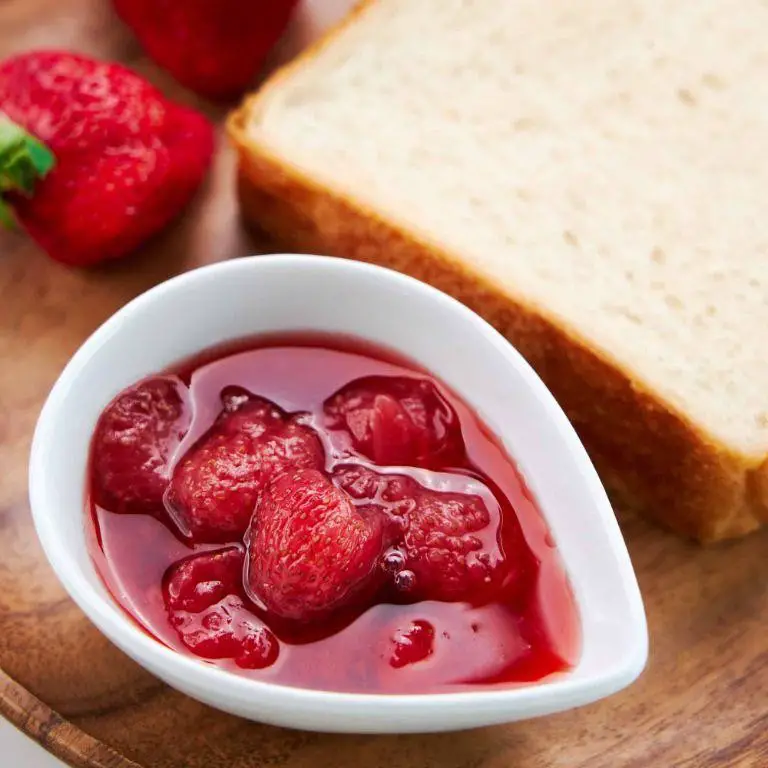
Delight in the vibrant allure of citric acid preserved strawberries, a sublime concoction that marries the sweetness of ripe berries with the zesty punch of citric acid, creating a preserve that’s as versatile as it is delicious. Perfect for elevating your morning toast or adding a burst of flavor to desserts, this recipe is a testament to the beauty of simple ingredients transformed.
Ingredients
- 2 cups of fresh strawberries, hulled and halved
- 1 cup of granulated sugar
- 1 tablespoon of citric acid
- A splash of water
Instructions
- In a medium saucepan, combine the strawberries, sugar, and a splash of water over medium heat. Stir gently to mix.
- Bring the mixture to a simmer, then reduce the heat to low. Let it cook for about 20 minutes, stirring occasionally, until the strawberries soften and the syrup thickens slightly.
- Sprinkle in the citric acid, stirring well to ensure it’s fully dissolved and evenly distributed throughout the mixture.
- Continue to cook on low heat for another 10 minutes, or until the preserve reaches your desired consistency. Tip: For a thicker preserve, let it simmer a bit longer, but keep an eye on it to prevent burning.
- Remove from heat and let it cool slightly before transferring to a clean jar. Tip: Sterilize your jar beforehand by boiling it in water for 10 minutes to ensure your preserve stays fresh longer.
- Seal the jar tightly and store it in the refrigerator. Tip: The flavors will meld and intensify over the next 24 hours, making it even more delicious.
Just imagine the bright, tangy sweetness of these preserved strawberries drizzled over vanilla ice cream or folded into a creamy cheesecake. Their glossy texture and vibrant color make them not only a treat for the palate but also a feast for the eyes.
Citric Acid Cured Salmon
Yielded by the gentle embrace of citric acid, this cured salmon is a testament to the beauty of simplicity in gourmet cooking. Perfect for elevating your brunch or adding a touch of sophistication to your appetizer spread, it’s a dish that promises to impress with minimal effort.
Ingredients
- 1 lb fresh salmon fillet, skin on
- 1/4 cup kosher salt
- 1/4 cup granulated sugar
- 2 tbsp citric acid
- A couple of sprigs of fresh dill
- A splash of vodka (optional, for sterilizing)
Instructions
- Begin by ensuring your salmon fillet is free of any bones. Run your fingers over the flesh to check; use tweezers to remove any you find.
- In a small bowl, mix together the kosher salt, sugar, and citric acid until well combined. This is your cure mixture.
- Place a large piece of plastic wrap on your work surface and sprinkle half of the cure mixture evenly over it. Lay the salmon fillet, skin side down, on top of the cure.
- Cover the flesh side of the salmon with the remaining cure mixture, then lay the dill sprigs on top. If using, lightly drizzle the vodka over the dill.
- Wrap the salmon tightly in the plastic wrap, then place it in a shallow dish. Refrigerate for 48 hours, flipping the salmon every 12 hours to ensure even curing.
- After 48 hours, unwrap the salmon and rinse off the cure under cold water. Pat the fillet dry with paper towels.
- Using a sharp knife, slice the salmon thinly against the grain for serving. For the best texture, angle your knife slightly towards the skin.
Zesty and velvety, this citric acid cured salmon melts in your mouth with a bright, clean flavor. Serve it atop a crisp cucumber round for a refreshing bite, or layer it over warm, toasted baguette slices for a contrast in temperatures.
Citric Acid Pickled Red Onions
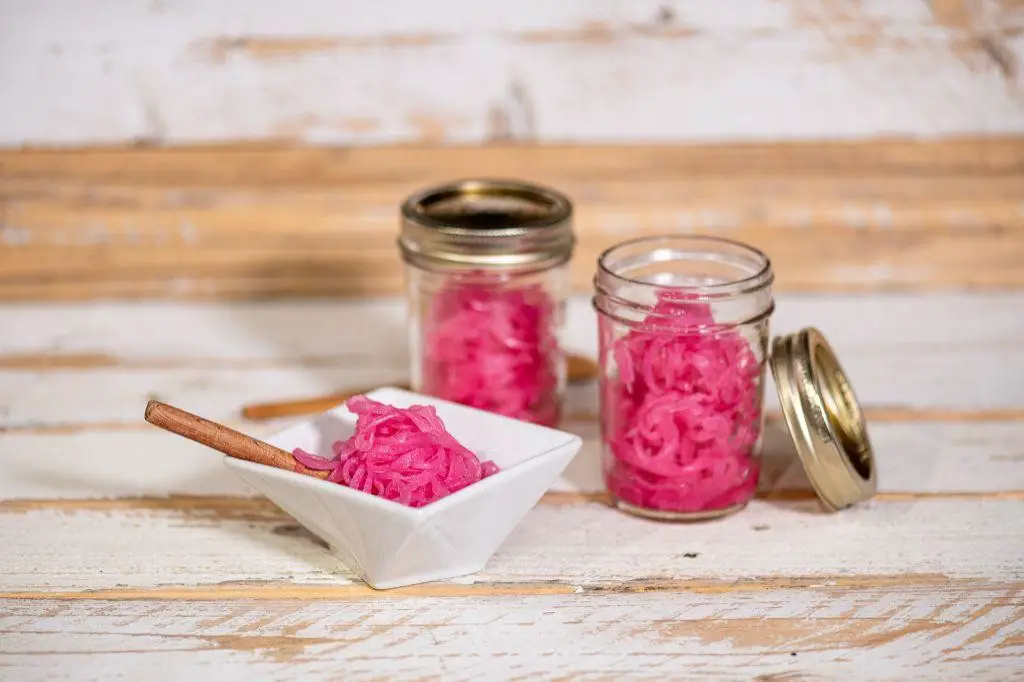
On a vibrant note, citric acid pickled red onions offer a tangy twist to your culinary creations, blending the sharpness of onions with the bright acidity of citric acid for a condiment that elevates any dish from ordinary to extraordinary.
Ingredients
- 2 medium red onions, thinly sliced
- 1 cup water
- 1/2 cup apple cider vinegar
- 1 tablespoon citric acid
- 1 tablespoon sugar
- a pinch of salt
- a couple of whole peppercorns
Instructions
- Start by slicing the red onions thinly, aiming for uniform pieces to ensure even pickling.
- In a small saucepan, combine the water, apple cider vinegar, citric acid, sugar, and salt. Bring the mixture to a simmer over medium heat, stirring occasionally until the sugar and citric acid are completely dissolved.
- Place the sliced onions and peppercorns in a clean, heatproof jar. Carefully pour the hot vinegar mixture over the onions, ensuring they are fully submerged.
- Let the jar cool to room temperature before sealing it with a lid. For the best flavor, refrigerate the pickled onions for at least 2 hours before using, though overnight is ideal.
- Tip: Use a mandoline for perfectly even onion slices. Tip: The pickling liquid can be reused for another batch or as a tangy addition to dressings. Tip: For a spicier version, add a sliced jalapeño to the jar with the onions.
Delightfully crisp and vibrantly pink, these pickled onions add a punch of flavor to tacos, salads, or grilled meats. Their tangy sweetness makes them a versatile garnish that’s as beautiful as it is tasty.
Citric Acid Preserved Limes
Delightfully tangy and bursting with flavor, citric acid preserved limes are a culinary gem that can elevate any dish from ordinary to extraordinary. This simple yet sophisticated preservation method captures the bright essence of limes, transforming them into a versatile condiment that’s as beautiful as it is delicious.
Ingredients
- a dozen fresh limes, washed and dried
- 1 cup of citric acid
- a splash of water
- a couple of clean, sterilized jars with lids
Instructions
- Slice each lime into quarters, leaving them attached at the base to form a flower-like shape.
- Generously coat each lime with citric acid, ensuring every nook and cranny is covered for even preservation.
- Gently press the limes into your jars, packing them tightly but without crushing to maintain their shape.
- Add a splash of water to each jar to help dissolve any remaining citric acid and create a brine.
- Seal the jars tightly and store them in a cool, dark place for at least 2 weeks, shaking gently every few days to redistribute the brine.
- After 2 weeks, check the limes for a translucent appearance and a slightly softened texture, indicating they’re ready to enjoy.
Bright and zesty, these preserved limes offer a punch of acidity that can brighten up rice dishes, marinades, or even cocktails. Their unique texture, somewhere between a pickle and a confit, makes them a standout addition to your pantry.
Citric Acid Marinated Artichokes
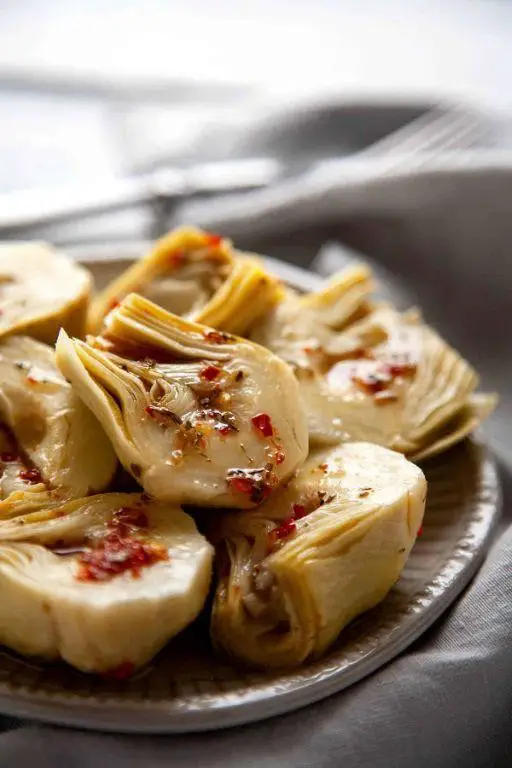
Marvel at the vibrant flavors and tender texture of citric acid marinated artichokes, a dish that brings a refreshing zest to your table. Perfect for those who appreciate the finer nuances of vegetarian cuisine, this recipe promises a delightful balance of tang and earthiness.
Ingredients
- 4 large artichokes
- a splash of olive oil
- a couple of garlic cloves, minced
- a pinch of salt
- a tablespoon of citric acid
- a cup of water
- a squeeze of lemon juice
Instructions
- Trim the tops and stems of the artichokes, then cut them in half lengthwise.
- In a large bowl, mix the water with the citric acid until fully dissolved.
- Submerge the artichoke halves in the citric acid solution for about 10 minutes to prevent browning.
- Heat a splash of olive oil in a pan over medium heat, then add the minced garlic, sautéing until fragrant.
- Drain the artichokes and pat them dry, then add them to the pan, cooking for 5 minutes on each side until they start to brown.
- Sprinkle a pinch of salt over the artichokes and add a squeeze of lemon juice for extra flavor.
- Cover the pan and let the artichokes steam for another 10 minutes, or until tender when pierced with a fork.
For a stunning presentation, arrange the artichokes on a platter with a drizzle of olive oil and a sprinkle of fresh herbs. The citric acid not only preserves their vibrant color but also enhances their natural tang, making each bite a refreshing experience. Pair them with a crisp white wine or incorporate them into a Mediterranean-inspired salad for a meal that sings with flavor.
Citric Acid Fermented Kimchi
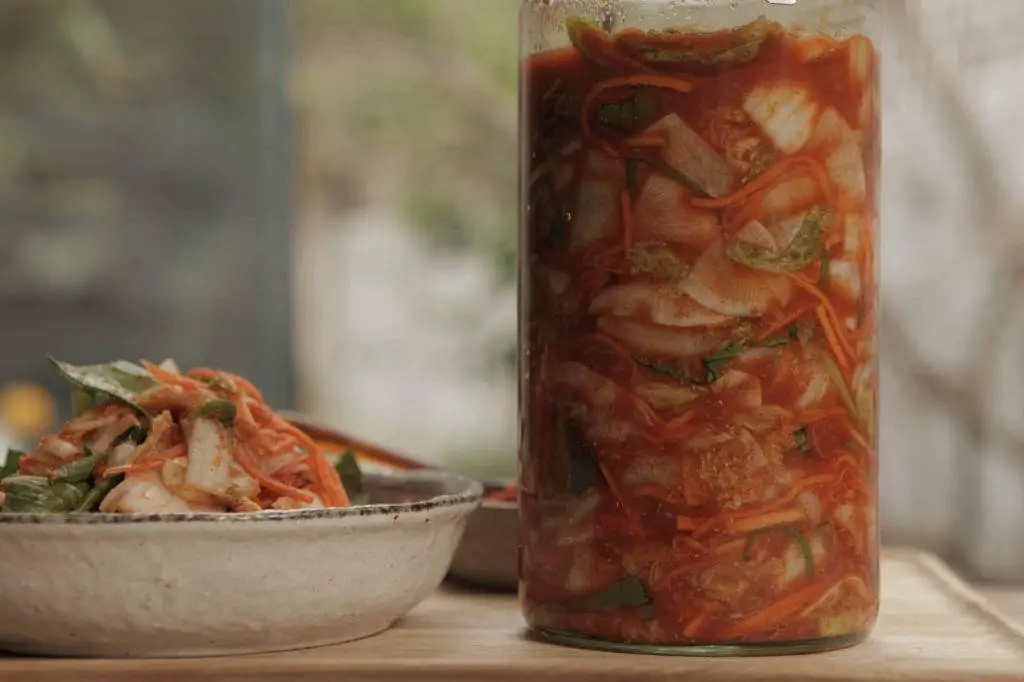
Just when you thought kimchi couldn’t get any more tantalizing, along comes this citric acid fermented version, offering a brighter, more vibrant twist on the traditional Korean staple. Its effervescent tang and crisp texture make it an unforgettable addition to any meal, promising to elevate your culinary repertoire with each bite.
Ingredients
- 1 large napa cabbage, chopped into bite-sized pieces
- 1/4 cup sea salt
- 6 cups water
- 1 tbsp citric acid
- 1 daikon radish, julienned
- 5 green onions, chopped
- 3 cloves garlic, minced
- 1 inch ginger, grated
- 2 tbsp fish sauce
- 1 tbsp sugar
- 1/2 cup gochugaru (Korean chili flakes)
Instructions
- In a large bowl, dissolve the sea salt in 6 cups of water to create a brine. Submerge the chopped napa cabbage in the brine, ensuring it’s fully covered. Let it sit for 2 hours to soften.
- After 2 hours, drain and rinse the cabbage thoroughly under cold water to remove excess salt. Squeeze out any remaining water gently.
- In a separate bowl, mix together the citric acid, daikon radish, green onions, garlic, ginger, fish sauce, sugar, and gochugaru until well combined.
- Add the drained cabbage to the spice mixture, using your hands to massage the spices into the cabbage evenly. Tip: Wear gloves to protect your hands from the chili flakes.
- Pack the kimchi tightly into a clean, large jar, pressing down to eliminate air pockets. Leave about 2 inches of space at the top.
- Seal the jar loosely to allow gases to escape and let it ferment at room temperature for 48 hours. Tip: Place the jar on a plate to catch any overflow during fermentation.
- After fermentation, refrigerate the kimchi to slow down the process. It’s ready to eat immediately but develops more flavor over time. Tip: For best results, wait at least a week before serving.
Crunchy, tangy, and bursting with umami, this citric acid fermented kimchi is a game-changer. Try it atop a steaming bowl of rice or as a bold accompaniment to grilled meats for an extra kick of flavor.
Citric Acid Candied Ginger

Perfectly balancing the fiery warmth of ginger with the bright, tangy notes of citric acid, this candied ginger recipe transforms a simple root into a sophisticated treat that dances on the palate.
Ingredients
- a cup of fresh ginger, peeled and thinly sliced
- a cup of granulated sugar
- a splash of water
- a teaspoon of citric acid
Instructions
- Peel the ginger and slice it into thin, even pieces to ensure uniform cooking.
- In a medium saucepan, combine the ginger slices with just enough water to cover them, bringing to a boil over medium heat. Tip: Boiling the ginger first helps to soften its fibrous texture.
- Reduce the heat and simmer for about 30 minutes, or until the ginger is tender. Tip: Check the ginger by piercing it with a fork; it should offer no resistance.
- Drain the ginger and return it to the pan. Add the sugar and a splash of water, stirring over low heat until the sugar dissolves completely.
- Increase the heat to medium and cook, stirring occasionally, until the syrup thickens and the ginger becomes translucent, about 20 minutes. Tip: Keep an eye on the syrup to prevent it from burning.
- Remove from heat and sprinkle the citric acid over the ginger, tossing gently to coat each piece evenly.
- Spread the candied ginger on a wire rack to cool and dry for at least an hour before serving.
How the citric acid elevates the ginger’s natural spice with its citrusy sharpness, creating a confection that’s both bold and refreshing. Enjoy these glossy, jewel-like pieces as a standalone snack or finely chop them to add a zesty punch to baked goods and cocktails.
Citric Acid Pickled Beets

Unveiling a vibrant twist on a classic, these citric acid pickled beets marry the earthy sweetness of beets with a bright, tangy punch, creating a condiment that’s as versatile as it is visually stunning.
Ingredients
- 2 pounds of fresh beets, peeled and sliced into 1/4-inch rounds
- 1 cup of white vinegar
- 1 cup of water
- 1/2 cup of granulated sugar
- 1 tablespoon of citric acid
- 1 teaspoon of salt
- A couple of whole cloves
- A splash of vanilla extract
Instructions
- In a large pot, combine the vinegar, water, sugar, citric acid, salt, cloves, and vanilla extract. Bring to a boil over medium-high heat, stirring until the sugar and salt dissolve completely.
- Add the sliced beets to the boiling liquid, ensuring they’re fully submerged. Reduce the heat to low and simmer for 20 minutes, or until the beets are tender but still hold their shape.
- While the beets are simmering, sterilize a quart-sized mason jar and its lid by boiling them in water for 10 minutes. Tip: Use tongs to handle the hot jar and lid to avoid burns.
- Once the beets are done, use a slotted spoon to transfer them into the sterilized jar. Pour the hot pickling liquid over the beets, leaving about 1/2 inch of headspace at the top.
- Seal the jar tightly and let it cool to room temperature before refrigerating. Tip: For best flavor, let the beets pickle in the fridge for at least 48 hours before serving.
- Before serving, give the jar a gentle shake to redistribute the spices. Tip: For an extra touch of elegance, serve these pickled beets on a cheese board or as a vibrant side to grilled meats.
Here, the beets emerge with a perfect balance of sweetness and acidity, their firm texture giving way to a slight crunch. The hint of vanilla adds an unexpected depth, making these pickled beets a standout addition to any meal or a bold snack straight from the jar.
Citric Acid Preserved Cherries
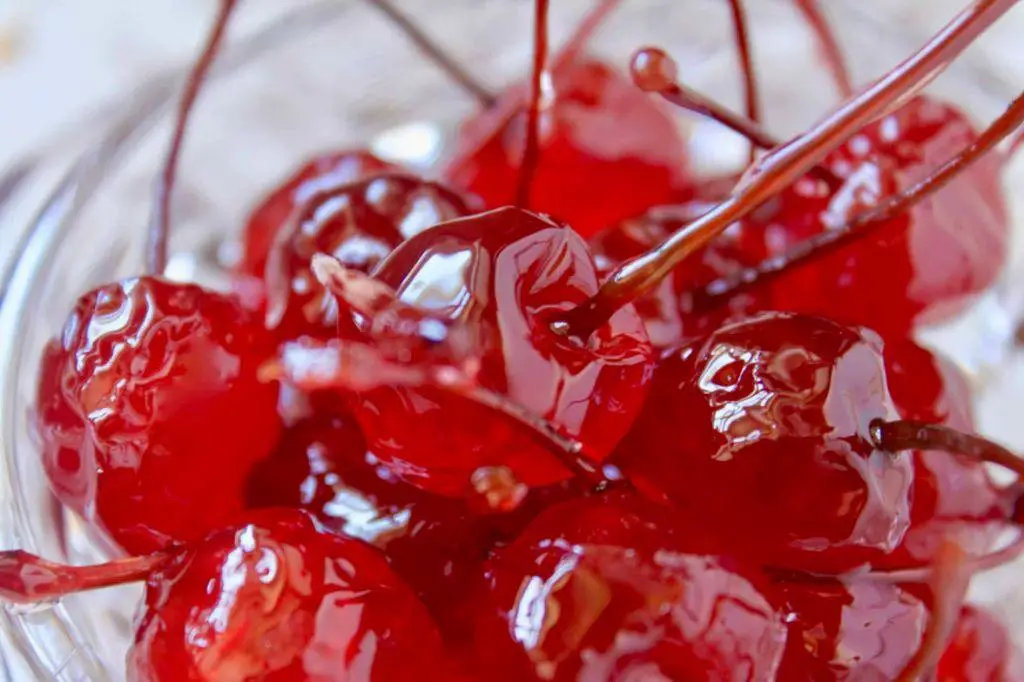
Amidst the bounty of summer’s harvest, preserving the vibrant essence of cherries with citric acid offers a delightful way to extend their joy beyond the season. This method not only captures their sun-kissed sweetness but also adds a tantalizing tang, perfect for elevating desserts or cocktails.
Ingredients
- 2 cups of fresh cherries, pitted
- 1 cup of granulated sugar
- 1 tablespoon of citric acid
- A splash of water
- A couple of clean, sterilized jars
Instructions
- Begin by washing the cherries thoroughly under cold water, then pat them dry with a clean towel.
- Carefully pit each cherry using a cherry pitter or a small knife, ensuring to keep them as intact as possible.
- In a medium saucepan, combine the sugar, citric acid, and a splash of water over medium heat, stirring until the sugar completely dissolves.
- Add the pitted cherries to the syrup, gently stirring to coat them evenly, then simmer for exactly 5 minutes to infuse the flavors without overcooking the fruit.
- Using a slotted spoon, transfer the cherries into the sterilized jars, then pour the hot syrup over them, leaving a 1/2-inch headspace at the top.
- Seal the jars tightly and process them in a boiling water bath for 10 minutes to ensure preservation, then let them cool to room temperature.
- Store the jars in a cool, dark place for up to a year, allowing the flavors to meld beautifully over time.
Lusciously tangy and sweet, these citric acid preserved cherries boast a firm yet yielding texture, making them an exquisite garnish for cheesecakes or a sophisticated twist in your next old-fashioned cocktail.
Citric Acid Cured Duck Breast
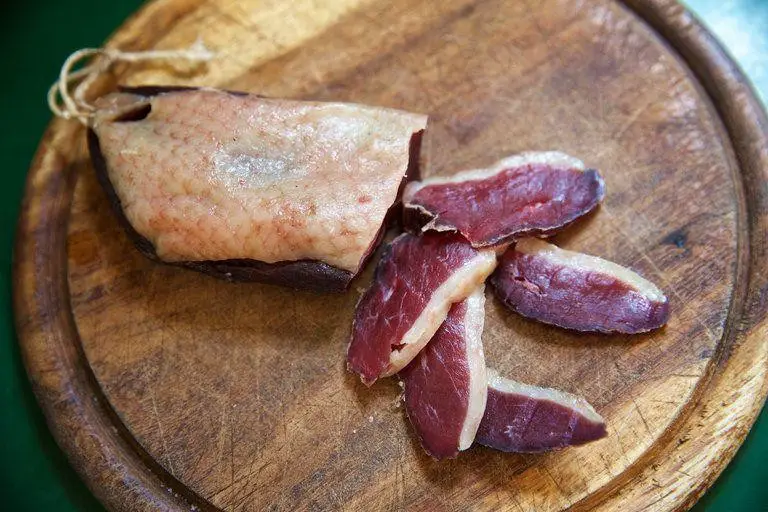
Brimming with sophistication, this Citric Acid Cured Duck Breast recipe transforms the humble duck into a masterpiece of flavor and texture, perfect for those seeking to impress at their next dinner gathering.
Ingredients
- 2 duck breasts, skin on
- A generous sprinkle of citric acid
- A couple of tablespoons of coarse sea salt
- A splash of olive oil
- A handful of fresh thyme sprigs
Instructions
- Begin by scoring the duck skin in a crosshatch pattern, being careful not to cut into the meat. This helps render the fat more effectively.
- Rub the duck breasts evenly with the citric acid and sea salt, ensuring every part is covered. Let them cure in the refrigerator for 24 hours for maximum flavor penetration.
- After curing, rinse the duck breasts under cold water to remove excess salt and pat them dry with paper towels.
- Heat a splash of olive oil in a skillet over medium heat. Once hot, place the duck breasts skin-side down. Cook for about 6 minutes, or until the skin is golden and crispy.
- Flip the duck breasts and add the thyme sprigs to the skillet. Cook for another 4 minutes for medium-rare, or until your desired doneness is achieved.
- Remove the duck from the skillet and let it rest for 5 minutes before slicing. This allows the juices to redistribute, ensuring a moist and flavorful bite.
Delightfully tender with a crisp, golden skin, this duck breast offers a perfect balance of acidity and richness. Serve it thinly sliced over a bed of arugula for a light yet luxurious meal, or alongside roasted root vegetables for a heartier option.
Conclusion
From pickles to jams, our roundup of 18 zesty citric acid recipes offers a treasure trove of preserving ideas to brighten your pantry. Whether you’re a seasoned canner or new to the craft, these recipes promise delicious results. We’d love to hear which ones become your favorites—drop us a comment below! And if you found this article helpful, please share the love on Pinterest. Happy preserving!

Michael Johnson is the founder of Pan Mastery, Inspired by his blacksmith grandfather’s legacy has a deep appreciation for hand-crafted pots and pans, he provides invaluable guides, reviews, and recipes to enhance your culinary journey.