Ready to explore a collection of meals that are as kind to your digestive system as they are delicious? Our roundup of 20 Gentle Colonoscopy Diet Recipes is packed with nutritious, easy-to-digest options that don’t skimp on flavor. Whether you’re prepping for a procedure or simply seeking stomach-friendly dishes, these recipes promise to keep your meals interesting and your body happy. Let’s dive in!
Clear Broth Soup
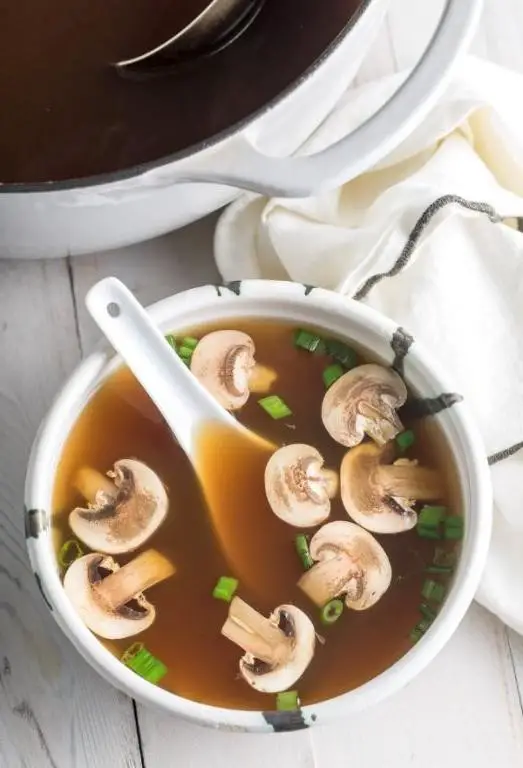
Just the other day, I found myself craving something light yet comforting, and that’s when I decided to whip up this Clear Broth Soup. It’s the perfect dish for those days when you need a little warmth without the heaviness, and trust me, it’s as simple as it is satisfying.
Ingredients
- 6 cups water (filtered for the best taste)
- 1 lb chicken breast (boneless, skinless for a leaner option)
- 2 carrots, sliced (peel if not organic)
- 1 celery stalk, chopped (adds a nice crunch)
- 1 onion, quartered (white or yellow for sweetness)
- 2 garlic cloves, smashed (because garlic makes everything better)
- 1 tsp salt (adjust to taste)
- 1/2 tsp black pepper (freshly ground preferred)
- 1 tbsp olive oil (or any neutral oil)
Instructions
- Heat the olive oil in a large pot over medium heat until shimmering, about 2 minutes.
- Add the chicken breast to the pot, searing each side for 3-4 minutes until golden brown. Tip: Don’t overcrowd the pot to ensure a good sear.
- Toss in the onion, garlic, carrots, and celery, stirring occasionally for 5 minutes until the vegetables start to soften.
- Pour in the water, bringing the mixture to a boil. Then, reduce the heat to low, cover, and simmer for 25 minutes. Tip: Skim off any foam that rises to the top for a clearer broth.
- Remove the chicken breast from the pot, shred it using two forks, and return it to the broth. Season with salt and pepper, simmering uncovered for another 5 minutes. Tip: Taste and adjust seasoning before serving.
Every spoonful of this Clear Broth Soup is a delicate balance of flavors, with the chicken and vegetables lending their essence to the light yet flavorful broth. Serve it with a sprinkle of fresh herbs or a squeeze of lemon for an extra zing.
Steamed White Fish
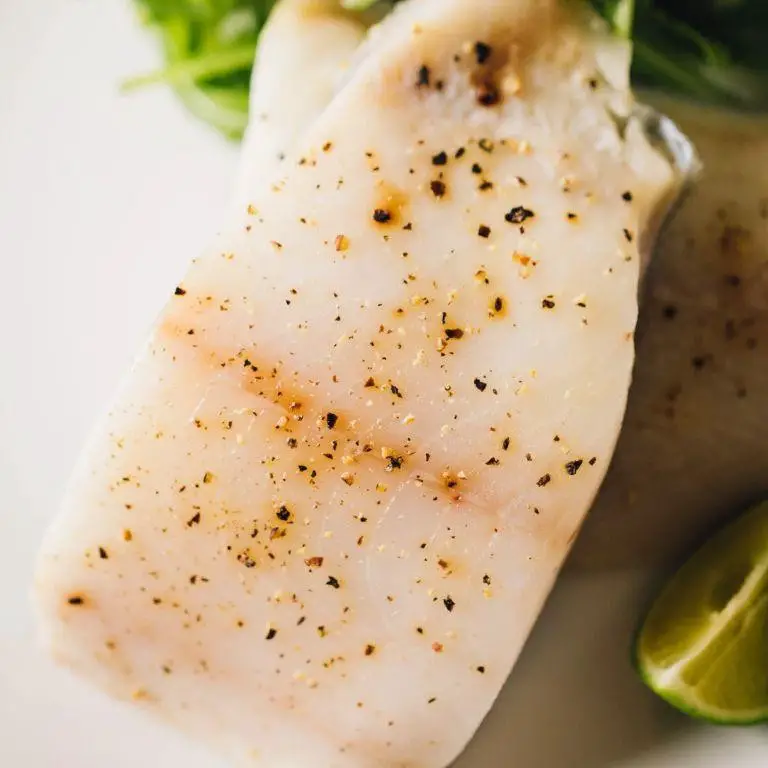
Last week, I found myself staring at a beautiful piece of white fish at the market, and it hit me—why not keep it simple and steam it? There’s something incredibly satisfying about the purity of steamed fish, its delicate flavor shining through with just a few enhancements. Here’s how I like to prepare it, with a couple of personal twists that make it feel like home.
Ingredients
- 1 lb white fish fillets (like cod or halibut, skinless for easier eating)
- 2 tbsp soy sauce (or tamari for gluten-free)
- 1 tbsp sesame oil (toasted for deeper flavor)
- 1 inch ginger, julienned (more if you love ginger)
- 2 green onions, sliced (reserve some for garnish)
- 1/4 cup water (for steaming)
- 1 tsp sugar (balances the saltiness)
Instructions
- Pat the fish fillets dry with paper towels to ensure even steaming.
- In a small bowl, mix soy sauce, sesame oil, and sugar until the sugar dissolves.
- Place the fish on a heatproof plate that fits inside your steamer. Scatter ginger and most of the green onions over the fish.
- Pour the soy sauce mixture evenly over the fish.
- Bring water in the steamer to a boil over high heat. Once boiling, place the plate with the fish in the steamer.
- Cover and steam for 8-10 minutes, depending on the thickness of the fillets. The fish is done when it flakes easily with a fork.
- Carefully remove the plate from the steamer. Garnish with the reserved green onions.
Remember, the key to perfect steamed fish is not overcooking it—keep an eye on the clock. The result? Silky, moist fish with a light, savory sauce that’s just begging to be spooned over a bowl of steamed rice. Try serving it with a side of blanched greens for a complete meal that’s both comforting and elegant.
Boiled Chicken Breast
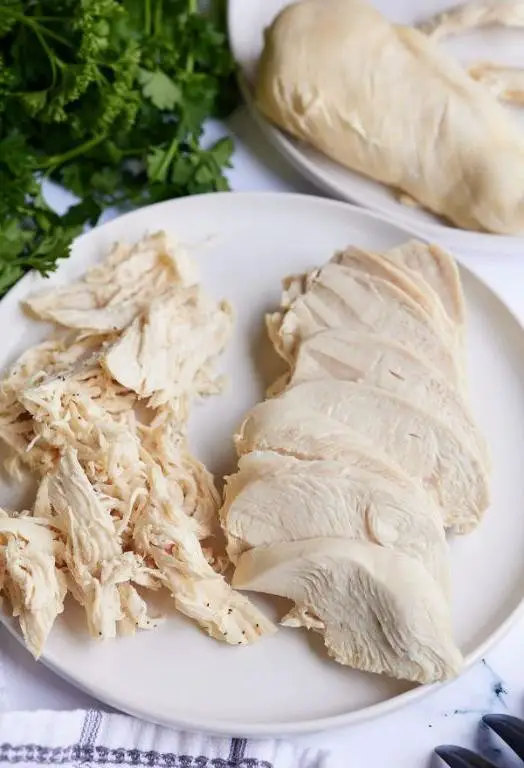
First off, let me tell you, boiled chicken breast doesn’t have to be boring. I’ve discovered that with the right technique, it can be incredibly juicy and flavorful—perfect for salads, sandwiches, or just on its own with a side of veggies.
Ingredients
- 2 boneless, skinless chicken breasts (about 1 lb total, for even cooking)
- 4 cups water (enough to fully submerge the chicken)
- 1 tsp salt (adjust to taste, but don’t skip—it’s key for flavor)
- 1/2 tsp black pepper (freshly ground is best)
- 1 bay leaf (optional, for a subtle herbal note)
Instructions
- In a medium pot, combine the water, salt, pepper, and bay leaf. Bring to a boil over high heat.
- Once boiling, carefully add the chicken breasts. Reduce the heat to low, ensuring the water is at a gentle simmer—not a rolling boil—to keep the chicken tender.
- Cover the pot with a lid and let the chicken simmer for 12-15 minutes. Tip: Use a meat thermometer to check for an internal temperature of 165°F for perfectly cooked chicken.
- After cooking, remove the pot from the heat and let the chicken sit in the hot water for 5 minutes. This step ensures the juices redistribute, making the chicken extra moist.
- Transfer the chicken to a cutting board and let it rest for another 5 minutes before slicing or shredding. Tip: For easier shredding, use two forks to pull the meat apart while it’s still warm.
After trying this method, you’ll notice how the chicken breast turns out tender and full of flavor, not dry or stringy. It’s fantastic tossed in a bright vinaigrette for a quick salad or layered in a sandwich with avocado and sprouts for a healthy lunch option.
Plain Scrambled Eggs

Nothing says ‘home’ to me quite like the smell of scrambled eggs cooking in the morning. It’s a simple dish that I’ve made a thousand times, yet it never fails to comfort. Whether it’s a lazy Sunday or a hectic weekday, scrambled eggs are my go-to for a quick, satisfying meal.
Ingredients
- 2 large eggs (farm-fresh if possible, for the best flavor)
- 1 tbsp unsalted butter (or any neutral oil, but butter adds richness)
- Salt (adjust to taste, but don’t skimp—it brings out the eggs’ flavor)
- Freshly ground black pepper (a pinch for a little kick)
Instructions
- Crack the eggs into a bowl and whisk them until the yolks and whites are fully blended. Tip: Whisking introduces air, making the eggs fluffier.
- Heat a non-stick skillet over medium-low heat (about 275°F) and add the butter, letting it melt without browning. Tip: Low heat prevents the eggs from becoming rubbery.
- Pour the whisked eggs into the skillet. Let them sit undisturbed for about 20 seconds until the edges start to set.
- Using a spatula, gently push the set edges toward the center, letting the uncooked eggs flow to the edges. Repeat this process around the skillet. Tip: This technique creates soft, creamy curds.
- When the eggs are mostly set but still slightly runny, remove the skillet from the heat. The residual heat will finish cooking them perfectly.
- Season with salt and a pinch of black pepper, then give one final gentle stir to distribute the seasoning.
Silky and soft, these scrambled eggs are a blank canvas for your favorite toppings. Try them with a sprinkle of sharp cheddar or a dollop of salsa for an extra flavor boost. Perfectly cooked scrambled eggs should be moist and tender, not dry—every bite a little taste of morning comfort.
Steamed Carrots
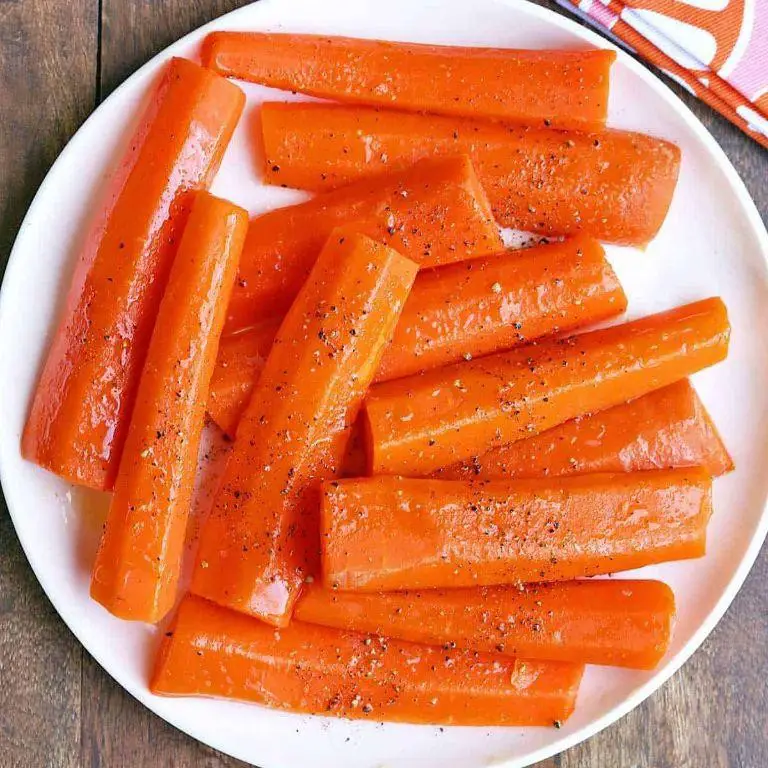
Perfectly steamed carrots are a simple yet vibrant side dish that brings a splash of color and a dose of health to any meal. I remember my grandma always had a bowl of these on her table, claiming they were the secret to her longevity. Today, I’m sharing my take on this humble dish, with a few tips to make it even more delightful.
Ingredients
- 1 lb carrots, peeled and sliced into 1/2-inch rounds (uniform sizes cook evenly)
- 1/2 cup water (for steaming)
- 1 tbsp butter (or olive oil for a dairy-free option)
- 1/2 tsp salt (adjust to taste)
- 1/4 tsp black pepper (freshly ground preferred)
Instructions
- Prepare your steamer by adding 1/2 cup of water to the pot and bringing it to a boil over high heat.
- Place the carrot rounds in the steamer basket in a single layer to ensure even cooking. Cover with a lid.
- Steam the carrots for 5-7 minutes. Check for doneness by piercing a piece with a fork; it should go through easily but the carrots should still be firm.
- Once done, transfer the carrots to a bowl. Immediately add the butter, salt, and black pepper, tossing gently until the butter melts and coats the carrots evenly.
- Tip: For an extra flavor boost, sprinkle with fresh herbs like dill or parsley before serving.
Great for meal prep or a quick side, these steamed carrots retain a slight crunch and their natural sweetness shines through. Try serving them over a bed of quinoa or alongside grilled chicken for a balanced meal.
Boiled Potatoes without Skin
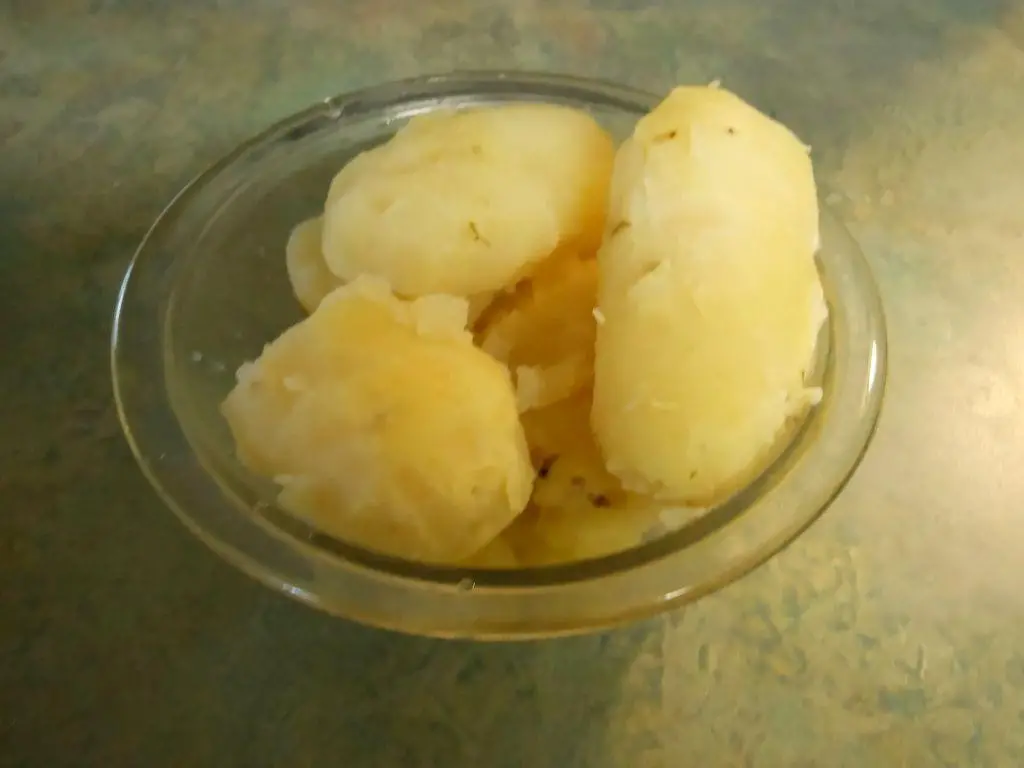
Sometimes, the simplest dishes bring the most comfort, and that’s exactly what boiled potatoes without skin do for me. Whether it’s a lazy Sunday or I’m in need of a quick side dish, this recipe never fails to deliver.
Ingredients
- 2 lbs potatoes (Yukon Gold preferred for their buttery texture)
- 4 cups water (enough to cover the potatoes in the pot)
- 1 tbsp salt (adjust to taste)
- 2 tbsp butter (or olive oil for a dairy-free option)
Instructions
- Wash the potatoes thoroughly under cold running water to remove any dirt.
- Peel the potatoes using a vegetable peeler, ensuring all skin is removed for a smooth texture.
- Cut the peeled potatoes into even-sized chunks, about 1.5 inches, to ensure they cook uniformly.
- Place the potato chunks in a large pot and add enough water to cover them by about an inch.
- Add 1 tbsp of salt to the water, which helps to season the potatoes from the inside out.
- Bring the water to a boil over high heat, then reduce the heat to medium-low to maintain a gentle simmer.
- Simmer the potatoes uncovered for about 15-20 minutes, or until they are fork-tender but not falling apart.
- Drain the potatoes in a colander and let them sit for a minute to steam off excess moisture.
- Return the potatoes to the pot and add 2 tbsp of butter, gently tossing until the butter is melted and the potatoes are evenly coated.
What you’ll love about these boiled potatoes is their creamy interior and how the butter adds a rich, comforting flavor. They’re perfect as is, or you can mash them slightly for a rustic side dish. Try serving them with a sprinkle of fresh herbs for an extra touch of flavor.
White Rice
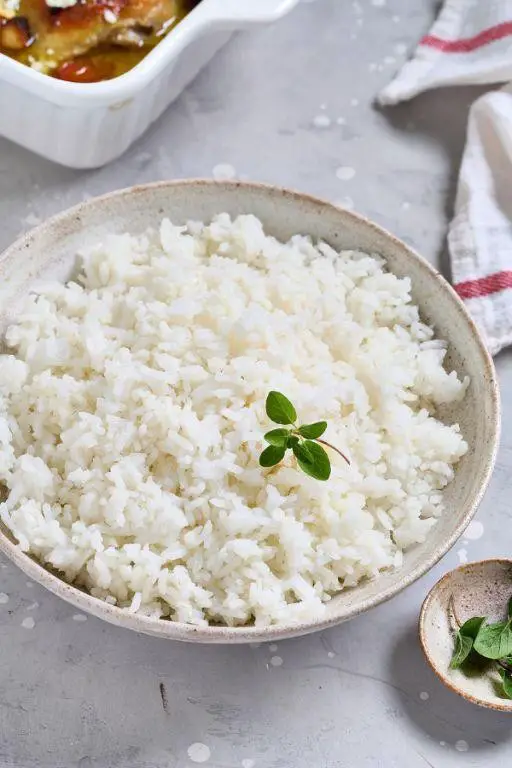
Today, as I was rummaging through my pantry, I realized how often I overlook the humble white rice—a staple that’s both versatile and comforting. There’s something about its simplicity that brings back memories of family dinners and lazy Sunday meals.
Ingredients
- 1 cup long-grain white rice (basmati or jasmine works great for fragrance)
- 2 cups water (for a firmer texture, reduce by 1/4 cup)
- 1/2 tsp salt (adjust to taste, or skip if watching sodium intake)
- 1 tbsp unsalted butter or olive oil (for a richer flavor, or any neutral oil)
Instructions
- Rinse the rice under cold water in a fine-mesh strainer until the water runs clear to remove excess starch.
- In a medium saucepan, combine the rinsed rice, water, salt, and butter or oil. Stir once to distribute the ingredients.
- Bring the mixture to a boil over high heat, then immediately reduce the heat to low and cover the saucepan with a tight-fitting lid.
- Simmer the rice for 18 minutes without lifting the lid—this ensures even cooking and prevents steam from escaping.
- After 18 minutes, turn off the heat and let the rice sit, covered, for 5 minutes to allow the grains to firm up and absorb any remaining moisture.
- Fluff the rice gently with a fork before serving to separate the grains without crushing them.
Great for pairing with almost any dish, this white rice turns out fluffy and slightly sticky, perfect for soaking up sauces or serving under a hearty stew. Try topping it with a fried egg for a simple, satisfying meal any time of day.
Apple Sauce
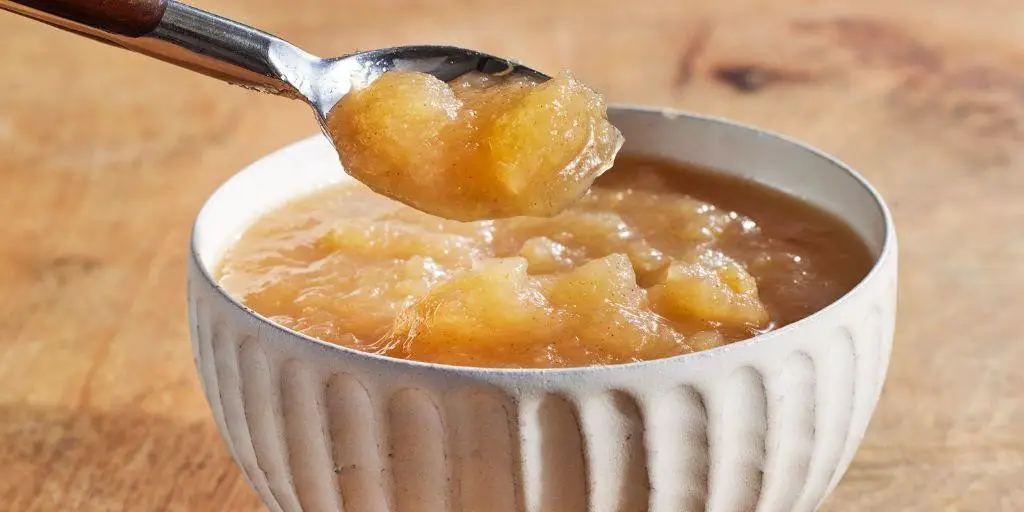
Every fall, I find myself buried under a mountain of apples from my backyard tree, and that’s how my love affair with homemade apple sauce began. It’s simpler than you think, and the taste? Absolutely unbeatable.
Ingredients
- 4 large apples, peeled and cored (I prefer Honeycrisp for their sweetness)
- 1/2 cup water (just enough to prevent sticking)
- 1 tbsp lemon juice (to keep the apples from browning)
- 1/4 cup sugar (adjust to taste, depending on the apples’ sweetness)
- 1/2 tsp cinnamon (optional, but adds a warm spice note)
Instructions
- Chop the peeled and cored apples into 1-inch pieces for even cooking.
- In a medium saucepan, combine the apples, water, and lemon juice. Stir to coat the apples evenly.
- Cover the saucepan and cook over medium heat for 15 minutes, stirring occasionally to prevent sticking. Tip: If the mixture looks dry, add a tablespoon more water.
- After 15 minutes, remove the lid and mash the apples with a potato masher or fork to your desired consistency. For smoother sauce, blend briefly with an immersion blender.
- Stir in the sugar and cinnamon, if using, and cook uncovered for another 5 minutes to thicken slightly. Tip: Taste and adjust sweetness or spice at this stage.
- Remove from heat and let cool for a few minutes before serving. Tip: The sauce will thicken more as it cools.
Great for breakfast, as a snack, or even as a dessert topping, this apple sauce is wonderfully versatile. Its smooth texture and sweet-tart flavor make it a hit with both kids and adults. Try swirling it into oatmeal or yogurt for an extra special touch.
Banana Puree
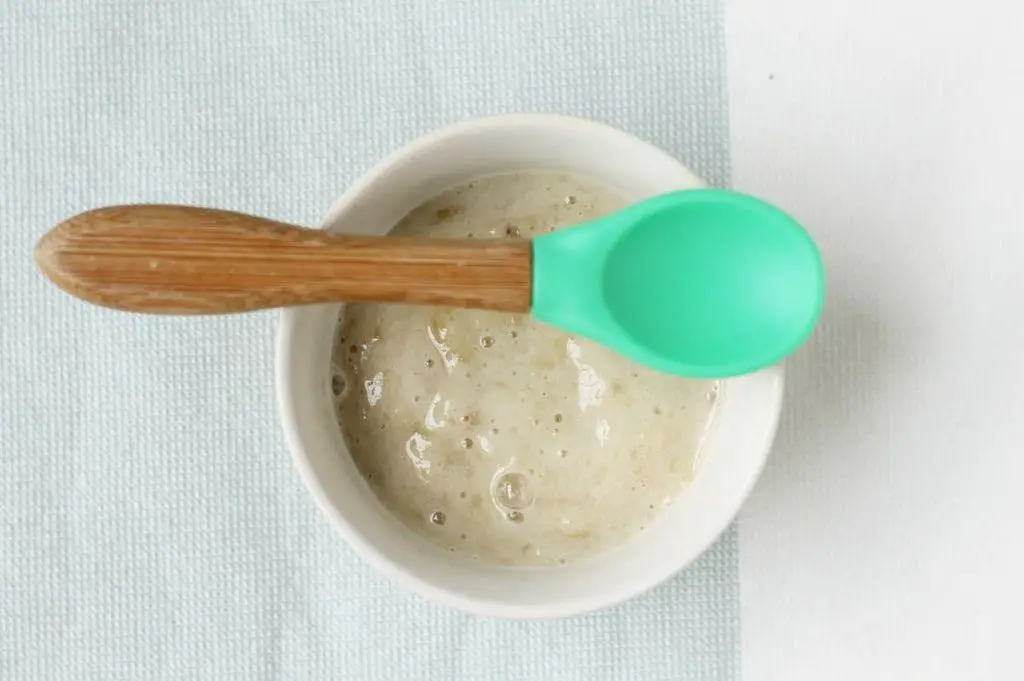
Afternoon cravings hit me hard today, and I found myself staring at a bunch of overripe bananas on my kitchen counter. That’s when I decided to whip up some banana puree, a simple yet versatile dish that’s perfect for babies, smoothies, or even as a natural sweetener in baked goods. It’s amazing how something so easy can be so delicious!
Ingredients
- 2 ripe bananas (the spottier, the sweeter)
- 1 tbsp lemon juice (to prevent browning)
- 1/4 cup water (adjust for desired consistency)
Instructions
- Peel the bananas and break them into chunks. Tip: Using overripe bananas will give your puree a naturally sweeter flavor.
- Place the banana chunks in a blender or food processor. Add the lemon juice and water. Tip: Lemon juice not only prevents browning but also adds a slight tang that balances the sweetness.
- Blend on high speed for 1-2 minutes, or until the mixture is completely smooth. Tip: If the puree is too thick, add water one tablespoon at a time until you reach your preferred consistency.
- Transfer the puree to a bowl or container. It’s now ready to use or store in the refrigerator for up to 3 days.
How silky and sweet this banana puree turns out! I love using it as a base for my morning smoothie bowls or mixing it into pancake batter for an extra flavor boost. The possibilities are endless, and the simplicity of this recipe makes it a staple in my kitchen.
Peach Jelly
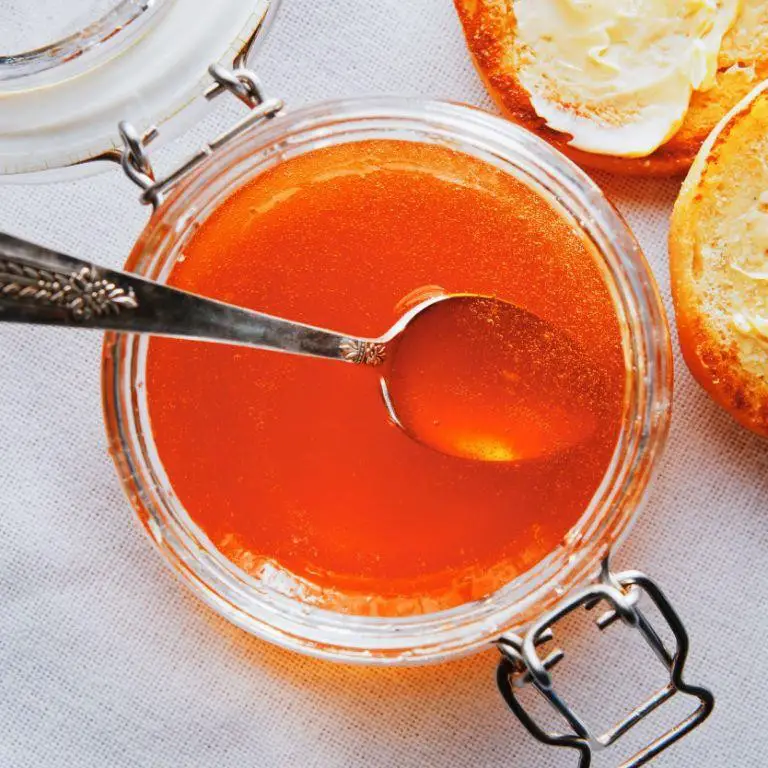
Kicking off the summer with a bang, I’ve been obsessed with making peach jelly ever since I stumbled upon a basket of overripe peaches at my local farmer’s market. There’s something incredibly satisfying about turning those sweet, juicy peaches into a shimmering, wobbly jelly that’s perfect for toast, desserts, or even as a glaze for meats.
Ingredients
- 4 cups peeled, pitted, and chopped peaches (about 6 medium peaches)
- 1 cup granulated sugar (adjust to taste based on the sweetness of your peaches)
- 1/4 cup lemon juice (freshly squeezed for the best flavor)
- 1 packet (1.75 oz) powdered pectin (ensure it’s fresh for optimal gelling)
- 1/2 tsp unsalted butter (to reduce foaming, optional)
Instructions
- In a large pot, combine the chopped peaches and lemon juice. Mash the peaches slightly to release their juices.
- Stir in the pectin until fully dissolved. Add the butter to minimize foaming during cooking.
- Bring the mixture to a full rolling boil over medium-high heat, stirring constantly to prevent sticking.
- Once boiling, add the sugar all at once, stirring vigorously to ensure it dissolves completely.
- Return the mixture to a full rolling boil and let it boil for exactly 1 minute, continuing to stir.
- Remove from heat and skim off any foam from the surface with a spoon for a clearer jelly.
- Ladle the hot jelly into sterilized jars, leaving 1/4 inch of headspace. Wipe the rims clean before sealing.
- Process the jars in a boiling water bath for 10 minutes to ensure preservation. Let cool undisturbed for 24 hours.
Just like that, you’ve got a batch of peach jelly that’s bursting with summer flavor. The texture is luxuriously smooth with just the right amount of firmness, making it a versatile addition to your pantry. Try swirling it into yogurt or layering it in a parfait for a delightful treat.
Popsicles without Fruit Pieces
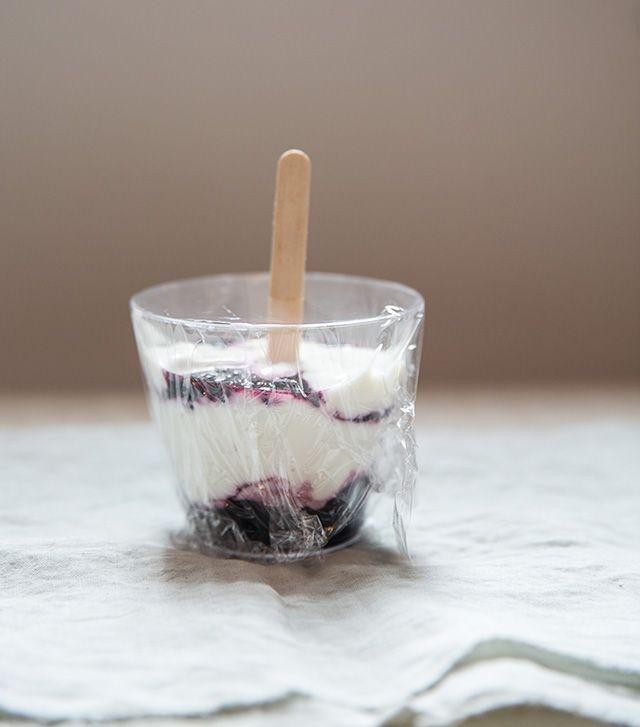
Unbelievably, the heat has been relentless this summer, and I’ve found myself reaching for anything cold to beat it. That’s when I remembered these simple, smooth popsicles without fruit pieces—perfect for those who prefer a uniform texture or are just too lazy to deal with chunks (no judgment here).
Ingredients
- 2 cups of coconut milk (full-fat for creaminess)
- 1/2 cup of honey (adjust to taste)
- 1 tsp of vanilla extract (pure for best flavor)
- A pinch of salt (enhances sweetness)
Instructions
- In a medium bowl, whisk together the coconut milk, honey, vanilla extract, and a pinch of salt until fully combined. Tip: Warming the honey slightly can make it easier to mix.
- Pour the mixture into popsicle molds, leaving a little space at the top for expansion. Tip: Tap the molds gently on the counter to remove any air bubbles.
- Insert popsicle sticks and freeze for at least 6 hours, or overnight for best results. Tip: If your sticks don’t stay upright, cover the molds with foil and make a small slit to hold the sticks in place.
- To unmold, run warm water over the outside of the molds for a few seconds, then gently pull the popsicles out.
Enjoy these creamy, dreamy popsicles straight from the freezer—their smooth texture and sweet vanilla flavor are a perfect match for a hot day. Try drizzling them with melted chocolate before serving for an extra indulgent treat.
Gelatin Desserts
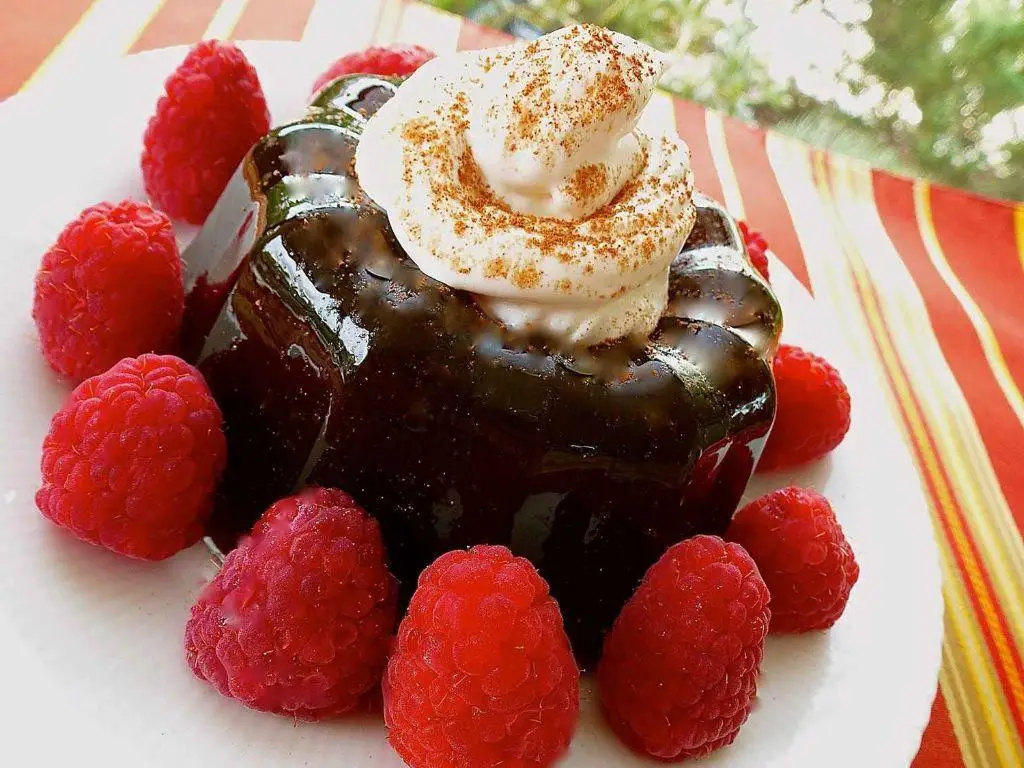
Gelatin desserts have always been a nostalgic treat for me, reminding me of summer picnics and family gatherings. There’s something magical about their wobbly texture and endless flavor possibilities that keeps me coming back for more.
Ingredients
- 1 cup cold water (for blooming the gelatin)
- 1 cup boiling water (to dissolve the gelatin)
- 3 tbsp gelatin powder (unflavored, for a clear base)
- 1/2 cup sugar (adjust to taste)
- 2 cups fruit juice (any flavor, for a natural taste)
- 1 tsp vanilla extract (optional, for added aroma)
Instructions
- In a large bowl, sprinkle the gelatin powder over 1 cup of cold water. Let it sit for 5 minutes to bloom, ensuring the gelatin absorbs the water evenly.
- Pour 1 cup of boiling water into the bloomed gelatin, stirring continuously until the gelatin is completely dissolved. This should take about 2 minutes.
- Add the sugar to the gelatin mixture, stirring until fully dissolved. Tip: If you’re using a less sweet fruit juice, you might want to add a bit more sugar here.
- Stir in the fruit juice and vanilla extract (if using) until the mixture is uniform. This is your chance to get creative with flavors!
- Pour the mixture into your desired molds or a large dish. Refrigerate for at least 4 hours, or until fully set. Tip: For quicker setting, you can place it in the freezer for the first hour, then transfer to the fridge.
- Once set, gently loosen the edges with a knife and invert onto a serving plate. For molds, a quick dip in warm water helps release the dessert easily.
Velvety smooth with a playful jiggle, these gelatin desserts are a joy to both make and eat. Serve them with a dollop of whipped cream or fresh fruit on top for an extra special touch.
Herbal Tea

Yesterday, as I was rummaging through my spice cabinet, I stumbled upon a forgotten treasure—a bag of dried chamomile flowers. It reminded me of the countless evenings I’ve spent sipping on herbal tea, a simple yet profound pleasure that soothes the soul. Today, I’m sharing my go-to herbal tea recipe, a blend that’s as versatile as it is comforting.
Ingredients
- 2 cups water (filtered for the best taste)
- 1 tbsp dried chamomile flowers (or lavender for a floral twist)
- 1 tsp honey (adjust to taste, or use agave for a vegan option)
- 1 cinnamon stick (optional, for a spicy note)
- 1 slice of lemon (freshly squeezed for a zesty kick)
Instructions
- Bring 2 cups of filtered water to a boil in a small saucepan over medium-high heat, about 5 minutes.
- Once boiling, remove the saucepan from heat and add 1 tbsp of dried chamomile flowers. Let steep for 5 minutes for a light flavor, or up to 10 minutes for a stronger brew.
- Strain the tea into your favorite mug, pressing gently on the flowers to extract all the flavor.
- Stir in 1 tsp of honey until fully dissolved, adjusting the amount based on your sweetness preference.
- Add a cinnamon stick to the mug for an aromatic spice or a slice of lemon for a refreshing citrus note.
- Let the tea sit for another minute to allow the flavors to meld together beautifully.
Velvety smooth with a floral aroma, this herbal tea is a hug in a mug. Serve it with a side of shortbread cookies for a delightful afternoon treat, or enjoy it as is for a moment of tranquility in your busy day.
Decaffeinated Coffee

Just when you think your love for coffee has to end because of caffeine sensitivity, decaffeinated coffee comes to the rescue. I remember the first time I tried it, skeptical but desperate for that familiar comfort, and was pleasantly surprised by how it didn’t compromise on taste. Here’s how I make my perfect cup at home, ensuring it’s just as rich and aromatic as the regular kind.
Ingredients
- 1 cup decaffeinated coffee beans (freshly ground for best flavor)
- 4 cups water (filtered, if possible, for a cleaner taste)
- 1 tbsp sugar (optional, adjust to taste)
- 1/4 cup milk or cream (or any dairy-free alternative for a vegan option)
Instructions
- Grind the decaffeinated coffee beans to a medium-coarse consistency, similar to sea salt, for optimal extraction.
- Heat the water to 200°F, just below boiling, to avoid burning the coffee grounds.
- Place the ground coffee in a filter within your coffee maker or French press. Pour the hot water over the grounds, ensuring all are evenly saturated.
- Let the coffee steep for 4 minutes if using a French press, or follow your coffee maker’s instructions for drip coffee.
- Press the plunger down slowly if using a French press, or wait for the drip cycle to complete.
- Pour the brewed coffee into a cup, add sugar if desired, and stir until dissolved.
- Heat the milk or cream separately until warm but not boiling, then froth if desired for a latte-like texture.
- Add the milk or cream to the coffee, adjusting the amount to your preference.
Offering a smooth, full-bodied flavor without the caffeine kick, this decaffeinated coffee is perfect for late-night cravings or a gentle morning start. Try serving it with a cinnamon stick or a dash of cocoa powder on top for an extra special touch.
Strained Vegetable Juice
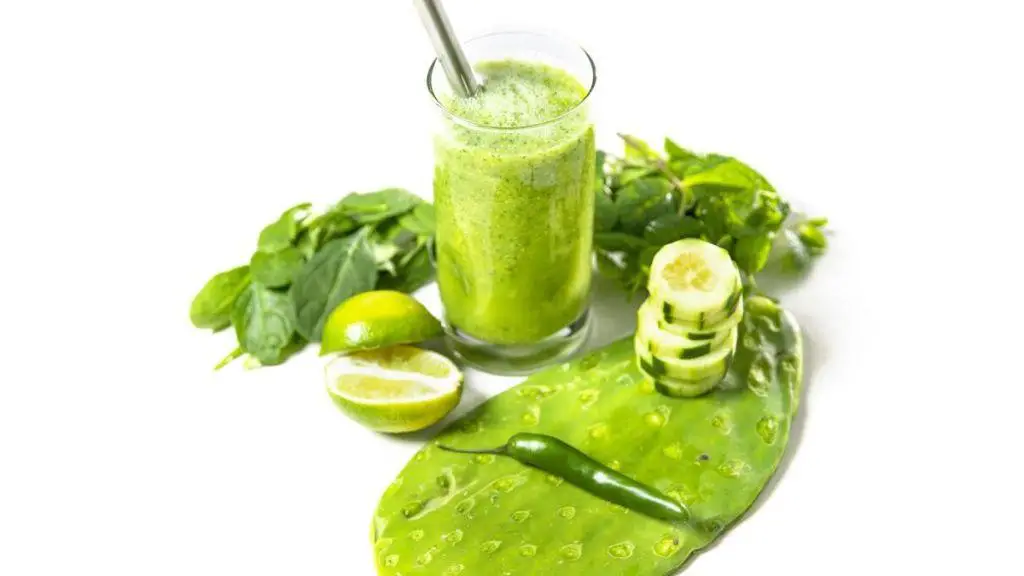
Have you ever found yourself staring at a pile of vegetables in your fridge, wondering how to use them all before they go bad? I’ve been there more times than I’d like to admit, and that’s exactly how my love affair with strained vegetable juice began. It’s a simple, nutritious way to give those veggies a second life, and the best part? You can customize it based on what you have on hand.
Ingredients
- 4 cups mixed vegetables (carrots, celery, spinach, and tomatoes work great)
- 1 tbsp lemon juice (freshly squeezed for the best flavor)
- 1/2 tsp salt (adjust to taste)
- 1/4 tsp black pepper (freshly ground if possible)
- 2 cups water (filtered is preferred)
Instructions
- Wash all vegetables thoroughly under cold running water to remove any dirt or pesticides.
- Chop the vegetables into roughly 1-inch pieces to ensure they blend evenly.
- Add the chopped vegetables, lemon juice, salt, black pepper, and water into a blender.
- Blend on high speed for 2 minutes, or until the mixture is completely smooth. Tip: If your blender struggles, add a bit more water to help it along.
- Strain the blended mixture through a fine mesh sieve or cheesecloth into a large bowl to remove any pulp. Tip: Press down with a spoon to extract as much juice as possible.
- Transfer the strained juice into a pitcher and refrigerate for at least 1 hour before serving to allow the flavors to meld. Tip: For a clearer juice, strain it a second time.
Great for a hot summer day, this strained vegetable juice is refreshingly light with a hint of tanginess from the lemon. Serve it over ice with a sprig of mint for an extra touch of freshness, or mix it with a bit of sparkling water for a fizzy twist.
Low-Fiber Cereal

Zesty mornings call for something light yet satisfying, and that’s exactly what this Low-Fiber Cereal brings to the table. I remember stumbling upon this recipe during a hectic week when my digestive system was begging for a break, and it’s been a gentle go-to ever since.
Ingredients
- 1 cup white rice flour (for a smoother texture)
- 2 tbsp sugar (adjust to taste)
- 1/4 tsp salt
- 1 cup water (room temperature)
- 1 tbsp vegetable oil (or any neutral oil)
Instructions
- In a medium bowl, whisk together 1 cup white rice flour, 2 tbsp sugar, and 1/4 tsp salt until well combined.
- Gradually add 1 cup water to the dry ingredients, stirring continuously to prevent lumps. Tip: A whisk works better than a spoon for a smoother batter.
- Heat a non-stick skillet over medium heat and lightly grease it with 1 tbsp vegetable oil. Tip: Ensure the skillet is properly heated to avoid sticking.
- Pour a thin layer of the batter into the skillet, tilting it to spread evenly. Cook for 2-3 minutes until the edges start to lift.
- Flip the cereal carefully and cook for another 1-2 minutes until lightly golden. Tip: Use a wide spatula for easier flipping.
- Transfer to a plate and repeat with the remaining batter, greasing the skillet as needed.
Enjoy this Low-Fiber Cereal warm, with a drizzle of honey or a sprinkle of cinnamon for extra flavor. Its delicate texture and mild taste make it a comforting base for both sweet and savory toppings.
Plain Yogurt without Fruit

Today, I stumbled upon a simple yet incredibly versatile dish that I just had to share with you all. Plain yogurt without fruit might sound basic, but trust me, it’s a blank canvas waiting for your culinary creativity. I remember my grandma always had a bowl of it in the fridge, ready to be transformed into something magical.
Ingredients
- 4 cups whole milk (for a creamier texture, or 2% for lighter)
- 2 tablespoons plain yogurt with live cultures (as a starter, ensure it’s fresh)
- 1 tablespoon honey (optional, adjust to taste)
Instructions
- Heat the milk in a heavy-bottomed saucepan over medium heat until it reaches 180°F, stirring occasionally to prevent scorching. Use a thermometer for accuracy.
- Remove the saucepan from the heat and let the milk cool down to 110°F. This step is crucial to not kill the live cultures in your starter.
- Whisk in the plain yogurt starter until fully incorporated. The smoother the mixture, the better the texture of your yogurt.
- Cover the saucepan with a lid and wrap it in a thick towel to maintain warmth. Let it sit undisturbed in a warm place for 6-8 hours. The longer it sits, the tangier it gets.
- After the incubation, check the yogurt. It should be set and have a creamy consistency. If it’s too runny, let it sit for another hour.
- Refrigerate the yogurt for at least 2 hours before serving to halt the culturing process and achieve the perfect thickness.
Once chilled, this plain yogurt boasts a velvety texture and a mildly tangy flavor that’s incredibly refreshing. Try drizzling it with olive oil and a sprinkle of sea salt for a savory twist, or mix in some granola for crunch. The possibilities are endless!
Cottage Cheese
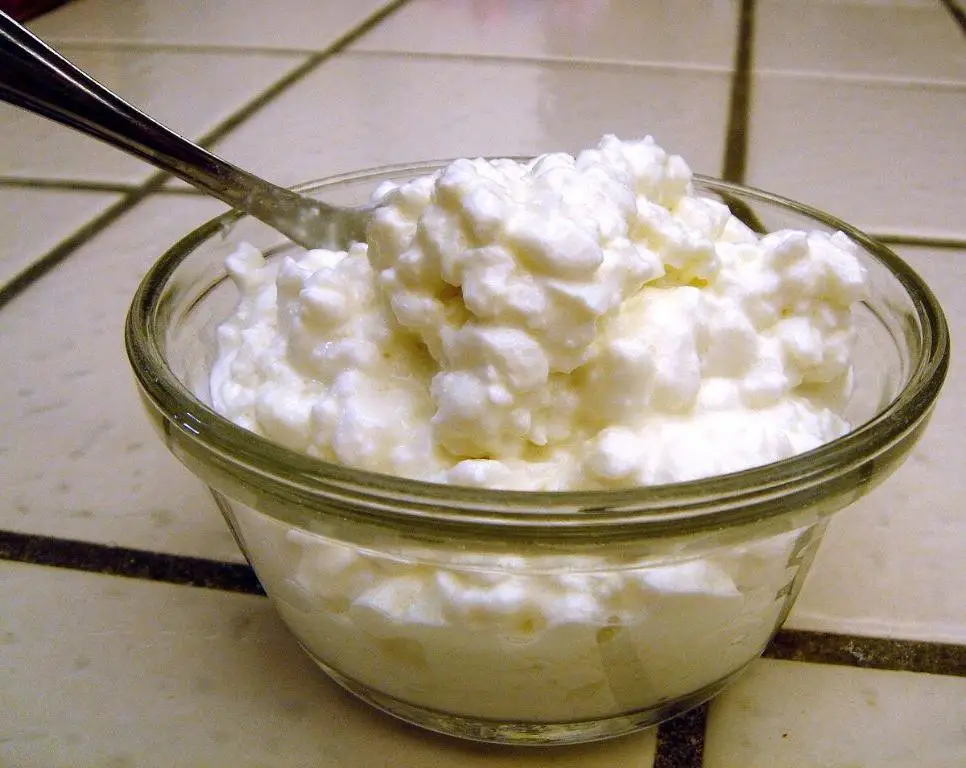
First off, let me tell you, cottage cheese has been my go-to for a quick, protein-packed snack ever since I discovered its versatility. Whether it’s dolloped on toast or mixed into pancakes, its mild flavor and creamy texture never disappoint.
Ingredients
- 2 cups cottage cheese (full-fat for creamier texture)
- 1 tbsp honey (adjust to taste)
- 1/2 tsp vanilla extract (or almond extract for a twist)
- Fresh berries for serving (optional, but highly recommended)
Instructions
- In a medium bowl, combine 2 cups of cottage cheese, 1 tbsp of honey, and 1/2 tsp of vanilla extract.
- Using a fork or whisk, gently mix the ingredients until well combined. Tip: For a smoother consistency, blend the mixture for a few seconds.
- Taste the mixture and adjust the sweetness by adding more honey if desired. Tip: The sweetness can vary based on the cottage cheese brand, so always taste as you go.
- Serve immediately topped with fresh berries, or chill in the refrigerator for 30 minutes for a firmer texture. Tip: This dish can also be used as a filling for crepes or as a topping for granola.
Unbelievably simple, this cottage cheese mixture is delightfully creamy with just the right amount of sweetness. Try it layered with granola and fruit for a parfait that’s both satisfying and elegant.
Pudding without Nuts or Fruit
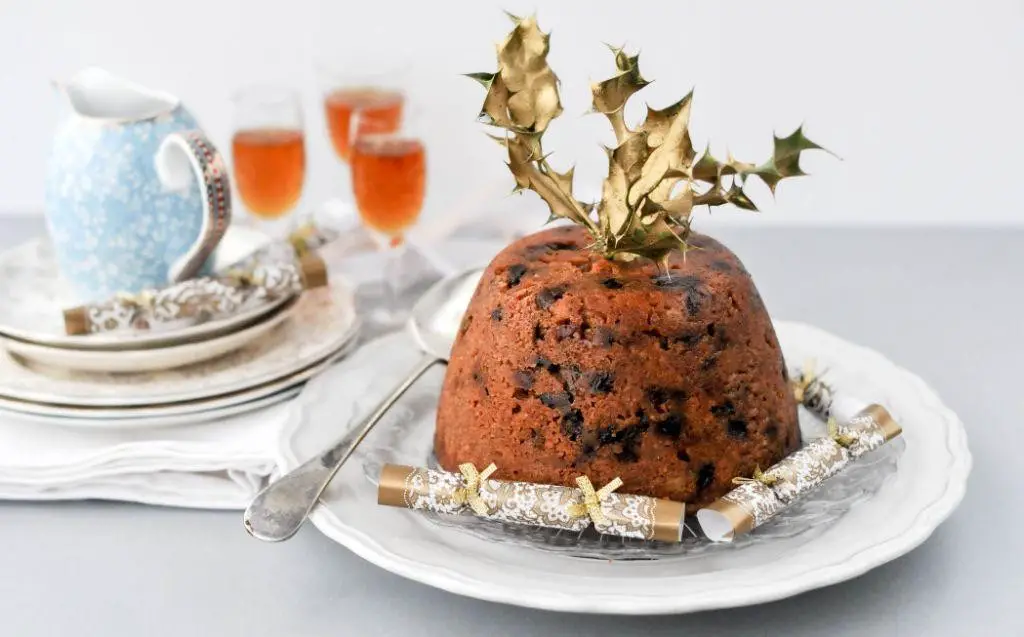
Zesty as it may sound, today I’m sharing a pudding recipe that’s as simple as it gets—no nuts, no fruit, just pure, creamy delight. Perfect for those with allergies or anyone craving a smooth, uncomplicated dessert. I remember whipping this up during a late-night craving, and it’s been a go-to ever since.
Ingredients
- 2 cups whole milk (for richness, but 2% works too)
- 1/2 cup granulated sugar (adjust to sweetness preference)
- 3 tbsp cornstarch (for the perfect thickness)
- 1/4 tsp salt (enhances flavor)
- 1 tsp vanilla extract (pure for best taste)
- 1 tbsp unsalted butter (adds a silky finish)
Instructions
- In a medium saucepan, whisk together 1 1/2 cups of milk, sugar, cornstarch, and salt until no lumps remain.
- Place the saucepan over medium heat and cook, stirring constantly with a wooden spoon, until the mixture begins to thicken, about 5 minutes.
- Once thickened, reduce the heat to low and slowly pour in the remaining 1/2 cup of milk, stirring continuously to avoid lumps.
- Continue cooking for another 2 minutes, then remove from heat. Stir in the vanilla extract and butter until fully incorporated.
- Pour the pudding into serving dishes and cover with plastic wrap directly on the surface to prevent a skin from forming.
- Chill in the refrigerator for at least 2 hours, or until set.
Delightfully creamy and smooth, this pudding is a testament to simplicity. Serve it with a sprinkle of cinnamon or a dollop of whipped cream for an extra touch of indulgence.
Clear Fruit Juices without Pulp
Many of us crave the refreshing taste of fruit juices without the hassle of pulp getting in the way. I remember the first time I tried making clear fruit juice at home; it was a game-changer for my morning routine. Here’s how you can achieve that crystal-clear, pulp-free juice with ease.
Ingredients
- 4 cups of your favorite fruit (e.g., apples, oranges, grapes) – choose ripe fruits for the best flavor
- 1/2 cup water – adjust based on the juiciness of your fruit
- 1 tbsp lemon juice – optional, for a slight tang
- Ice cubes – for serving chilled
Instructions
- Wash all your fruits thoroughly under cold running water to remove any dirt or pesticides.
- Cut the fruits into small pieces, removing any seeds or hard parts that might affect the juicing process.
- In a blender, combine the fruit pieces with water and lemon juice. Blend on high for 2 minutes until completely smooth.
- Strain the blended mixture through a fine-mesh sieve or cheesecloth into a large bowl to remove all pulp. Press down gently to extract as much juice as possible.
- Transfer the clear juice into a pitcher and refrigerate for at least 1 hour to chill.
- Serve over ice cubes in a tall glass for a refreshing drink.
Yielded from this process is a beautifully clear juice, bursting with the natural sweetness of your chosen fruits. Perfect for those who prefer their juice without the pulp, it’s a versatile base for cocktails or mocktails. You’ll love how the flavors shine through without any texture interference.
Conclusion
Absolutely delightful and nutritious, these 20 gentle colonoscopy diet recipes are your go-to for a smooth prep and recovery. Each dish is crafted to nourish and comfort, making the process a bit easier. We’d love to hear which recipes became your favorites—drop us a comment below! Don’t forget to share this helpful roundup with friends on Pinterest. Happy cooking and here’s to your health!

Michael Johnson is the founder of Pan Mastery, Inspired by his blacksmith grandfather’s legacy has a deep appreciation for hand-crafted pots and pans, he provides invaluable guides, reviews, and recipes to enhance your culinary journey.