Hungry for meals that pack a protein punch without skimping on flavor or requiring hours in the kitchen? You’re in the right place! Our roundup of 18 Delicious Easy High Protein Recipes is your ticket to nutritious, satisfying dishes that fit perfectly into your busy lifestyle. From quick dinners to comfort food favorites, these recipes are sure to keep you fueled and excited about cooking. Let’s dive in!
Grilled Chicken and Quinoa Bowl

Elevate your lunch routine with a Grilled Chicken and Quinoa Bowl, a dish that marries the smoky char of perfectly grilled chicken with the nutty wholesomeness of quinoa, all brought together with a vibrant array of toppings for a meal that’s as nutritious as it is delicious.
Ingredients
- 1 cup quinoa, rinsed (I find rinsing removes any bitterness)
- 2 cups water (for fluffier quinoa, I sometimes use chicken broth)
- 2 boneless, skinless chicken breasts (about 1 lb, I prefer organic for better flavor)
- 2 tbsp extra virgin olive oil (my go-to for its fruity notes)
- 1 tsp salt (I like to use sea salt for its mineral quality)
- 1/2 tsp black pepper (freshly ground makes all the difference)
- 1 avocado, sliced (ripe but firm works best)
- 1/2 cup cherry tomatoes, halved (I love the pop of color and sweetness they add)
- 1/4 cup red onion, thinly sliced (soaked in cold water for 10 minutes to mellow the bite)
- 2 tbsp lime juice (freshly squeezed, please!)
- 1/4 cup cilantro, chopped (for a fresh, herby finish)
Instructions
- In a medium saucepan, combine the quinoa and water. Bring to a boil over high heat, then reduce the heat to low, cover, and simmer for 15 minutes, or until the water is absorbed and the quinoa is tender. Tip: Let it sit covered for 5 minutes off the heat for extra fluffiness.
- While the quinoa cooks, preheat your grill to medium-high heat (about 375°F to 400°F). Brush the chicken breasts with olive oil and season both sides with salt and pepper.
- Grill the chicken for 6-7 minutes per side, or until the internal temperature reaches 165°F. Tip: Avoid moving the chicken too much to get those beautiful grill marks.
- Let the chicken rest for 5 minutes before slicing it against the grain into strips. Tip: Resting ensures juicy, tender meat.
- In a large bowl, combine the cooked quinoa, sliced chicken, avocado, cherry tomatoes, red onion, lime juice, and cilantro. Gently toss to mix.
This bowl is a symphony of textures, from the creamy avocado to the crisp vegetables and tender chicken, all atop a bed of fluffy quinoa. Try serving it with a drizzle of your favorite hot sauce for an extra kick.
High Protein Pancakes with Greek Yogurt

Venturing into the realm of breakfast delights, these High Protein Pancakes with Greek Yogurt stand as a testament to the perfect marriage of nutrition and indulgence. Fluffy, satisfying, and packed with protein, they’re a morning game-changer that doesn’t compromise on taste or texture.
Ingredients
- 1 cup all-purpose flour (I swear by King Arthur for consistent results)
- 2 tablespoons sugar (a dash more if you like it sweet)
- 1 teaspoon baking powder (aluminum-free for a cleaner taste)
- 1/2 teaspoon baking soda
- 1/4 teaspoon salt (sea salt adds a nice depth)
- 1 cup Greek yogurt (full-fat for richness, but any works)
- 1 large egg (room temp blends smoother)
- 1/2 cup milk (whole milk makes them extra tender)
- 1 tablespoon melted butter (unsalted, so you control the salt)
- 1 teaspoon vanilla extract (pure, for that aromatic warmth)
Instructions
- In a large bowl, whisk together the flour, sugar, baking powder, baking soda, and salt until well combined.
- In another bowl, mix the Greek yogurt, egg, milk, melted butter, and vanilla extract until smooth.
- Gently fold the wet ingredients into the dry ingredients until just combined; a few lumps are okay for fluffy pancakes.
- Heat a non-stick skillet over medium heat (350°F is ideal) and lightly grease with butter or cooking spray.
- Pour 1/4 cup of batter for each pancake onto the skillet. Cook until bubbles form on the surface and the edges look set, about 2-3 minutes.
- Flip the pancakes carefully and cook for another 1-2 minutes until golden brown and cooked through.
- Serve immediately with your favorite toppings. Maple syrup and fresh berries are my go-to for a touch of sweetness and freshness.
These pancakes boast a tender crumb and a slight tang from the Greek yogurt, making them irresistibly light yet satisfying. Try layering them with a dollop of yogurt and a drizzle of honey for an extra protein-packed treat.
Egg White and Spinach Omelette
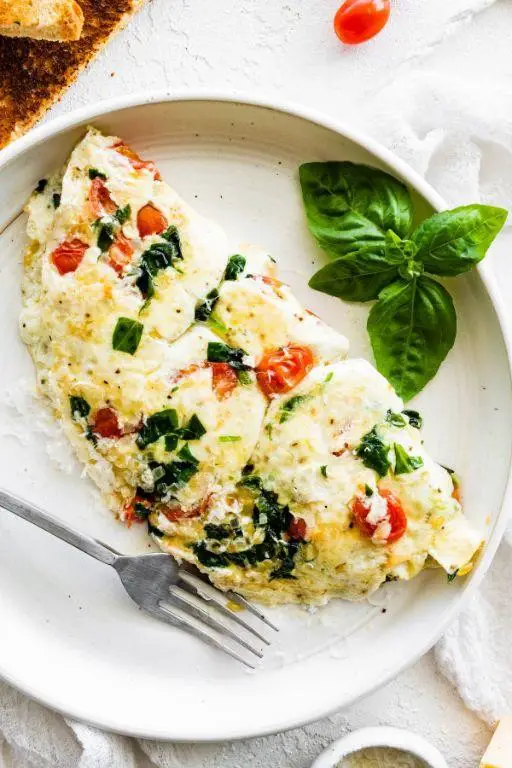
Morning light pours into the kitchen, casting a golden glow on the counter where a simple yet sophisticated Egg White and Spinach Omelette comes to life, a dish that marries health with indulgence in every fluffy bite.
Ingredients
- 3 large egg whites (I find room temperature eggs blend more smoothly)
- 1 cup fresh spinach, tightly packed (baby spinach leaves are tender and sweet)
- 1 tbsp extra virgin olive oil (my go-to for its fruity notes)
- 1/4 tsp sea salt (a pinch more if you’re like me and love a well-seasoned omelette)
- 1/8 tsp freshly ground black pepper (freshly cracked makes all the difference)
- 1 tbsp grated Parmesan cheese (for a subtle umami kick)
Instructions
- In a medium bowl, gently whisk the egg whites until slightly frothy, about 30 seconds. Tip: A fork works better than a whisk for incorporating just the right amount of air.
- Heat the olive oil in a non-stick skillet over medium-low heat (300°F) until shimmering but not smoking. Tip: The right temperature ensures your omelette cooks evenly without browning.
- Add the spinach to the skillet, sautéing for 1 minute until just wilted. Spread evenly across the pan.
- Pour the whisked egg whites over the spinach, tilting the pan to distribute evenly. Sprinkle with salt and pepper.
- Cook undisturbed for 2 minutes, then sprinkle Parmesan cheese over one half. Tip: Adding cheese at this stage allows it to melt perfectly without making the omelette soggy.
- Using a spatula, fold the omelette in half over the cheese-covered side. Cook for another 30 seconds, then slide onto a plate.
Yielded is an omelette with a cloud-like texture, the spinach adding a slight crunch against the creamy Parmesan. Serve it atop a slice of toasted sourdough for a contrast in textures, or alongside a crisp arugula salad dressed lightly in lemon vinaigrette to complement the dish’s delicate flavors.
Turkey and Black Bean Chili
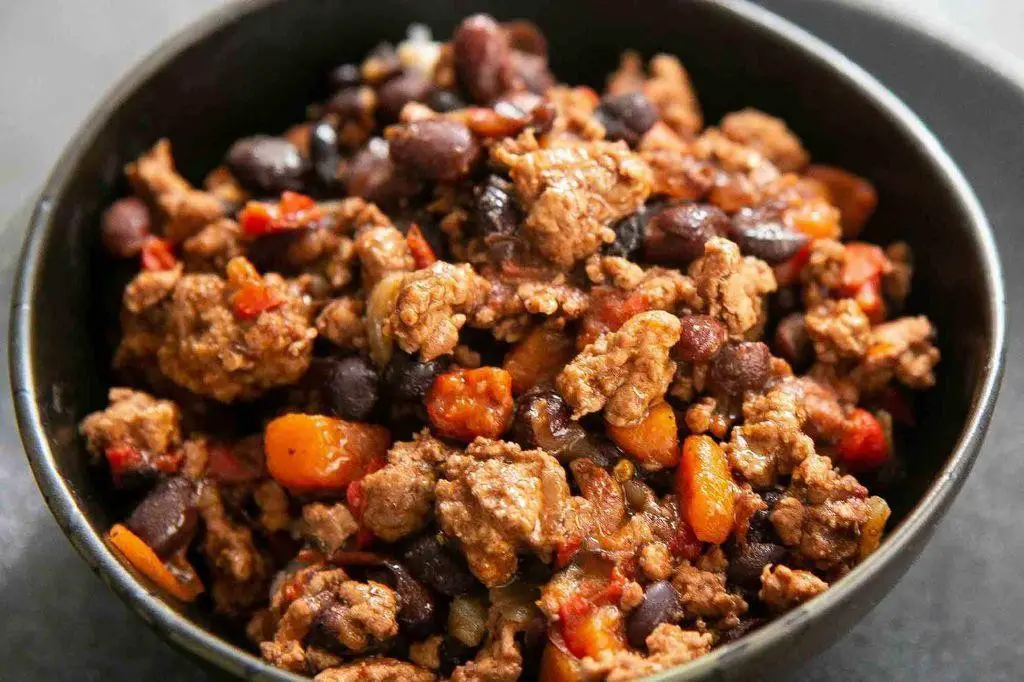
Flavorful and hearty, this Turkey and Black Bean Chili is a comforting dish that marries the richness of ground turkey with the earthy depth of black beans, all simmered in a fragrant blend of spices. Perfect for a cozy night in, it’s a recipe that promises warmth and satisfaction with every spoonful.
Ingredients
- 1 tbsp extra virgin olive oil (my go-to for its fruity notes)
- 1 lb ground turkey (I find the 93% lean variety offers the best balance of flavor and tenderness)
- 1 medium onion, diced (yellow onions are my preference for their sweetness)
- 3 garlic cloves, minced (freshly minced garlic makes all the difference)
- 1 red bell pepper, diced (adds a lovely sweetness and color)
- 1 can (15 oz) black beans, rinsed and drained (I love the creamy texture they bring)
- 1 can (14.5 oz) diced tomatoes (fire-roasted tomatoes add a smoky depth)
- 2 cups chicken broth (homemade broth elevates the dish, but store-bought works fine)
- 2 tbsp chili powder (adjust based on your heat preference)
- 1 tsp ground cumin (for that essential earthy warmth)
- 1/2 tsp smoked paprika (a little goes a long way in adding complexity)
- Salt to taste (I start with 1/2 tsp and adjust from there)
Instructions
- Heat the olive oil in a large pot over medium heat until shimmering, about 1 minute.
- Add the ground turkey, breaking it apart with a spoon, and cook until no longer pink, about 5 minutes. Tip: Don’t rush this step; browning the turkey well builds flavor.
- Stir in the onion, garlic, and red bell pepper, cooking until softened, about 4 minutes. Tip: A pinch of salt here helps the vegetables release their moisture and sweetness.
- Add the black beans, diced tomatoes, chicken broth, chili powder, cumin, and smoked paprika. Stir to combine.
- Bring the mixture to a boil, then reduce the heat to low and simmer uncovered for 25 minutes, stirring occasionally. Tip: The chili thickens as it simmers, so keep an eye on it to prevent sticking.
- Season with salt to taste, then serve hot.
With its robust flavors and velvety texture, this chili is a standout. Serve it with a dollop of sour cream and a sprinkle of fresh cilantro for a vibrant finish, or over a bed of rice for a more substantial meal.
Protein-Packed Smoothie Bowl
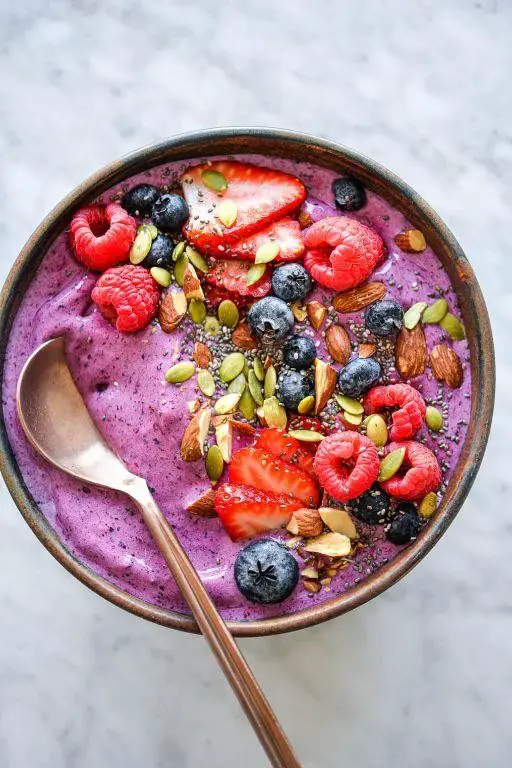
Lush and vibrant, this Protein-Packed Smoothie Bowl is a delightful way to start your day, blending nutrition with indulgence in every spoonful. Perfect for those seeking a quick yet wholesome breakfast, it’s a symphony of flavors and textures that will keep you energized.
Ingredients
- 1 frozen banana, sliced (the riper, the sweeter your bowl will be)
- 1/2 cup frozen mixed berries (I love the antioxidant boost they provide)
- 1 scoop vanilla protein powder (choose your favorite brand for that personal touch)
- 1/2 cup almond milk, unsweetened (adds a subtle nutty flavor)
- 1 tbsp chia seeds (for that extra omega-3 kick)
- 1/4 cup granola (I prefer a crunchy, honey-sweetened variety)
- 1 tbsp almond butter (a dollop adds richness and protein)
Instructions
- In a high-speed blender, combine the frozen banana, mixed berries, protein powder, and almond milk. Blend on high until smooth and creamy, about 1 minute.
- Pour the smoothie into a bowl. The consistency should be thick enough to hold toppings without sinking.
- Sprinkle chia seeds evenly over the top for a nutritious crunch.
- Add granola around the edges for texture and a satisfying bite.
- Drizzle almond butter in a zigzag pattern across the bowl for a decadent finish.
Velvety smooth with bursts of berry sweetness, this bowl is a feast for the senses. Serve it immediately to enjoy the contrast between the creamy base and the crunchy toppings, or customize with seasonal fruits for a fresh twist.
Salmon and Asparagus Foil Packets
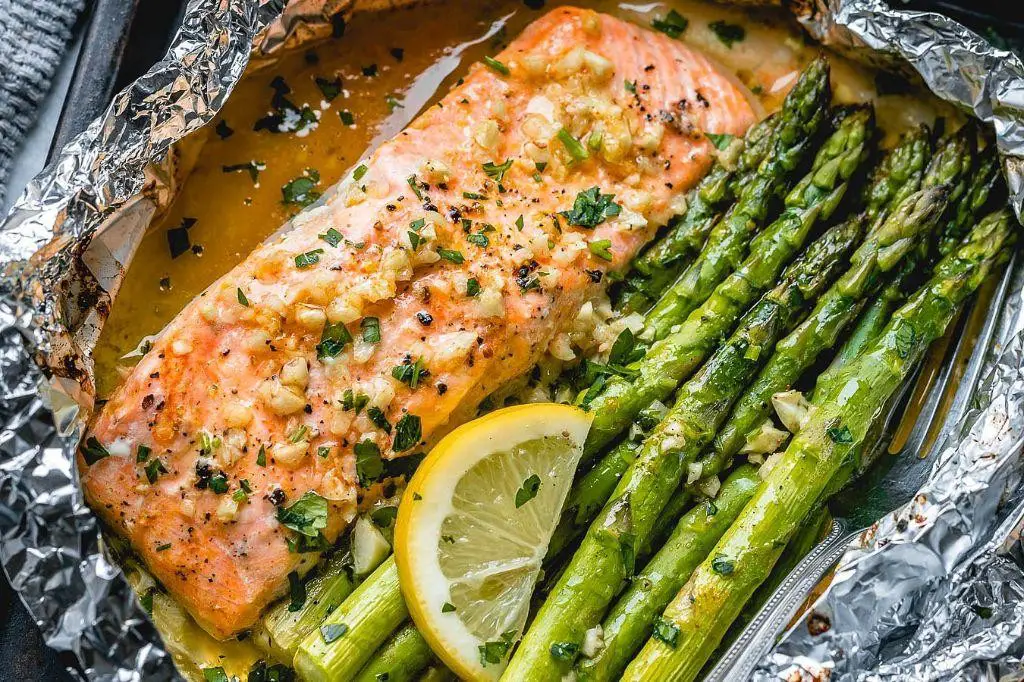
Whisking together the simplicity of a one-pan meal with the sophistication of a gourmet dish, these Salmon and Asparagus Foil Packets are a testament to the beauty of minimal ingredients yielding maximum flavor. Perfect for a busy weeknight or a leisurely weekend dinner, they promise a meal that’s as nutritious as it is delicious.
Ingredients
- 4 salmon fillets (about 6 oz each, skin-on for extra flavor)
- 1 lb asparagus, trimmed (look for spears that are bright green and firm)
- 2 tbsp extra virgin olive oil (my go-to for its fruity notes)
- 1 lemon, thinly sliced (plus extra for serving)
- 2 cloves garlic, minced (freshly minced makes all the difference)
- 1 tsp dried dill (or fresh if you have it)
- Salt and freshly ground black pepper (to season generously)
Instructions
- Preheat your oven to 400°F (200°C) to ensure it’s perfectly heated for even cooking.
- Cut four large pieces of aluminum foil, about 12×18 inches each, and lay them flat on your workspace.
- Divide the asparagus evenly among the foil pieces, placing them in the center as a bed for the salmon.
- Place a salmon fillet on top of each asparagus bed, skin side down if using skin-on fillets.
- Drizzle each fillet with olive oil, then sprinkle with minced garlic, dill, salt, and pepper.
- Top each salmon fillet with two lemon slices for a bright, citrusy flavor.
- Fold the foil over the salmon and asparagus, sealing the edges tightly to create a packet. Tip: Leave a little space inside the packet for steam to circulate.
- Place the foil packets on a baking sheet and bake for 15-18 minutes, depending on the thickness of your salmon. Tip: The salmon is done when it flakes easily with a fork.
- Carefully open the packets (watch out for steam) and serve immediately. Tip: For an extra touch, garnish with additional lemon slices and a sprinkle of fresh dill.
Not only does this dish boast a moist, flaky salmon paired with crisp-tender asparagus, but the lemon and dill also add a refreshing zest that elevates the entire meal. Consider serving these foil packets directly on the plate for a rustic presentation, or transfer the contents to a platter for a more refined look.
Lentil and Vegetable Stir Fry
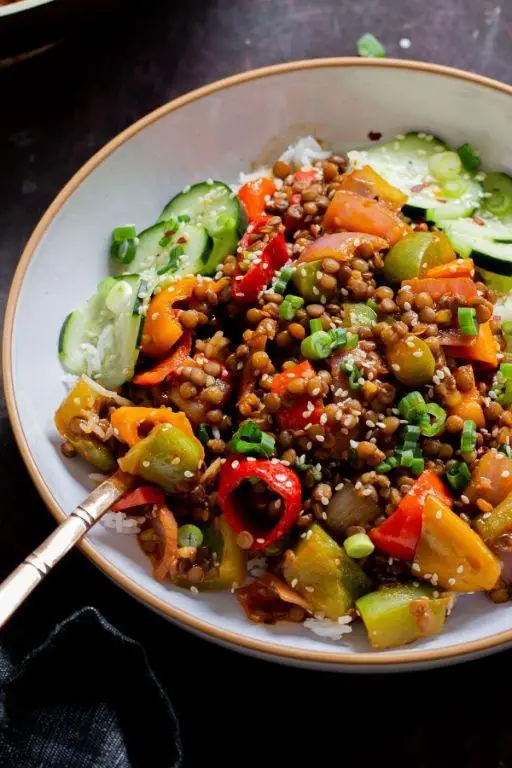
This vibrant Lentil and Vegetable Stir Fry is a testament to how simple ingredients can transform into a dish bursting with color, texture, and flavor. Perfect for those seeking a nutritious yet satisfying meal, it’s a delightful way to bring the garden to your plate.
Ingredients
- 1 cup green lentils (I love their earthy flavor and how they hold shape)
- 2 tbsp extra virgin olive oil (my go-to for its fruity notes)
- 1 large carrot, julienned (for a sweet crunch)
- 1 red bell pepper, thinly sliced (adds a pop of color and sweetness)
- 2 cloves garlic, minced (because everything’s better with garlic)
- 1 tbsp soy sauce (for that umami depth)
- 1 tsp ginger, grated (fresh is best for a zesty kick)
- 1/2 tsp red pepper flakes (adjust to your heat preference)
- Salt to taste (I prefer sea salt for its clean flavor)
Instructions
- Rinse the lentils under cold water until the water runs clear, then drain.
- In a medium saucepan, bring 2 cups of water to a boil. Add the lentils, reduce heat to low, cover, and simmer for 20 minutes or until tender but not mushy. Drain any excess water.
- Heat olive oil in a large skillet over medium-high heat. Add the carrot and bell pepper, stirring frequently for 5 minutes until they start to soften.
- Add the garlic, ginger, and red pepper flakes to the skillet, cooking for another minute until fragrant.
- Stir in the cooked lentils and soy sauce, mixing well to combine all the flavors. Cook for an additional 2 minutes, allowing the lentils to absorb the seasonings.
- Season with salt to taste, then remove from heat.
You’ll love the contrast of the tender lentils against the crisp vegetables, with a sauce that’s rich and slightly spicy. Serve it over a bed of quinoa for an extra protein boost, or enjoy it as is for a light yet fulfilling meal.
Cottage Cheese and Fruit Plate
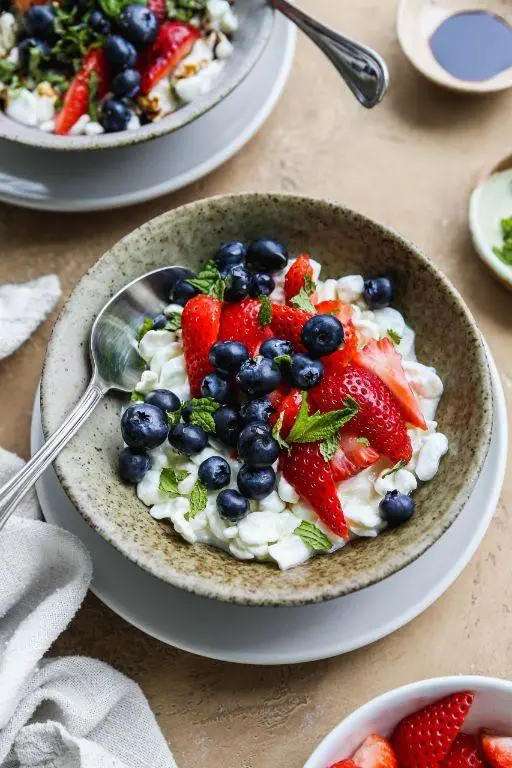
Nothing quite captures the essence of summer like a beautifully arranged Cottage Cheese and Fruit Plate, a dish that marries the creamy richness of cottage cheese with the vibrant, juicy sweetness of seasonal fruits. This elegant yet simple creation is perfect for a light breakfast, a refreshing snack, or even as a sophisticated dessert option for those warm evenings.
Ingredients
- 1 cup cottage cheese (I love the creamy texture of full-fat versions for this dish)
- 1 cup mixed fresh fruits (such as berries, peaches, and grapes—choose what’s in season for the best flavor)
- 1 tbsp honey (local honey adds a lovely floral note)
- A few fresh mint leaves (for garnish and a burst of freshness)
Instructions
- Begin by selecting a wide, shallow plate to showcase the colors and textures of your ingredients.
- Scoop the cottage cheese onto the center of the plate, spreading it slightly with the back of a spoon to create a creamy base.
- Wash and prepare your chosen fruits. Slice larger fruits like peaches into thin wedges, and leave smaller fruits like berries whole.
- Arrange the fruits around and on top of the cottage cheese, aiming for a balance of colors and textures.
- Drizzle the honey lightly over the cottage cheese and fruits. The honey should be at room temperature to ensure it flows easily.
- Garnish with fresh mint leaves, tearing them slightly to release their aroma before placing them on the dish.
Unveiling this dish reveals a delightful contrast between the creamy cottage cheese and the crisp, juicy fruits, with the honey adding a subtle sweetness that ties everything together. Serve it immediately to enjoy the freshness at its peak, or get creative by adding a sprinkle of toasted nuts for an extra crunch.
Beef and Broccoli Stir Fry
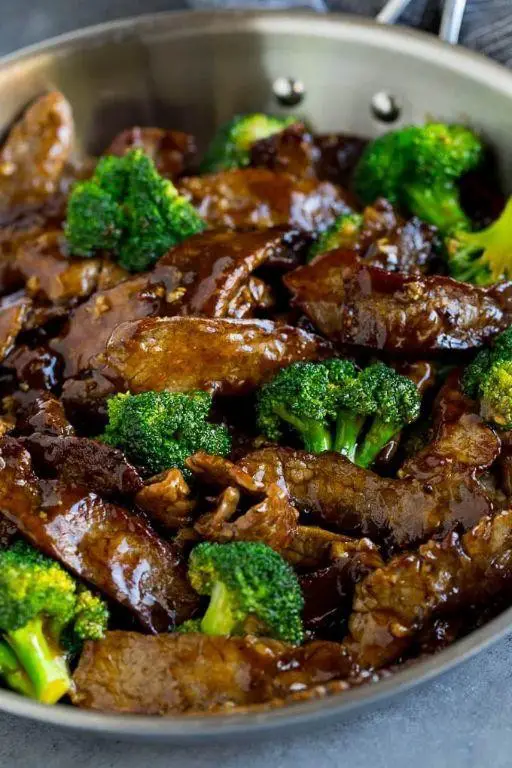
Savory and satisfying, this Beef and Broccoli Stir Fry brings the vibrant flavors of your favorite takeout right to your kitchen, with a freshness that only homemade can offer.
Ingredients
- 1 lb flank steak, thinly sliced against the grain (for tenderness)
- 3 cups broccoli florets (I like them crisp-tender)
- 2 tbsp soy sauce (low sodium is my preference for better control over saltiness)
- 1 tbsp oyster sauce (the secret to depth of flavor)
- 1 tbsp brown sugar (for a hint of sweetness)
- 2 cloves garlic, minced (fresh is always best)
- 1 tbsp ginger, grated (adds a bright, spicy note)
- 2 tbsp vegetable oil (high smoke point is key here)
- 1/2 cup beef broth (homemade or low sodium for the win)
- 1 tsp cornstarch (to thicken the sauce beautifully)
- 1/2 tsp red pepper flakes (optional, for a bit of heat)
Instructions
- In a small bowl, whisk together soy sauce, oyster sauce, brown sugar, and cornstarch until smooth. Set aside.
- Heat 1 tbsp vegetable oil in a large skillet or wok over high heat until shimmering.
- Add the beef in a single layer, working in batches if necessary to avoid overcrowding. Cook for 2 minutes per side until just browned but not fully cooked through. Remove and set aside.
- In the same skillet, add the remaining 1 tbsp vegetable oil. Stir in garlic, ginger, and red pepper flakes, cooking for 30 seconds until fragrant.
- Add broccoli florets, stirring frequently, for 3 minutes until bright green and slightly tender.
- Pour in the beef broth, scraping up any browned bits from the bottom of the pan for extra flavor.
- Return the beef to the skillet, along with any accumulated juices. Pour the sauce over the top, stirring to coat everything evenly.
- Cook for an additional 2 minutes, until the sauce has thickened and the beef is cooked to your liking.
Unbelievably tender beef meets crisp broccoli in a glossy, savory sauce that clings perfectly to every bite. Serve this stir fry over a bed of steamed jasmine rice or alongside noodles for a complete meal that’s sure to impress.
Tuna Salad Stuffed Avocados
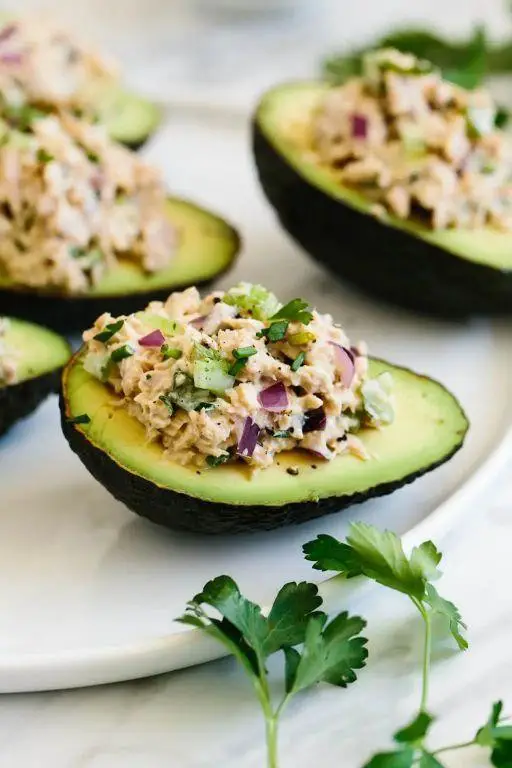
On a bright summer morning, nothing quite captures the essence of freshness like Tuna Salad Stuffed Avocados. This dish is a harmonious blend of creamy, rich avocados and the light, tangy crunch of tuna salad, making it a perfect meal for those seeking both nutrition and indulgence.
Ingredients
- 2 ripe avocados – look for ones that yield slightly to gentle pressure for the perfect creaminess.
- 1 can (5 oz) of tuna in water, drained – I find water-packed tuna offers a cleaner taste for this dish.
- 1/4 cup mayonnaise – for a richer texture, I often opt for full-fat versions.
- 1 tbsp lemon juice – freshly squeezed, to brighten up the flavors.
- 1/4 cup diced celery – for that essential crunch.
- 2 tbsp finely chopped red onion – it adds a slight sharpness that balances the creaminess.
- Salt and pepper to taste – I like to start with 1/4 tsp of salt and adjust from there.
Instructions
- Cut the avocados in half and remove the pits. Scoop out a small amount of the avocado flesh to create more room for the tuna salad, setting aside the scooped flesh.
- In a medium bowl, combine the drained tuna, mayonnaise, lemon juice, diced celery, and chopped red onion. Mix gently until all ingredients are evenly distributed.
- Add the scooped avocado flesh to the tuna mixture. This not only adds creaminess but also reduces waste. Mash lightly with a fork to incorporate.
- Season the mixture with salt and pepper, then divide evenly among the avocado halves.
- For an extra touch of elegance, garnish with a sprinkle of paprika or a few microgreens before serving.
Simply delightful, the contrast between the smooth avocado and the chunky tuna salad creates a symphony of textures. Serve these on a platter for a visually stunning appetizer or enjoy as a standalone lunch for a satisfying meal.
Chickpea and Spinach Curry
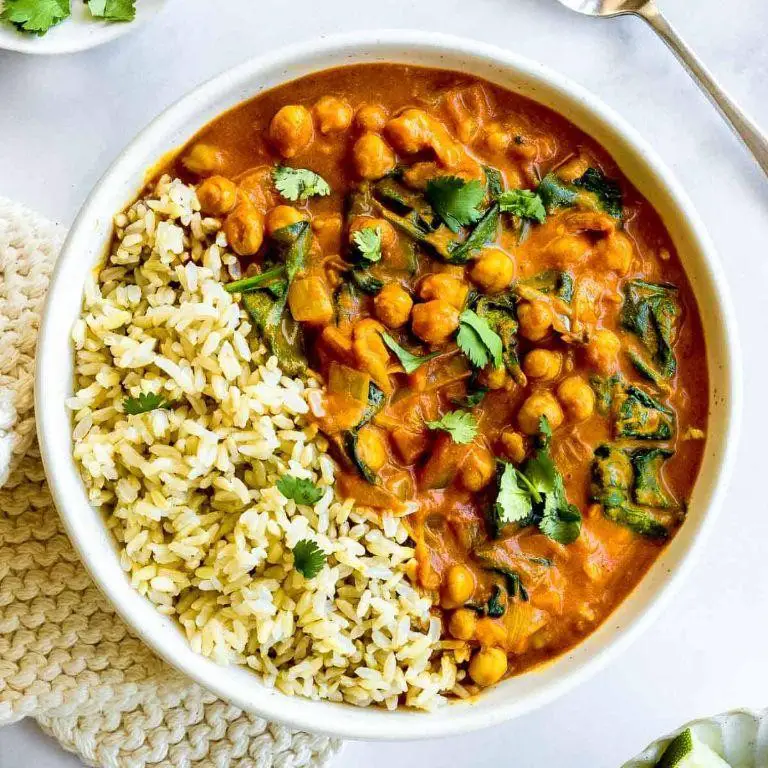
Amidst the hustle of everyday life, a comforting bowl of Chickpea and Spinach Curry offers a nourishing escape, blending earthy flavors with a touch of warmth and spice that feels like a gentle embrace.
Ingredients
- 2 tbsp extra virgin olive oil (my go-to for its fruity notes)
- 1 large onion, finely diced (I find sweet onions work beautifully here)
- 3 garlic cloves, minced (freshly minced releases the best aroma)
- 1 tbsp ginger, grated (keep it fresh for that zing)
- 1 tsp cumin seeds (toasting them slightly elevates their nuttiness)
- 1 tsp turmeric powder (for that golden hue and earthy depth)
- 1 tsp garam masala (the heart of the dish’s warmth)
- 1 can (15 oz) chickpeas, drained and rinsed (for that perfect bite)
- 1 can (14.5 oz) diced tomatoes (I prefer fire-roasted for a smoky hint)
- 4 cups fresh spinach leaves (packed, they wilt down beautifully)
- 1 cup coconut milk (full-fat for creaminess)
- Salt to taste (I start with 1/2 tsp and adjust)
Instructions
- Heat the olive oil in a large skillet over medium heat until shimmering, about 1 minute.
- Add the onion, cooking until translucent, 4-5 minutes, stirring occasionally to prevent burning.
- Stir in the garlic and ginger, cooking for another minute until fragrant, a key step for building flavor.
- Sprinkle in the cumin seeds, turmeric, and garam masala, toasting for 30 seconds to unlock their aromas.
- Pour in the diced tomatoes with their juices, simmering for 5 minutes to meld the flavors.
- Add the chickpeas, stirring to coat them in the spiced tomato mixture, then simmer for 10 minutes.
- Fold in the spinach in batches, allowing each addition to wilt before adding more, about 2 minutes total.
- Pour in the coconut milk, stirring gently to combine, and let the curry simmer for another 5 minutes to thicken slightly.
- Season with salt, tasting and adjusting as needed, a crucial step for balancing the flavors.
Zesty with a creamy texture, this curry pairs wonderfully with fluffy basmati rice or warm naan for scooping up every last bit of its rich, spiced sauce.
Greek Yogurt and Honey Parfait
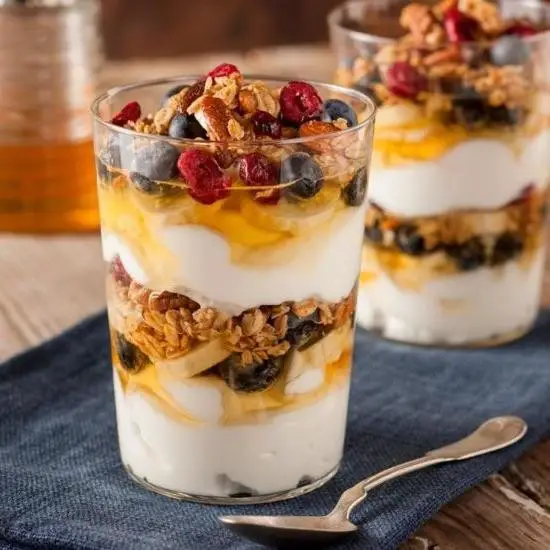
Silky layers of Greek yogurt and golden honey come together in this effortlessly elegant parfait, a testament to the beauty of simplicity in dessert making.
Ingredients
- 2 cups Greek yogurt (I swear by full-fat for its creamy texture)
- 1/4 cup honey (local, if you can find it, for that floral depth)
- 1 cup granola (homemade or your favorite store-bought blend)
- 1/2 cup mixed berries (fresh or frozen, though fresh adds a lovely pop of color)
Instructions
- Begin by chilling your serving glasses in the freezer for 10 minutes to ensure every layer stays distinct.
- Spoon 1/2 cup of Greek yogurt into the bottom of each glass, smoothing it with the back of a spoon for an even layer.
- Drizzle 1 tablespoon of honey over the yogurt, allowing it to pool slightly at the edges for a visually appealing effect.
- Add a 1/4 cup layer of granola on top of the honey, pressing lightly to adhere without crushing the granola.
- Repeat the layers once more, finishing with a final drizzle of honey and a scattering of mixed berries on top.
- Let the parfaits sit in the refrigerator for at least 15 minutes before serving to meld the flavors beautifully.
Yielded is a parfait with contrasting textures—creamy yogurt, crunchy granola, and juicy berries—all harmonized by the sweet, aromatic honey. Try serving it with a sprig of mint for an extra touch of elegance.
Baked Chicken Thighs with Sweet Potatoes
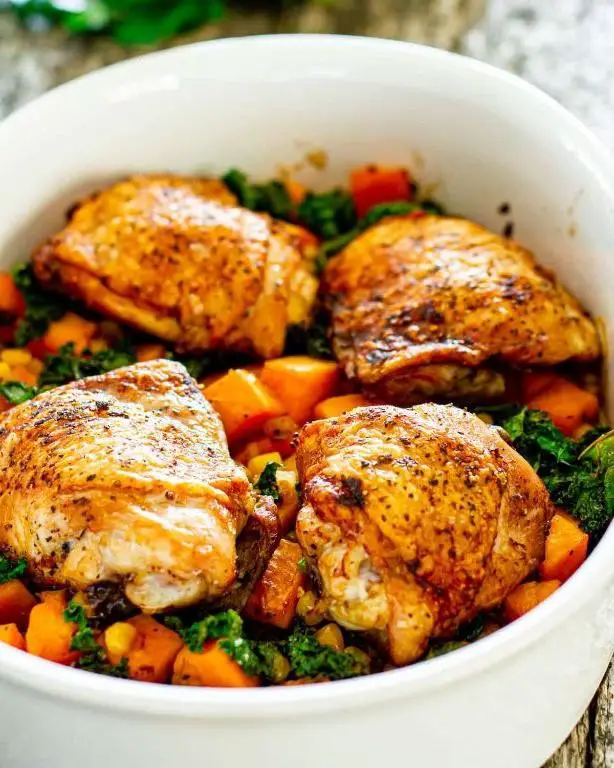
Craving a dish that marries simplicity with sophistication? These baked chicken thighs with sweet potatoes are a testament to how minimal effort can yield maximum flavor, perfect for a weeknight dinner that feels anything but ordinary.
Ingredients
- 4 bone-in, skin-on chicken thighs (for that irresistible crispiness)
- 2 medium sweet potatoes, peeled and cubed (about 2 cups, because their natural sweetness caramelizes beautifully)
- 2 tbsp extra virgin olive oil (my go-to for its fruity notes)
- 1 tsp smoked paprika (for a hint of warmth and depth)
- 1 tsp garlic powder (because garlic makes everything better)
- 1/2 tsp salt (to elevate all the flavors)
- 1/4 tsp black pepper (freshly ground, for that sharp bite)
Instructions
- Preheat your oven to 400°F (200°C) to ensure a perfectly crispy skin and tender interior.
- In a large bowl, toss the sweet potato cubes with 1 tbsp of olive oil, 1/2 tsp of salt, and 1/4 tsp of black pepper until evenly coated. Spread them on a baking sheet in a single layer for even roasting.
- Rub the chicken thighs with the remaining olive oil, then season both sides with smoked paprika, garlic powder, the remaining salt, and pepper. Nestle them among the sweet potatoes on the baking sheet.
- Bake for 35-40 minutes, or until the chicken skin is golden and crispy, and the sweet potatoes are tender and caramelized at the edges. A meat thermometer should read 165°F (74°C) when inserted into the thickest part of the thigh.
- Let the chicken rest for 5 minutes before serving to allow the juices to redistribute, ensuring every bite is moist and flavorful.
Marvel at the contrast between the crispy, savory chicken and the sweet, tender potatoes. Serve this dish atop a bed of wilted greens for a pop of color and freshness, or alongside a crisp white wine to complement its rich flavors.
Shrimp and Quinoa Salad
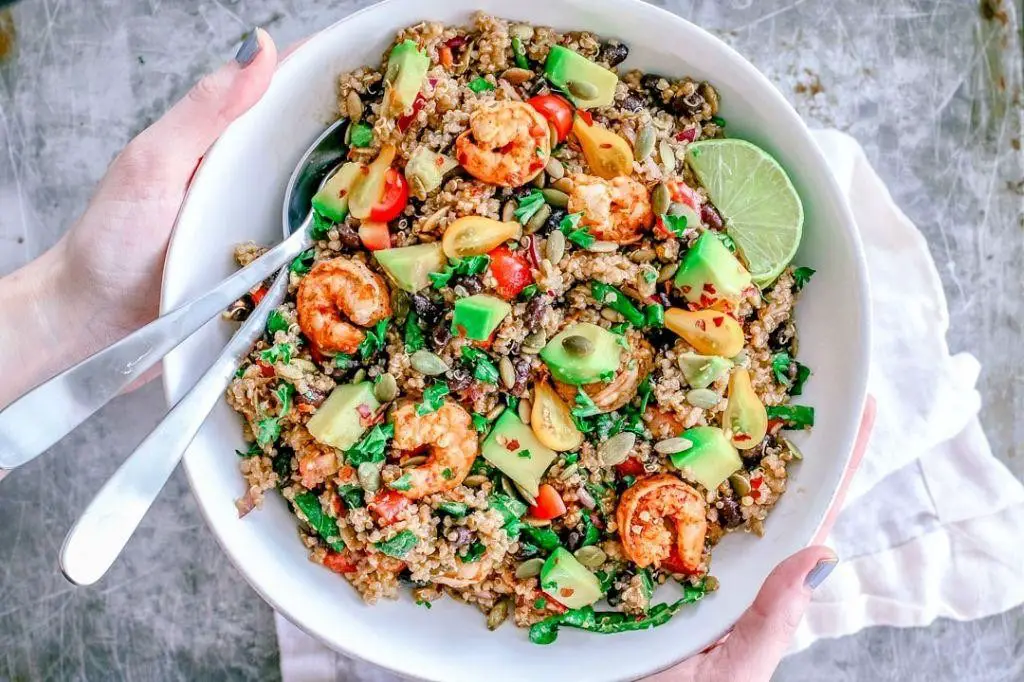
Gracefully blending the delicate flavors of the sea with the earthy wholesomeness of grains, this Shrimp and Quinoa Salad is a testament to the beauty of simple, yet sophisticated cooking. Perfect for a light lunch or a refreshing dinner, it’s a dish that promises to delight the senses with every bite.
Ingredients
- 1 cup quinoa, rinsed (I find that rinsing removes any bitterness, making for a cleaner taste)
- 1 lb shrimp, peeled and deveined (opt for wild-caught for the best flavor)
- 2 tbsp extra virgin olive oil (my go-to for its fruity notes)
- 1 lemon, juiced (about 2 tbsp, fresh is always better)
- 1 avocado, diced (adds a creamy texture that’s irresistible)
- 1/4 cup red onion, finely chopped (for a slight sharpness that balances the dish)
- Salt to taste (I prefer sea salt for its mineral quality)
Instructions
- In a medium saucepan, bring 2 cups of water to a boil. Add the rinsed quinoa, reduce heat to low, cover, and simmer for 15 minutes, or until the water is absorbed and the quinoa is fluffy.
- While the quinoa cooks, heat the olive oil in a large skillet over medium-high heat. Add the shrimp, seasoning lightly with salt, and cook for 2-3 minutes per side, until they turn pink and opaque.
- Transfer the cooked quinoa to a large bowl. Fluff with a fork and let it cool slightly.
- Add the cooked shrimp, diced avocado, chopped red onion, and lemon juice to the quinoa. Gently toss to combine, ensuring the avocado is evenly distributed without becoming mushy.
- Season the salad with additional salt if needed, and serve immediately for the best texture and flavor.
The salad boasts a delightful contrast between the tender shrimp and the fluffy quinoa, with the avocado adding a lush creaminess. For an extra touch of elegance, serve it on a bed of arugula or garnish with fresh herbs like cilantro or parsley.
Protein Bars with Nuts and Seeds
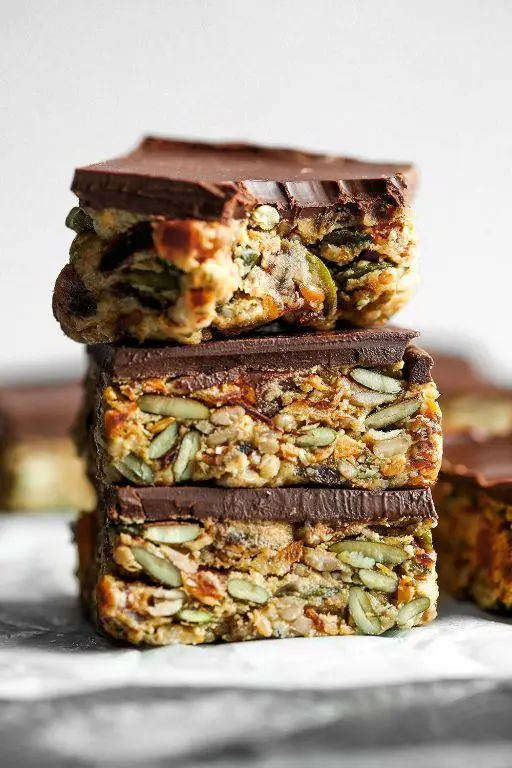
Zesty and nutrient-packed, these protein bars with nuts and seeds are the perfect blend of convenience and health, offering a satisfying crunch and a rich, earthy flavor that energizes your day.
Ingredients
- 1 cup rolled oats (for a hearty base)
- 1/2 cup almond butter (creamy and rich, my favorite for binding)
- 1/4 cup honey (a natural sweetener that adds a lovely gloss)
- 1/4 cup chia seeds (for that extra omega-3 boost)
- 1/4 cup sunflower seeds (I love their subtle crunch)
- 1/4 cup pumpkin seeds (for a pop of color and texture)
- 1/2 cup protein powder (vanilla or chocolate, depending on your mood)
- 1 tsp vanilla extract (a dash of warmth)
- A pinch of sea salt (to balance the sweetness)
Instructions
- Preheat your oven to 350°F (175°C) and line an 8×8 inch baking pan with parchment paper, leaving some overhang for easy removal.
- In a large bowl, mix the rolled oats, chia seeds, sunflower seeds, pumpkin seeds, protein powder, and sea salt until well combined.
- In a small saucepan over low heat, warm the almond butter and honey until they’re easily stirrable, about 2-3 minutes. Stir in the vanilla extract.
- Pour the wet ingredients into the dry ingredients and mix until everything is evenly coated and sticky.
- Transfer the mixture to the prepared pan, pressing down firmly with the back of a spoon or your hands to create an even layer.
- Bake for 15-18 minutes, or until the edges are just starting to turn golden. Tip: Don’t overbake to keep them chewy.
- Let the bars cool completely in the pan on a wire rack before lifting them out using the parchment overhang. Tip: Chilling them in the fridge for an hour makes cutting easier.
- Cut into 12 bars or squares. Tip: Use a sharp knife and wipe it clean between cuts for neat edges.
Yieldingly delicious, these bars boast a chewy texture with a satisfying crunch from the nuts and seeds, making them a perfect on-the-go snack or a post-workout treat. Enjoy them with a drizzle of melted dark chocolate for an indulgent twist.
Egg and Vegetable Muffins

Brilliantly versatile and effortlessly elegant, these Egg and Vegetable Muffins are the perfect blend of nutrition and flavor, ideal for a quick breakfast or a sophisticated brunch. Packed with fresh vegetables and rich eggs, they’re a delightful way to start any day.
Ingredients
- 6 large eggs (I find room temperature eggs blend more smoothly)
- 1/4 cup whole milk (for a creamier texture)
- 1 cup diced bell peppers (a mix of colors adds vibrancy)
- 1/2 cup chopped spinach (fresh is best for that bright green hue)
- 1/4 cup grated Parmesan cheese (extra sharp for a flavor punch)
- 1 tbsp extra virgin olive oil (my go-to for its fruity notes)
- 1/2 tsp salt (fine sea salt dissolves evenly)
- 1/4 tsp black pepper (freshly ground for maximum aroma)
Instructions
- Preheat your oven to 375°F (190°C) and generously grease a 12-cup muffin tin with extra virgin olive oil.
- In a large bowl, whisk together the eggs and milk until fully combined and slightly frothy.
- Stir in the diced bell peppers, chopped spinach, grated Parmesan cheese, salt, and black pepper into the egg mixture.
- Evenly distribute the mixture among the muffin cups, filling each about three-quarters full.
- Bake for 20-25 minutes, or until the muffins are set and the tops are lightly golden. A toothpick inserted should come out clean.
- Let the muffins cool in the tin for 5 minutes before transferring them to a wire rack.
Juxtaposing the creamy texture of the eggs with the crispness of the vegetables, these muffins offer a delightful contrast. Serve them warm with a dollop of sour cream or alongside a fresh arugula salad for a complete meal.
Lean Beef and Vegetable Skewers
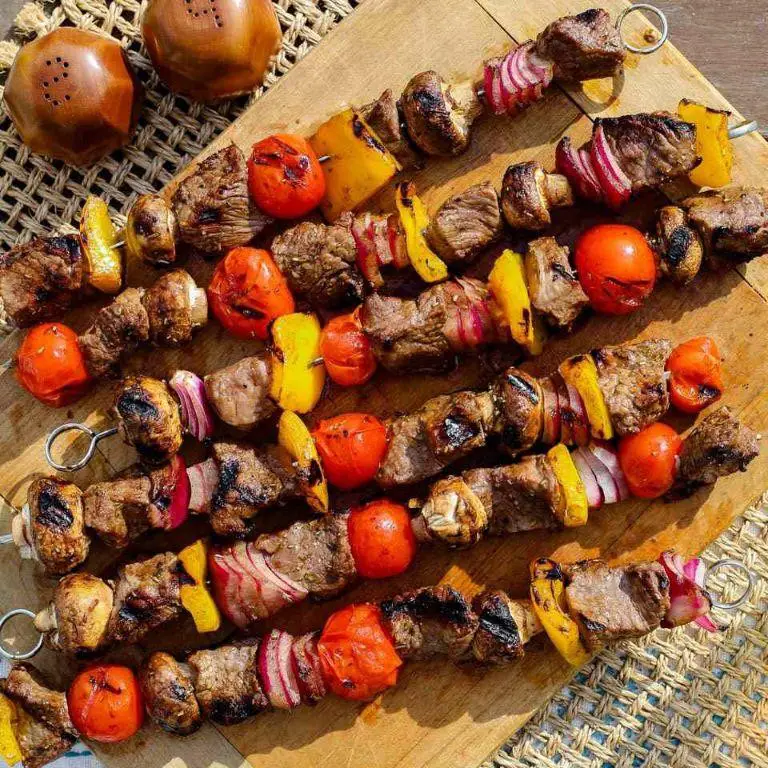
Kickstart your culinary adventure with these Lean Beef and Vegetable Skewers, a dish that marries the robust flavors of premium beef with the fresh, vibrant notes of seasonal vegetables, all brought together on a skewer for a visually stunning and deliciously satisfying meal.
Ingredients
- 1.5 lbs lean beef sirloin, cut into 1-inch cubes (I find that sirloin offers the perfect balance of tenderness and flavor)
- 2 bell peppers, any color, cut into 1-inch pieces (I love using a mix of red and yellow for a pop of color)
- 1 large red onion, cut into 1-inch pieces
- 1/4 cup extra virgin olive oil (my go-to for its fruity notes)
- 2 tbsp soy sauce (for that umami depth)
- 1 tbsp honey (to add a subtle sweetness)
- 2 cloves garlic, minced (because everything’s better with garlic)
- 1 tsp smoked paprika (for a hint of smokiness)
- Salt and freshly ground black pepper, to taste
Instructions
- In a large bowl, whisk together the olive oil, soy sauce, honey, minced garlic, smoked paprika, salt, and pepper to create the marinade.
- Add the beef cubes to the marinade, ensuring each piece is well coated. Cover and refrigerate for at least 2 hours, or overnight for deeper flavor. Tip: Turning the beef occasionally in the marinade ensures even flavor absorption.
- Preheat your grill to medium-high heat, about 400°F, ensuring it’s clean and lightly oiled to prevent sticking.
- Thread the marinated beef, bell peppers, and red onion onto skewers, alternating between the ingredients for a colorful presentation. Tip: If using wooden skewers, soak them in water for 30 minutes beforehand to prevent burning.
- Grill the skewers for about 10-12 minutes, turning occasionally, until the beef is cooked to your desired doneness and the vegetables are slightly charred. Tip: For medium-rare beef, aim for an internal temperature of 135°F.
Now, these skewers emerge from the grill with the beef boasting a perfect sear, juicy interior, and the vegetables offering a delightful crunch and sweetness. Serve them atop a bed of fluffy quinoa or with a side of creamy tzatziki for an extra layer of flavor.
High Protein Mac and Cheese with Chicken

Nothing satisfies the soul quite like a bowl of creamy, indulgent mac and cheese, especially when it’s packed with high-protein chicken to keep you fueled. This elevated version of the classic comfort dish combines the richness of aged cheddar with the wholesome goodness of lean chicken, creating a meal that’s as nutritious as it is delicious.
Ingredients
- 2 cups elbow macaroni (I love the way the ridges hold onto the cheese sauce)
- 1 lb boneless, skinless chicken breasts (sliced into bite-sized pieces for even cooking)
- 2 tbsp unsalted butter (for that velvety sauce base)
- 2 tbsp all-purpose flour (the secret to a perfectly thickened sauce)
- 2 cups whole milk (warmed slightly to prevent clumping)
- 2 cups shredded aged cheddar cheese (the sharper, the better for depth of flavor)
- 1/2 tsp garlic powder (a little goes a long way)
- 1/2 tsp smoked paprika (for a subtle, smoky undertone)
- Salt and freshly ground black pepper (to season the dish perfectly)
Instructions
- Preheat your oven to 375°F (190°C) to ensure it’s ready for baking the mac and cheese to golden perfection.
- Bring a large pot of salted water to a boil and cook the elbow macaroni according to package instructions until al dente, about 8 minutes. Drain and set aside.
- While the pasta cooks, heat a large skillet over medium-high heat. Add the chicken pieces, seasoning lightly with salt and pepper, and cook until golden and cooked through, about 6-7 minutes. Remove from heat and set aside.
- In the same pot used for pasta, melt the butter over medium heat. Whisk in the flour and cook for 1 minute to remove the raw flour taste, creating a roux.
- Gradually whisk in the warmed milk, ensuring no lumps form. Bring to a simmer and cook until the sauce thickens slightly, about 3-4 minutes.
- Reduce the heat to low and stir in the shredded cheddar cheese until melted and smooth. Add the garlic powder and smoked paprika, seasoning with salt and pepper to taste.
- Fold in the cooked macaroni and chicken, ensuring everything is evenly coated with the cheese sauce.
- Transfer the mixture to a baking dish and bake for 20 minutes, or until the top is bubbly and lightly golden.
Final thoughts: This High Protein Mac and Cheese with Chicken emerges from the oven with a creamy interior and a slightly crispy top, offering a delightful contrast in textures. The smoky paprika and sharp cheddar elevate the dish, making it a sophisticated twist on a classic. Serve it alongside a crisp green salad for a balanced meal that doesn’t skimp on flavor.
Conclusion
Zesty and packed with protein, these 18 recipes are your ticket to nutritious, easy meals that don’t skimp on flavor. Whether you’re meal prepping or looking for quick dinner ideas, there’s something here for everyone. We’d love to hear which recipes become your favorites—drop us a comment below! And if you found this roundup helpful, don’t forget to share the love on Pinterest. Happy cooking!

Michael Johnson is the founder of Pan Mastery, Inspired by his blacksmith grandfather’s legacy has a deep appreciation for hand-crafted pots and pans, he provides invaluable guides, reviews, and recipes to enhance your culinary journey.