Craving something sweet but need to keep it gluten-free and dairy-free? You’re in luck! Our roundup of 20 Delicious Gluten-Free Dairy-Free Dessert Recipes is packed with mouthwatering options that everyone can enjoy. From rich chocolate treats to fruity delights, these recipes prove that dietary restrictions don’t mean sacrificing flavor. Dive in and discover your next favorite dessert today!
Chocolate Avocado Mousse
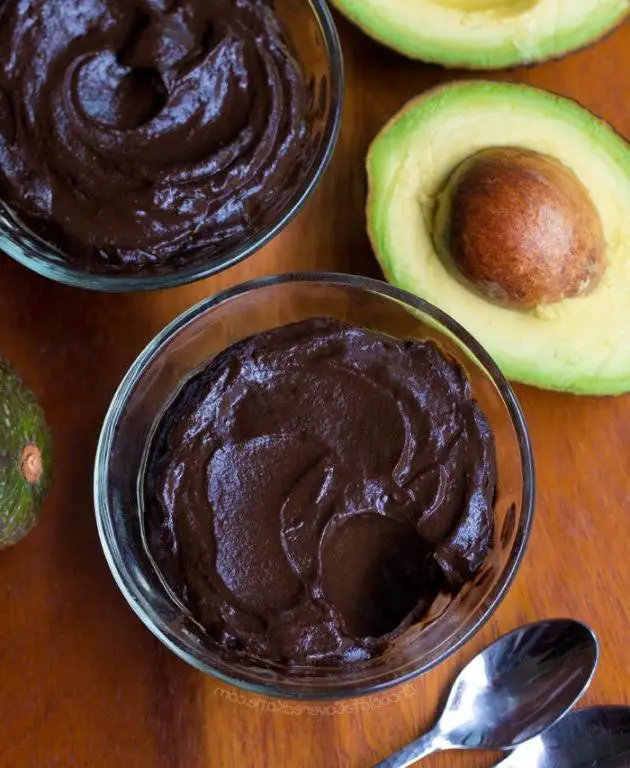
Ever find yourself craving something sweet but also kinda healthy? Chocolate avocado mousse is your answer—it’s creamy, dreamy, and secretly good for you.
Ingredients
- 2 ripe avocados
- 1/4 cup cocoa powder
- 1/4 cup honey
- 1/2 tsp vanilla extract
- 1/4 cup almond milk
- Pinch of salt
Instructions
- Cut the avocados in half, remove the pits, and scoop the flesh into a blender.
- Add the cocoa powder, honey, vanilla extract, almond milk, and salt to the blender.
- Blend on high speed for 1-2 minutes, scraping down the sides as needed, until the mixture is completely smooth. Tip: For an extra silky texture, blend a little longer than you think you need to.
- Taste the mousse and adjust the sweetness by adding more honey if desired. Tip: The ripeness of your avocados can affect the sweetness, so adjust accordingly.
- Transfer the mousse to serving bowls or glasses. Tip: For a fancy touch, pipe the mousse into glasses using a pastry bag.
- Chill in the refrigerator for at least 30 minutes before serving to allow the flavors to meld and the texture to firm up.
Cool and creamy, this mousse has a rich chocolate flavor with a hint of avocado freshness. Serve it topped with fresh berries or a sprinkle of sea salt for an extra flavor contrast.
Vegan Almond Flour Cookies
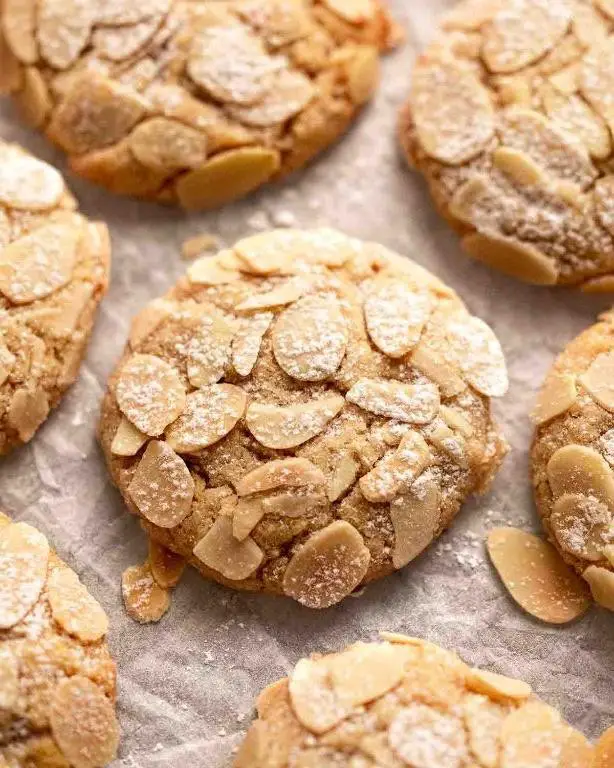
Deliciously simple and satisfying, these vegan almond flour cookies are your next go-to treat. You’ll love how they’re just sweet enough, with a tender bite that’s hard to resist.
Ingredients
- 2 cups almond flour
- 1/2 cup maple syrup
- 1/4 cup coconut oil, melted
- 1 tsp vanilla extract
- 1/2 tsp baking soda
- 1/4 tsp salt
Instructions
- Preheat your oven to 350°F and line a baking sheet with parchment paper.
- In a large bowl, whisk together the almond flour, baking soda, and salt.
- Add the maple syrup, melted coconut oil, and vanilla extract to the dry ingredients. Stir until a thick dough forms. Tip: If the dough feels too sticky, let it sit for 5 minutes to firm up.
- Scoop tablespoon-sized portions of dough onto the prepared baking sheet, spacing them about 2 inches apart.
- Flatten each cookie slightly with the back of a spoon. Tip: For evenly shaped cookies, dip the spoon in water to prevent sticking.
- Bake for 10-12 minutes, or until the edges are golden brown. Tip: Keep an eye on them after 10 minutes to avoid over-baking.
- Let the cookies cool on the baking sheet for 5 minutes before transferring to a wire rack to cool completely.
Just out of the oven, these cookies are soft with a slight crunch around the edges. Enjoy them with a cup of tea or crumble over dairy-free ice cream for an extra special treat.
Banana Oatmeal Breakfast Bars

You know those mornings when you’re rushing out the door but still want something hearty and healthy? These banana oatmeal breakfast bars are your savior—easy to make, delicious, and packed with energy to start your day right.
Ingredients
- 2 cups rolled oats
- 1 cup mashed bananas
- 1/2 cup honey
- 1/4 cup almond butter
- 1 tsp vanilla extract
- 1/2 tsp cinnamon
- 1/4 tsp salt
Instructions
- Preheat your oven to 350°F and line an 8×8 inch baking pan with parchment paper.
- In a large bowl, mix the rolled oats, mashed bananas, honey, almond butter, vanilla extract, cinnamon, and salt until well combined. Tip: For extra texture, you can add a handful of chopped nuts or chocolate chips to the mixture.
- Press the mixture firmly into the prepared baking pan. Tip: Wetting your hands slightly can help prevent the mixture from sticking to them.
- Bake for 25 minutes, or until the edges are golden brown. Tip: Let the bars cool completely in the pan before cutting to ensure they hold together well.
- Cut into bars and serve.
Rich in flavor and with a chewy texture, these bars are perfect for breakfast on the go. Try drizzling them with a little extra almond butter or serving with a side of fresh fruit for an extra treat.
Coconut Flour Chocolate Cake
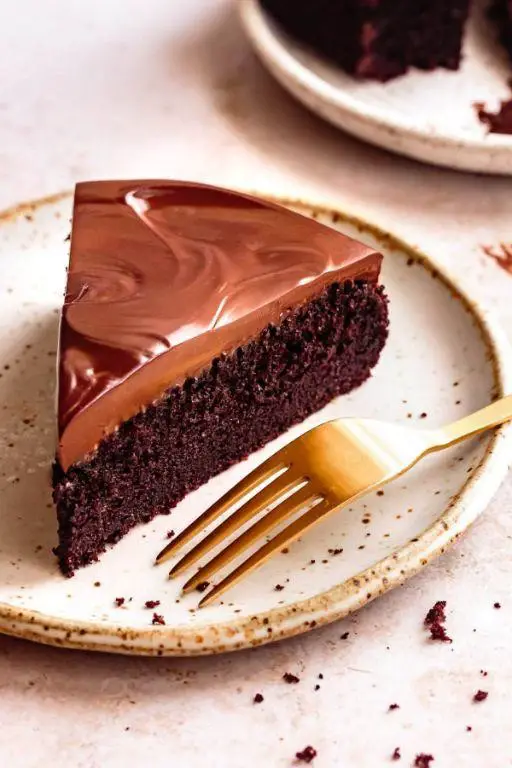
This coconut flour chocolate cake is a game-changer for anyone looking for a gluten-free dessert that doesn’t skimp on flavor. You’ll love how moist and rich it turns out, with just the right amount of sweetness.
Ingredients
- 1/2 cup coconut flour
- 1/2 cup cocoa powder
- 1/2 teaspoon baking soda
- 1/4 teaspoon salt
- 4 large eggs
- 1/2 cup honey
- 1/2 cup coconut oil, melted
- 1 teaspoon vanilla extract
Instructions
- Preheat your oven to 350°F and grease an 8-inch round cake pan.
- In a large bowl, whisk together the coconut flour, cocoa powder, baking soda, and salt until well combined.
- In another bowl, beat the eggs, then mix in the honey, melted coconut oil, and vanilla extract.
- Gradually add the dry ingredients to the wet ingredients, stirring until the batter is smooth. Tip: Let the batter sit for 5 minutes to allow the coconut flour to absorb the liquids.
- Pour the batter into the prepared cake pan and smooth the top with a spatula.
- Bake for 25-30 minutes, or until a toothpick inserted into the center comes out clean. Tip: Avoid opening the oven door too early to prevent the cake from sinking.
- Let the cake cool in the pan for 10 minutes, then transfer to a wire rack to cool completely. Tip: For extra moisture, brush the top with a little honey while it’s still warm.
Perfectly dense yet fluffy, this cake boasts a deep chocolate flavor with a hint of coconut. Serve it with a dollop of whipped cream or fresh berries for an extra special touch.
Raw Vegan Cheesecake
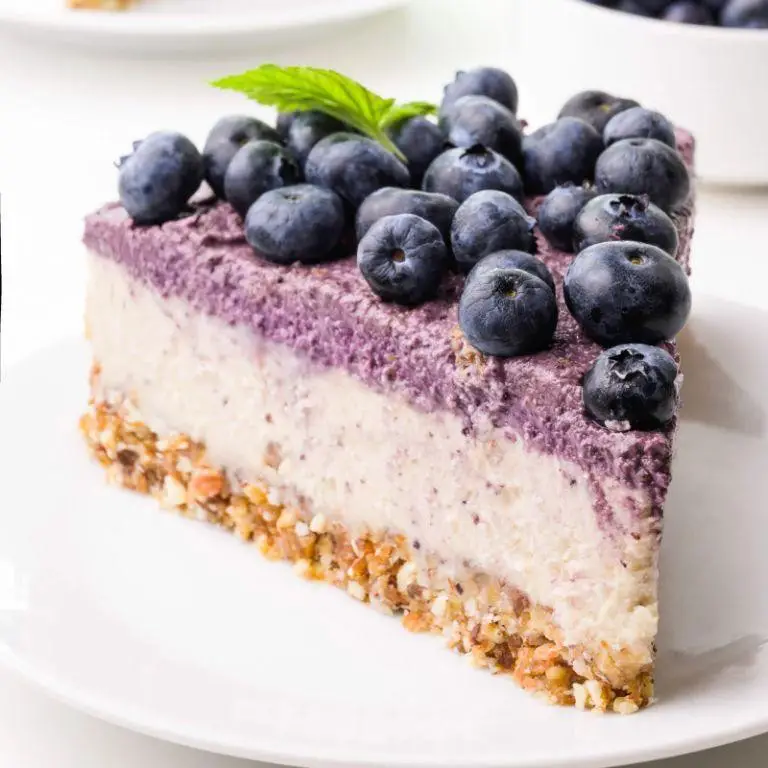
Feeling like treating yourself to something sweet but healthy? This raw vegan cheesecake is your answer. It’s creamy, delicious, and guilt-free, perfect for any occasion.
Ingredients
- 1.5 cups raw cashews, soaked overnight
- 1 cup pitted dates
- 0.5 cup almond flour
- 0.25 cup coconut oil, melted
- 0.5 cup maple syrup
- 1 tsp vanilla extract
- 2 tbsp lemon juice
- 0.25 tsp salt
Instructions
- Drain the soaked cashews and set aside.
- In a food processor, blend the dates and almond flour until a sticky dough forms.
- Press the dough evenly into the bottom of a 7-inch springform pan to create the crust.
- Clean the food processor, then blend the cashews, coconut oil, maple syrup, vanilla extract, lemon juice, and salt until smooth.
- Pour the filling over the crust, smoothing the top with a spatula.
- Freeze the cheesecake for at least 4 hours, or until firm.
- Let it thaw for 10 minutes before slicing and serving.
Delightfully creamy with a hint of tang from the lemon, this cheesecake is a dream. Try topping it with fresh berries or a drizzle of chocolate for an extra special touch.
Paleo Pumpkin Pie

Ever crave a dessert that’s both indulgent and wholesome? This Paleo Pumpkin Pie hits the spot with its creamy filling and flaky crust, all without any grains or refined sugars.
Ingredients
- 1 1/2 cups almond flour
- 1/4 cup coconut oil, melted
- 1 tbsp maple syrup
- 1/4 tsp salt
- 1 can (15 oz) pumpkin puree
- 1/2 cup coconut milk
- 1/4 cup maple syrup
- 2 eggs
- 1 tsp vanilla extract
- 1 tsp cinnamon
- 1/2 tsp ginger
- 1/4 tsp nutmeg
- 1/4 tsp cloves
Instructions
- Preheat your oven to 350°F.
- In a bowl, mix 1 1/2 cups almond flour, 1/4 cup melted coconut oil, 1 tbsp maple syrup, and 1/4 tsp salt until a dough forms. Tip: If the dough is too sticky, add a bit more almond flour.
- Press the dough into a 9-inch pie dish, covering the bottom and sides evenly. Bake for 10 minutes, then let it cool.
- In another bowl, whisk together 15 oz pumpkin puree, 1/2 cup coconut milk, 1/4 cup maple syrup, 2 eggs, 1 tsp vanilla extract, 1 tsp cinnamon, 1/2 tsp ginger, 1/4 tsp nutmeg, and 1/4 tsp cloves until smooth. Tip: For extra smooth filling, blend the mixture in a food processor.
- Pour the filling into the cooled crust. Bake for 45 minutes, or until the center is set. Tip: To prevent cracking, let the pie cool slowly in the oven with the door slightly open.
- Let the pie cool completely before slicing.
Lightly spiced and perfectly sweet, this pie’s texture is luxuriously smooth. Serve it chilled with a dollop of coconut whipped cream for an extra treat.
Chia Seed Pudding
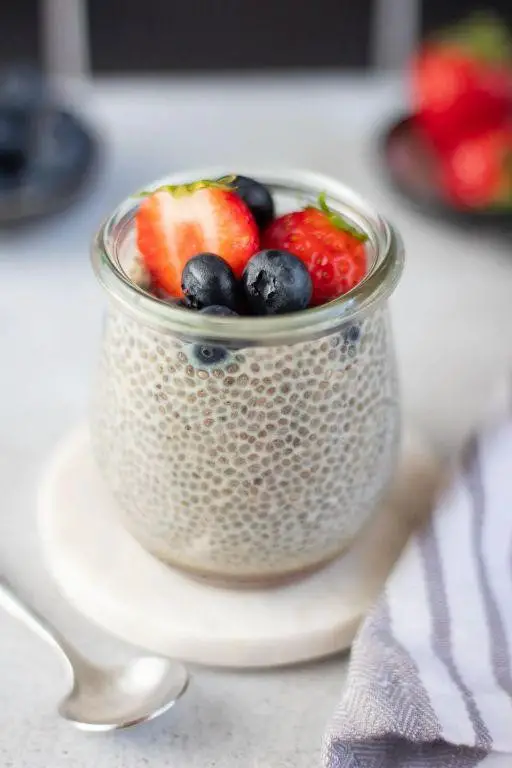
Breakfast just got a whole lot easier with this simple chia seed pudding. You’ll love how it comes together in minutes and can be customized with your favorite toppings.
Ingredients
- 1/4 cup chia seeds
- 1 cup almond milk
- 1 tbsp honey
- 1/2 tsp vanilla extract
Instructions
- In a medium bowl, combine 1/4 cup chia seeds and 1 cup almond milk.
- Stir in 1 tbsp honey and 1/2 tsp vanilla extract until well mixed.
- Let the mixture sit for 5 minutes, then stir again to prevent clumping.
- Cover the bowl and refrigerate for at least 4 hours, or overnight, until the pudding has thickened.
- Before serving, give the pudding a good stir to smooth out any lumps.
You’ll be amazed at how creamy and satisfying this chia seed pudding is. Try topping it with fresh berries or a drizzle of maple syrup for an extra touch of sweetness.
Flourless Almond Butter Brownies
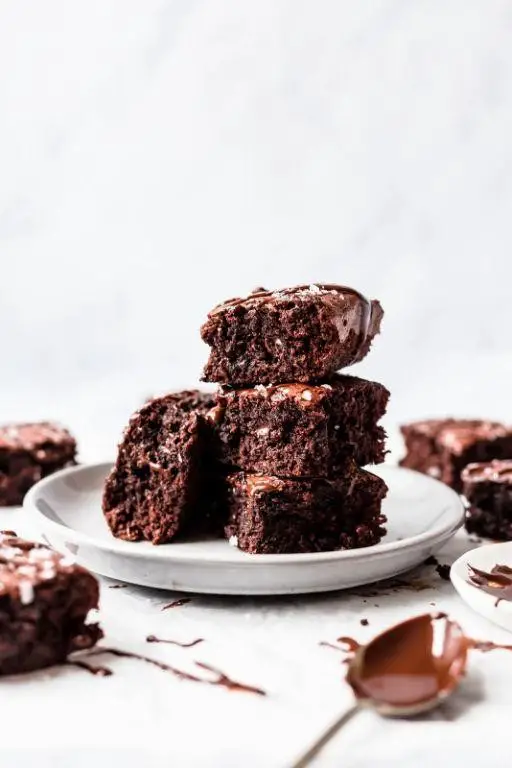
Unbelievably rich and fudgy, these flourless almond butter brownies are your new go-to for a quick dessert fix. You won’t believe they’re gluten-free and packed with protein, making them a guilt-free indulgence.
Ingredients
- 1 cup creamy almond butter
- 1/2 cup granulated sugar
- 1/4 cup unsweetened cocoa powder
- 1 large egg
- 1 tsp vanilla extract
- 1/2 tsp baking soda
- 1/4 tsp salt
- 1/2 cup dark chocolate chips
Instructions
- Preheat your oven to 350°F and line an 8×8 inch baking pan with parchment paper.
- In a large bowl, mix together 1 cup creamy almond butter, 1/2 cup granulated sugar, and 1/4 cup unsweetened cocoa powder until well combined.
- Add 1 large egg, 1 tsp vanilla extract, 1/2 tsp baking soda, and 1/4 tsp salt to the bowl. Stir until the mixture is smooth and no streaks remain.
- Fold in 1/2 cup dark chocolate chips, reserving a few to sprinkle on top.
- Pour the batter into the prepared pan, smoothing the top with a spatula. Sprinkle the reserved chocolate chips over the top.
- Bake for 20-25 minutes, or until the edges are set but the center is still slightly soft. A toothpick inserted into the center should come out with a few moist crumbs.
- Let the brownies cool in the pan for at least 10 minutes before slicing. This helps them set and makes for cleaner cuts.
Moist and dense with a crackly top, these brownies are a chocolate lover’s dream. Serve them warm with a scoop of vanilla ice cream for an extra decadent treat.
Vegan Coconut Macaroons
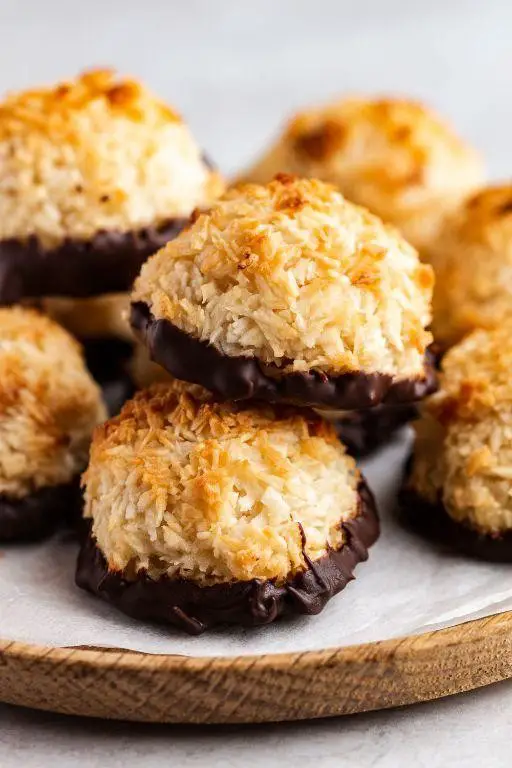
Kick off your baking adventure with these delightfully sweet vegan coconut macaroons. Perfect for those lazy Sunday afternoons or when you’re craving something sweet without the guilt.
Ingredients
- 2 cups shredded coconut
- 1/2 cup coconut flour
- 1/2 cup maple syrup
- 1/4 cup coconut oil, melted
- 1 tsp vanilla extract
- 1/4 tsp salt
Instructions
- Preheat your oven to 350°F and line a baking sheet with parchment paper.
- In a large bowl, combine the shredded coconut and coconut flour.
- Add the maple syrup, melted coconut oil, vanilla extract, and salt to the bowl. Mix until well combined. Tip: If the mixture seems too dry, add a tablespoon of almond milk to help it bind.
- Using a cookie scoop or your hands, form the mixture into small balls and place them on the prepared baking sheet. Tip: Wetting your hands slightly can prevent the mixture from sticking.
- Bake for 15-20 minutes, or until the macaroons are golden brown around the edges. Tip: Keep an eye on them after 15 minutes to prevent over-browning.
- Let the macaroons cool on the baking sheet for 5 minutes before transferring them to a wire rack to cool completely.
Light and chewy with a crispy exterior, these macaroons are a dream. Serve them with a drizzle of dark chocolate for an extra decadent touch.
Sweet Potato Brownies
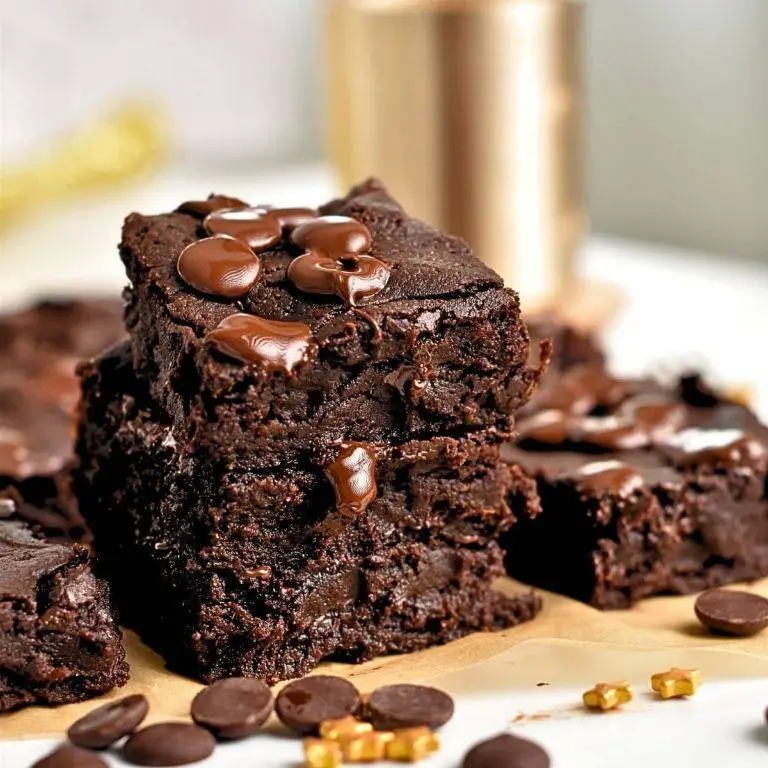
These sweet potato brownies are a game-changer for your dessert routine. They’re secretly healthy, incredibly moist, and packed with flavor. You won’t believe they’re made with sweet potatoes!
Ingredients
- 1 cup mashed sweet potato
- 1/2 cup almond butter
- 1/3 cup maple syrup
- 1/4 cup cocoa powder
- 1 tsp vanilla extract
- 1/2 tsp baking soda
- 1/4 tsp salt
- 1/2 cup dark chocolate chips
Instructions
- Preheat your oven to 350°F and line an 8×8 baking pan with parchment paper.
- In a large bowl, mix together the mashed sweet potato, almond butter, and maple syrup until smooth.
- Add the cocoa powder, vanilla extract, baking soda, and salt to the bowl. Stir until well combined.
- Fold in the dark chocolate chips, saving a handful to sprinkle on top.
- Pour the batter into the prepared pan and spread it evenly with a spatula.
- Sprinkle the remaining chocolate chips over the top of the batter.
- Bake for 20-25 minutes, or until a toothpick inserted into the center comes out mostly clean.
- Let the brownies cool in the pan for at least 10 minutes before slicing.
Zesty and rich, these brownies have a fudgy texture that’s hard to resist. Serve them warm with a scoop of vanilla ice cream for an extra indulgent treat.
Quinoa Chocolate Chip Cookies
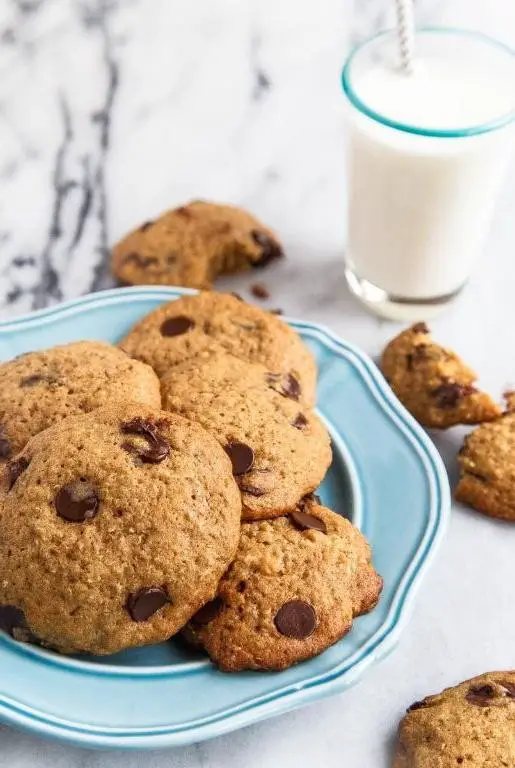
Hey, you’re going to love these quinoa chocolate chip cookies. They’re a fun twist on the classic, packed with protein and just the right amount of sweetness.
Ingredients
- 1 cup cooked quinoa
- 1/2 cup almond butter
- 1/4 cup maple syrup
- 1 tsp vanilla extract
- 1/2 tsp baking soda
- 1/4 tsp salt
- 1/2 cup dark chocolate chips
Instructions
- Preheat your oven to 350°F and line a baking sheet with parchment paper.
- In a large bowl, mix the cooked quinoa, almond butter, maple syrup, and vanilla extract until well combined.
- Add the baking soda and salt to the mixture, stirring to incorporate evenly.
- Fold in the dark chocolate chips, ensuring they’re distributed throughout the dough.
- Using a tablespoon, scoop the dough onto the prepared baking sheet, spacing the cookies about 2 inches apart.
- Bake for 12-15 minutes, or until the edges are golden brown. Tip: For softer cookies, lean towards the 12-minute mark.
- Let the cookies cool on the baking sheet for 5 minutes before transferring them to a wire rack to cool completely. Tip: They’ll firm up as they cool, so don’t worry if they seem soft at first.
- Store in an airtight container for up to a week. Tip: For a crispy texture, reheat in the oven at 350°F for a few minutes before serving.
Out of the oven, these cookies have a chewy center with a slightly crispy edge. The quinoa adds a nutty flavor that pairs perfectly with the rich chocolate chips. Try serving them warm with a scoop of vanilla ice cream for an extra special treat.
Raw Carrot Cake Bites

You’ve probably had carrot cake before, but have you tried it in bite-sized, raw form? These little treats are packed with flavor and so easy to make.
Ingredients
- 1 cup grated carrots
- 1 cup pitted dates
- 1/2 cup walnuts
- 1/2 cup almond flour
- 1 tsp cinnamon
- 1/2 tsp vanilla extract
- 1/4 tsp nutmeg
- 1 tbsp coconut oil
Instructions
- Place the grated carrots, pitted dates, walnuts, almond flour, cinnamon, vanilla extract, nutmeg, and coconut oil in a food processor.
- Process the mixture on high for 1-2 minutes, or until it forms a sticky dough. Tip: If the mixture is too dry, add a teaspoon of water to help it come together.
- Roll the dough into small balls, about 1 inch in diameter. Tip: Wet your hands slightly to prevent the dough from sticking.
- Place the balls on a baking sheet lined with parchment paper and refrigerate for at least 30 minutes to set. Tip: For a firmer texture, freeze the bites for 15 minutes before serving.
Enjoy these raw carrot cake bites for a quick snack or dessert. They’re perfectly sweet, with a hint of spice, and the texture is delightfully chewy. Try rolling them in shredded coconut for an extra touch of flavor.
Avocado Chocolate Pudding

Believe it or not, you can turn avocados into a decadent chocolate pudding that’s both healthy and delicious. It’s the perfect guilt-free dessert for when you’re craving something sweet but want to keep it light.
Ingredients
- 2 ripe avocados
- 1/4 cup cocoa powder
- 1/4 cup maple syrup
- 1 tsp vanilla extract
- 1/4 cup almond milk
- 1 pinch salt
Instructions
- Cut the avocados in half, remove the pits, and scoop the flesh into a blender.
- Add the cocoa powder, maple syrup, vanilla extract, almond milk, and salt to the blender.
- Blend on high speed for 1-2 minutes, or until the mixture is completely smooth. Tip: Stop and scrape down the sides of the blender if needed to ensure everything is well incorporated.
- Taste the pudding and adjust the sweetness by adding more maple syrup if desired. Tip: The ripeness of your avocados can affect the sweetness, so adjust accordingly.
- Transfer the pudding to serving bowls and refrigerate for at least 30 minutes to chill. Tip: Chilling thickens the pudding and enhances the flavors.
Rich and creamy, this avocado chocolate pudding has a velvety texture that’s surprisingly similar to traditional pudding. Serve it with a dollop of whipped cream and fresh berries for an extra special treat.
Gluten Free Vegan Apple Crisp
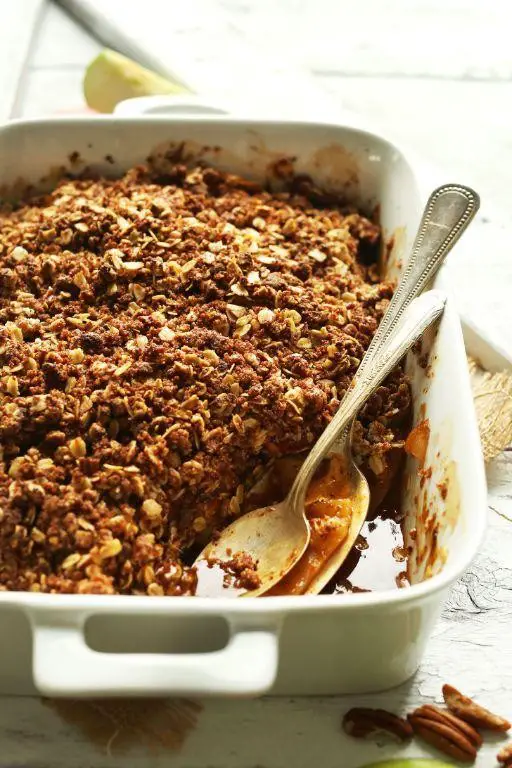
Vegan apple crisp is the ultimate comfort dessert that’s surprisingly easy to make. You’ll love the sweet, spiced apples topped with a crunchy oat topping—perfect for any occasion.
Ingredients
- 4 cups apples, peeled and sliced
- 1 tbsp lemon juice
- 1/2 cup maple syrup
- 1 tsp cinnamon
- 1/4 tsp nutmeg
- 1 cup gluten-free oats
- 1/2 cup almond flour
- 1/4 cup coconut oil, melted
- 1/4 cup brown sugar
- 1/2 tsp vanilla extract
Instructions
- Preheat your oven to 350°F and lightly grease an 8×8 baking dish.
- In a large bowl, toss the sliced apples with lemon juice, maple syrup, cinnamon, and nutmeg until evenly coated.
- Spread the apple mixture evenly in the prepared baking dish.
- In another bowl, mix the gluten-free oats, almond flour, melted coconut oil, brown sugar, and vanilla extract until crumbly.
- Sprinkle the oat mixture over the apples, covering them completely.
- Bake for 35-40 minutes, or until the topping is golden brown and the apples are bubbly.
- Let the crisp cool for 10 minutes before serving to allow the flavors to meld.
Delight in the warm, gooey apples paired with the crisp, buttery topping. Serve it with a scoop of dairy-free vanilla ice cream for an extra treat.
Cashew Butter Blondies
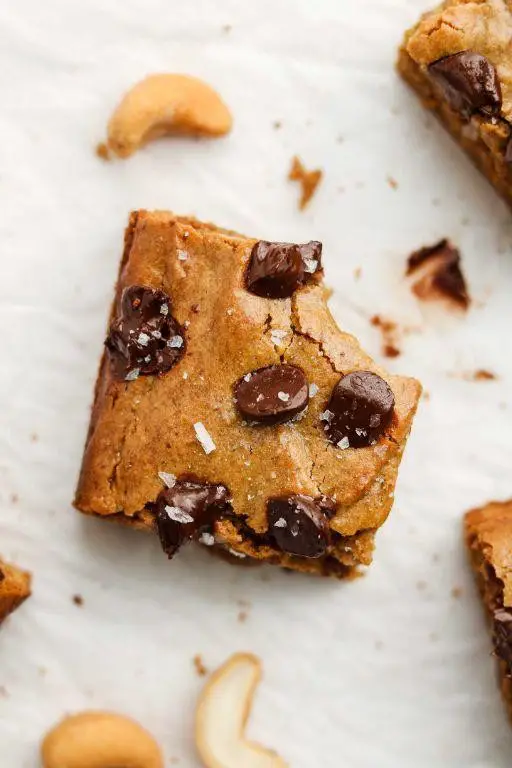
Oh, you’re going to love these Cashew Butter Blondies. They’re the perfect mix of chewy and rich, with a nutty twist that’ll have you coming back for seconds.
Ingredients
- 1 cup cashew butter
- 1/2 cup brown sugar
- 1/4 cup granulated sugar
- 1 large egg
- 1 tsp vanilla extract
- 1/2 tsp baking soda
- 1/4 tsp salt
- 1/2 cup chocolate chips
Instructions
- Preheat your oven to 350°F and line an 8×8 inch baking pan with parchment paper.
- In a large bowl, mix together the cashew butter, brown sugar, and granulated sugar until smooth.
- Add the egg and vanilla extract to the bowl, stirring until fully incorporated.
- Gently fold in the baking soda and salt, ensuring they’re evenly distributed throughout the batter.
- Stir in the chocolate chips, saving a handful to sprinkle on top before baking.
- Pour the batter into the prepared pan, smoothing the top with a spatula.
- Sprinkle the remaining chocolate chips over the top of the batter.
- Bake for 20-25 minutes, or until the edges are golden but the center is still slightly soft.
- Let the blondies cool in the pan for at least 10 minutes before cutting into squares.
Look at those blondies! They’re wonderfully dense with a melt-in-your-mouth quality, thanks to the cashew butter. Try serving them warm with a scoop of vanilla ice cream for an extra indulgent treat.
Paleo Chocolate Chip Cookies
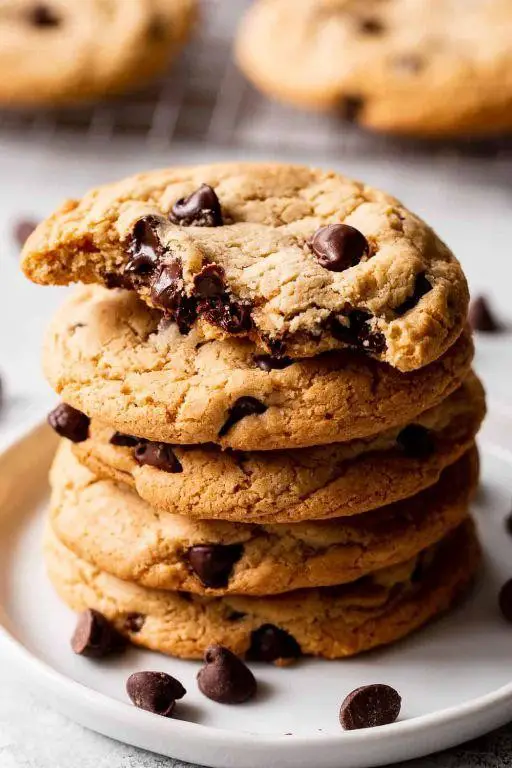
Craving something sweet but want to keep it healthy? These Paleo Chocolate Chip Cookies are your guilt-free ticket to indulgence. They’re easy to make, packed with wholesome ingredients, and absolutely delicious.
Ingredients
- 2 cups almond flour
- 1/4 cup coconut flour
- 1/2 tsp baking soda
- 1/4 tsp salt
- 1/3 cup coconut oil, melted
- 1/4 cup maple syrup
- 1 tsp vanilla extract
- 1/2 cup dark chocolate chips
Instructions
- Preheat your oven to 350°F and line a baking sheet with parchment paper.
- In a large bowl, whisk together the almond flour, coconut flour, baking soda, and salt.
- Add the melted coconut oil, maple syrup, and vanilla extract to the dry ingredients. Mix until well combined.
- Fold in the dark chocolate chips until evenly distributed throughout the dough.
- Scoop tablespoon-sized portions of dough onto the prepared baking sheet, spacing them about 2 inches apart.
- Flatten each dough ball slightly with the back of a spoon or your fingers.
- Bake for 10-12 minutes, or until the edges are golden brown.
- Let the cookies cool on the baking sheet for 5 minutes before transferring them to a wire rack to cool completely.
Rich in flavor with a perfect chewy texture, these cookies are a dream. Try serving them warm with a scoop of almond milk ice cream for an extra special treat.
Vegan Peanut Butter Cups
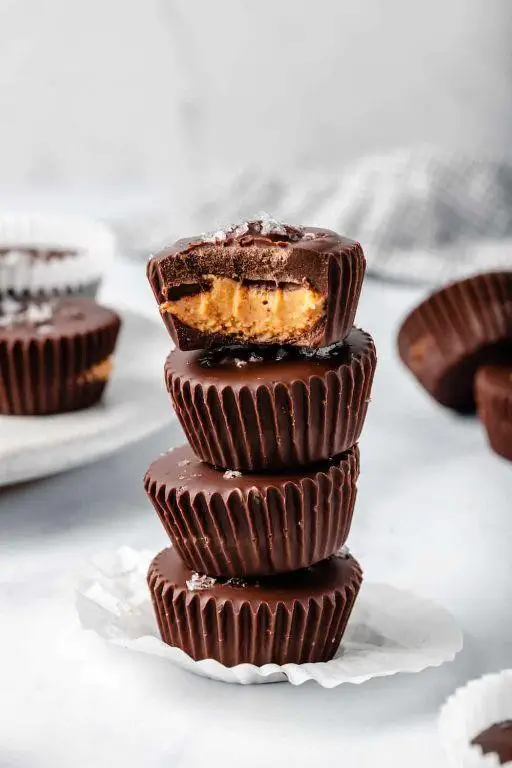
Got a sweet tooth but want to keep it vegan? These homemade vegan peanut butter cups are just the ticket. They’re rich, creamy, and surprisingly easy to whip up with just a few ingredients.
Ingredients
- 1 cup vegan chocolate chips
- 1/2 cup creamy peanut butter
- 2 tbsp maple syrup
- 1/4 tsp sea salt
- 1 tbsp coconut oil
Instructions
- Line a mini muffin tin with 12 paper liners.
- In a microwave-safe bowl, combine 1/2 cup vegan chocolate chips and 1/2 tbsp coconut oil. Microwave in 30-second intervals, stirring between each, until fully melted.
- Spoon about 1 tsp of melted chocolate into each liner, spreading it up the sides slightly. Freeze for 10 minutes to set.
- In a small bowl, mix together 1/2 cup peanut butter, 2 tbsp maple syrup, and 1/4 tsp sea salt until smooth.
- Place about 1 tsp of the peanut butter mixture on top of the set chocolate in each liner, pressing down lightly.
- Melt the remaining 1/2 cup chocolate chips with 1/2 tbsp coconut oil as before, then spoon over the peanut butter to cover completely.
- Freeze for another 20 minutes, or until fully set. Tip: For a smoother top, tap the tin lightly on the counter before freezing.
- Once set, remove from the liners and enjoy. Tip: Store in the fridge to keep them firm but not too hard.
Out of this world, these peanut butter cups have a perfect balance of sweet and salty with a melt-in-your-mouth texture. Try sprinkling a little sea salt on top before the final freeze for an extra flavor pop.
Almond Flour Banana Bread

Just when you thought banana bread couldn’t get any better, here comes a version that’s not only delicious but also gluten-free. Made with almond flour, it’s moist, flavorful, and has just the right amount of sweetness.
Ingredients
- 3 cups almond flour
- 1 tsp baking soda
- 1/2 tsp salt
- 3 ripe bananas, mashed
- 3 eggs
- 1/4 cup honey
- 1 tsp vanilla extract
- 1/2 cup chopped walnuts
Instructions
- Preheat your oven to 350°F and grease a 9×5 inch loaf pan.
- In a large bowl, whisk together the almond flour, baking soda, and salt.
- In another bowl, mix the mashed bananas, eggs, honey, and vanilla extract until well combined.
- Tip: Make sure your bananas are really ripe for the best flavor.
- Gradually add the dry ingredients to the wet ingredients, stirring until just combined.
- Fold in the chopped walnuts.
- Tip: Don’t overmix the batter to keep the bread tender.
- Pour the batter into the prepared loaf pan and smooth the top with a spatula.
- Bake for 50-60 minutes, or until a toothpick inserted into the center comes out clean.
- Tip: If the top starts to brown too quickly, cover it loosely with foil.
- Let the bread cool in the pan for 10 minutes, then transfer to a wire rack to cool completely.
So, this almond flour banana bread is wonderfully moist with a subtle nuttiness from the almond flour. Serve it warm with a dollop of almond butter for an extra treat.
Raw Vegan Chocolate Truffles
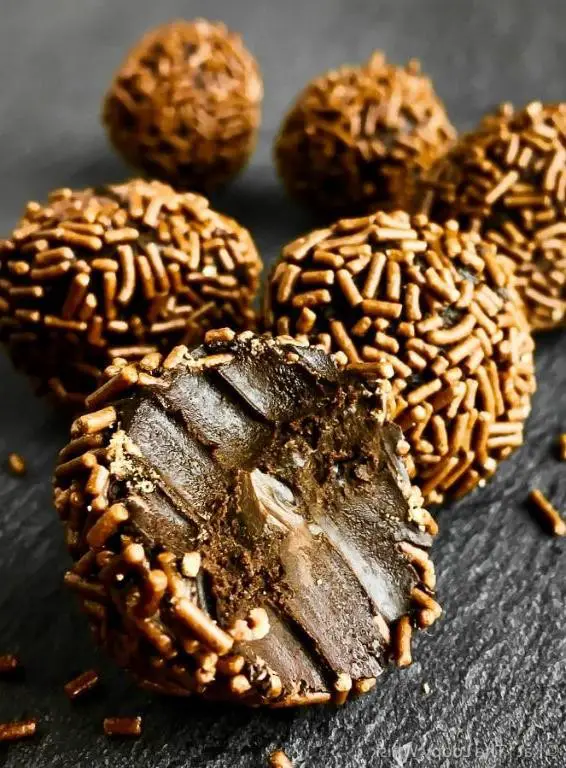
Looking for a guilt-free treat that satisfies your chocolate cravings? These raw vegan chocolate truffles are not only delicious but also packed with wholesome ingredients. You’ll love how easy they are to make, no baking required!
Ingredients
- 1 cup raw cashews
- 1/2 cup unsweetened cocoa powder
- 1/4 cup pure maple syrup
- 2 tbsp coconut oil, melted
- 1 tsp vanilla extract
- 1/4 tsp sea salt
- 1/4 cup shredded coconut, for rolling
Instructions
- Place the raw cashews in a food processor and blend until they form a fine powder, about 1 minute.
- Add the cocoa powder, maple syrup, melted coconut oil, vanilla extract, and sea salt to the food processor. Blend until the mixture comes together into a sticky dough, about 2 minutes. Tip: If the mixture is too dry, add a teaspoon of water to help it bind.
- Scoop out tablespoon-sized portions of the dough and roll them into balls between your palms. Tip: Wet your hands slightly to prevent the dough from sticking.
- Roll each truffle in shredded coconut until fully coated. Tip: For variety, try rolling some truffles in crushed nuts or extra cocoa powder.
- Place the truffles on a baking sheet lined with parchment paper and refrigerate for at least 30 minutes to set.
Velvety smooth with a rich chocolate flavor, these truffles are perfect for a quick snack or a fancy dessert. Serve them at your next gathering or keep them all to yourself—no judgment here!
Coconut Milk Ice Cream
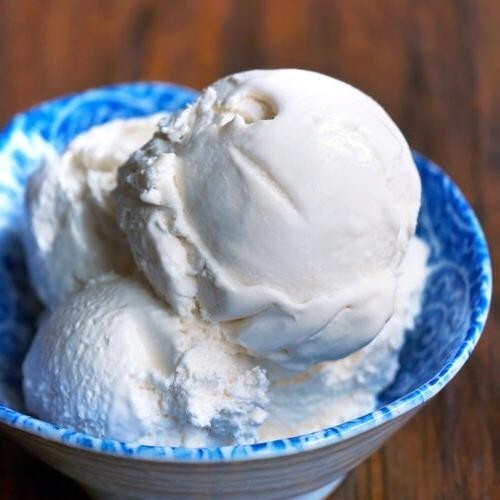
Hey, you’re going to love this coconut milk ice cream—it’s creamy, dreamy, and totally dairy-free. Perfect for those hot summer days or when you’re just craving something sweet and simple.
Ingredients
- 2 cups full-fat coconut milk
- 1/2 cup granulated sugar
- 1 tsp vanilla extract
- 1/8 tsp salt
Instructions
- In a medium saucepan, combine 2 cups full-fat coconut milk and 1/2 cup granulated sugar over low heat.
- Stir continuously until the sugar completely dissolves, about 3-5 minutes. Tip: Don’t let it boil to avoid curdling.
- Remove from heat and stir in 1 tsp vanilla extract and 1/8 tsp salt.
- Let the mixture cool to room temperature, then cover and refrigerate for at least 4 hours, or overnight for best results. Tip: Chilling thoroughly ensures a smoother texture.
- Pour the chilled mixture into an ice cream maker and churn according to the manufacturer’s instructions, usually about 20-25 minutes. Tip: If you don’t have an ice cream maker, freeze the mixture in a shallow dish, stirring every 30 minutes until firm.
- Transfer the ice cream to a freezer-safe container and freeze for an additional 2 hours to harden.
Best enjoyed straight from the freezer, this coconut milk ice cream is luxuriously smooth with a subtle tropical flavor. Try topping it with fresh berries or a drizzle of chocolate sauce for an extra special treat.
Conclusion
Outstanding! This roundup of 20 gluten-free, dairy-free dessert recipes proves that dietary restrictions don’t mean missing out on delicious treats. Whether you’re catering to specific needs or just exploring new flavors, there’s something here for everyone. We’d love to hear which recipes become your favorites—drop us a comment below. And if you found this collection helpful, please share the love by pinning it on Pinterest. Happy baking!

Michael Johnson is the founder of Pan Mastery, Inspired by his blacksmith grandfather’s legacy has a deep appreciation for hand-crafted pots and pans, he provides invaluable guides, reviews, and recipes to enhance your culinary journey.