Just when you thought weeknight dinners couldn’t get any easier or healthier, we’ve rounded up 18 delicious low-carb meal prep recipes that are perfect for those busy evenings. Whether you’re craving comfort food or looking for something light and fresh, these dishes are sure to satisfy without the guilt. Dive in and discover how simple and tasty low-carb eating can be—your future self will thank you!
Cauliflower Fried Rice
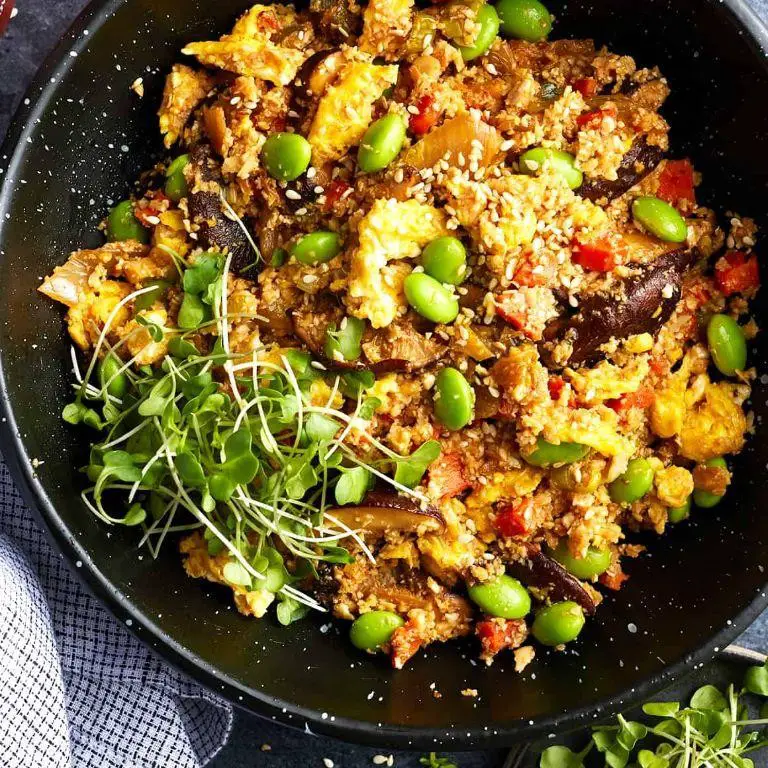
Kickstart your meal prep with this low-carb, high-flavor Cauliflower Fried Rice that’s ready in a flash. Swap out grains for grated cauliflower and **bold** flavors that pop.
Ingredients
- 1 large head cauliflower, riced (about 4 cups)
- 2 tbsp avocado oil
- 3 pasture-raised eggs, lightly beaten
- 1 cup diced carrots
- 1 cup frozen peas, thawed
- 3 cloves garlic, minced
- 1 tbsp fresh ginger, grated
- 2 tbsp coconut aminos
- 1 tsp sesame oil
- 2 green onions, thinly sliced
Instructions
- Heat 1 tbsp avocado oil in a large skillet over medium-high heat until shimmering.
- Add beaten eggs, scramble for 2 minutes until just set, then transfer to a plate.
- In the same skillet, heat remaining oil. Sauté carrots for 3 minutes until slightly softened.
- Stir in garlic and ginger, cook for 30 seconds until fragrant.
- Add riced cauliflower, peas, and coconut aminos. Stir-fry for 5 minutes until cauliflower is tender.
- Fold in scrambled eggs and drizzle with sesame oil, tossing to combine.
- Garnish with green onions before serving.
Yield a dish with a **crisp-tender** texture and a **savory-sweet** profile. Serve it in a hollowed-out pineapple for an Instagram-worthy presentation.
Zucchini Noodles with Pesto
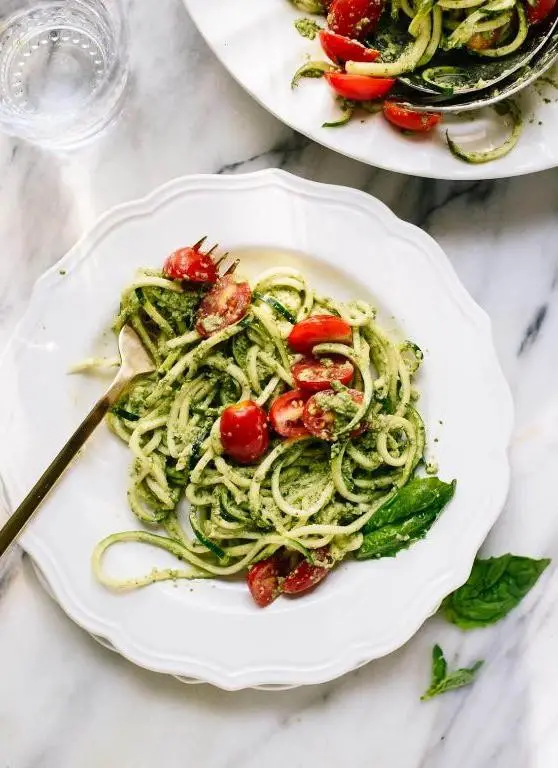
Viral on your feed and vibrant on your plate, these zucchini noodles with pesto twist up your dinner game in under 20 minutes. Fresh, fast, and packed with flavor, they’re your next go-to for a light yet satisfying meal.
Ingredients
- 4 medium zucchinis, spiralized into noodles
- 1/2 cup fresh basil leaves, tightly packed
- 1/4 cup extra-virgin olive oil
- 1/4 cup grated Parmesan cheese
- 2 tbsp pine nuts, toasted
- 1 small garlic clove, minced
- 1/2 tsp sea salt
- 1/4 tsp freshly ground black pepper
- 1 tbsp lemon juice
Instructions
- In a food processor, combine basil, olive oil, Parmesan, pine nuts, garlic, salt, pepper, and lemon juice. Pulse until smooth, scraping down the sides as needed.
- Heat a large skillet over medium heat. Add zucchini noodles and sauté for 2-3 minutes, just until slightly softened but still al dente.
- Remove skillet from heat. Add pesto to the zucchini noodles, tossing gently to coat evenly.
- Tip: For a nut-free version, substitute pine nuts with sunflower seeds.
- Tip: To prevent soggy noodles, avoid overcooking the zucchini; they should retain a bit of crunch.
- Tip: Enhance the dish with a sprinkle of red pepper flakes for a subtle heat.
Freshly tossed and vibrant, these zucchini noodles offer a crisp texture and a herby, garlicky punch. Serve them chilled for a refreshing summer lunch or warm as a cozy dinner side.
Egg Muffins with Spinach and Feta

Make your mornings effortless with these protein-packed egg muffins. They’re fluffy, flavorful, and ready in under 30 minutes.
Ingredients
- 6 pasture-raised eggs, lightly beaten
- 1 cup fresh spinach, finely chopped
- 1/2 cup feta cheese, crumbled
- 1/4 cup whole milk
- 1 tbsp clarified butter
- 1/2 tsp sea salt
- 1/4 tsp black pepper, freshly ground
Instructions
- Preheat your oven to 350°F (175°C) and grease a muffin tin with clarified butter.
- In a large bowl, whisk together the lightly beaten eggs, whole milk, sea salt, and black pepper until fully combined.
- Fold in the finely chopped spinach and crumbled feta cheese into the egg mixture.
- Evenly distribute the mixture into the prepared muffin tin, filling each cup about 3/4 full.
- Bake for 20-25 minutes, or until the egg muffins are set and the tops are lightly golden.
- Let the muffins cool in the tin for 5 minutes before transferring to a wire rack.
Delight in the creamy texture of feta paired with the earthy spinach. Serve these muffins warm with a drizzle of hot sauce or alongside a crisp arugula salad for a balanced breakfast.
Beef and Broccoli Stir Fry

Viral for a reason, this Beef and Broccoli Stir Fry packs a punch with its bold flavors and quick cook time. Perfect for weeknights, it’s a foolproof way to bring restaurant-quality to your table.
Ingredients
- 1 lb flank steak, thinly sliced against the grain
- 3 cups broccoli florets, blanched
- 2 tbsp clarified butter
- 3 cloves garlic, minced
- 1 tbsp ginger, freshly grated
- 1/4 cup soy sauce, low-sodium
- 2 tbsp oyster sauce
- 1 tbsp brown sugar
- 1 tsp sesame oil
- 1/2 cup beef broth, low-sodium
- 1 tbsp cornstarch
- 2 tbsp water
- 1/2 tsp red pepper flakes
- 2 tbsp scallions, thinly sliced for garnish
Instructions
- Heat clarified butter in a large wok or skillet over high heat until shimmering, about 1 minute.
- Add flank steak slices in a single layer, searing for 2 minutes per side until browned. Remove and set aside.
- In the same wok, add minced garlic and grated ginger, stir-frying for 30 seconds until fragrant.
- Pour in soy sauce, oyster sauce, brown sugar, sesame oil, and beef broth, bringing to a simmer for 2 minutes.
- Dissolve cornstarch in water, then stir into the sauce to thicken, cooking for an additional 1 minute.
- Return the beef to the wok, adding blanched broccoli florets and red pepper flakes, tossing to coat evenly for 2 minutes.
- Garnish with sliced scallions before serving.
Expect tender beef with crisp-tender broccoli in a glossy, umami-rich sauce. Serve over steamed jasmine rice or alongside a crisp Asian slaw for contrast.
Chicken Avocado Salad
Elevate your lunch game with this Chicken Avocado Salad—crisp, creamy, and packed with protein. Perfect for meal prep or a quick, nutritious bite.
Ingredients
- 2 cups shredded, free-range chicken breast
- 1 ripe Hass avocado, diced
- 1/4 cup Greek yogurt, full-fat
- 1 tbsp fresh lime juice
- 1/2 tsp smoked paprika
- 1/4 cup finely diced red onion
- 1/4 cup chopped cilantro
- Sea salt, to precise taste
Instructions
- In a large mixing bowl, combine the shredded chicken breast and diced avocado gently to avoid mashing the avocado.
- Add the Greek yogurt, fresh lime juice, and smoked paprika to the bowl. Mix until the ingredients are evenly coated.
- Fold in the finely diced red onion and chopped cilantro, distributing them uniformly throughout the salad.
- Season with sea salt, starting with 1/4 tsp and adjusting based on preference, mixing well after each addition.
- Chill the salad in the refrigerator for at least 30 minutes to allow the flavors to meld together.
Make this Chicken Avocado Salad the star of your next meal with its lush texture and smoky, tangy flavors. Serve it atop toasted sourdough or wrapped in butter lettuce leaves for a low-carb option.
Turkey and Cheese Roll-Ups

Transform your snack game with these Turkey and Cheese Roll-Ups—quick, flavorful, and endlessly customizable.
Ingredients
- 4 large flour tortillas (10-inch diameter)
- 1/2 cup cream cheese, softened
- 1 tbsp Dijon mustard
- 8 slices smoked turkey breast (about 1/2 lb)
- 1 cup sharp cheddar cheese, shredded
- 1/2 cup baby arugula
- 1/4 cup sun-dried tomatoes in oil, drained and finely chopped
Instructions
- Lay out the flour tortillas on a clean, flat surface.
- In a small bowl, mix the softened cream cheese and Dijon mustard until smooth. Tip: For extra flavor, add a pinch of smoked paprika to the cream cheese mixture.
- Spread an even layer of the cream cheese mixture over each tortilla, leaving a 1-inch border around the edges.
- Layer 2 slices of smoked turkey breast on top of the cream cheese mixture for each tortilla.
- Sprinkle shredded sharp cheddar cheese evenly over the turkey.
- Scatter baby arugula and chopped sun-dried tomatoes over the cheese. Tip: For a crunchier texture, add thinly sliced cucumber.
- Starting at one end, tightly roll each tortilla into a log. Tip: If the tortillas crack, warm them slightly in the microwave for 10 seconds to make them more pliable.
- Wrap each roll-up in plastic wrap and refrigerate for at least 30 minutes to set.
- Remove from the refrigerator, unwrap, and slice each roll-up into 1-inch pieces with a sharp knife.
Makes for a perfect grab-and-go snack with a satisfying contrast of creamy, tangy, and smoky flavors. Serve these roll-ups on a platter with a side of spicy mayo for dipping, or pack them in a lunchbox for a protein-packed midday treat.
Shrimp and Cauliflower Grits
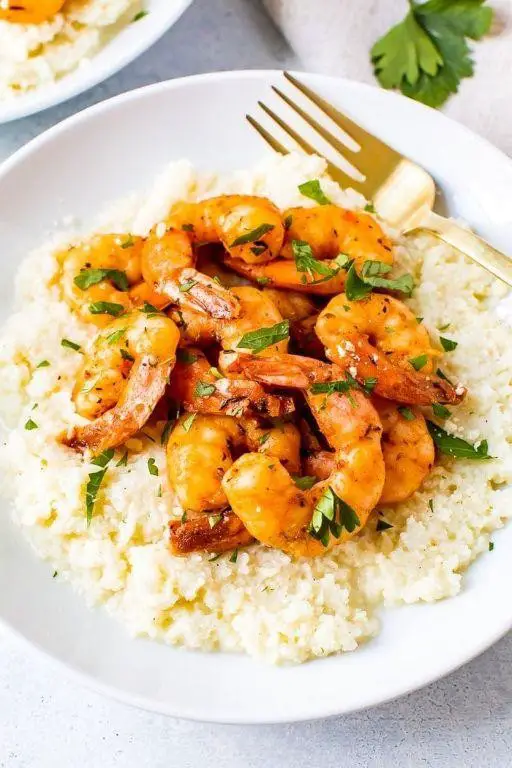
Savory meets creamy in this low-carb twist on a Southern classic. Shrimp and Cauliflower Grits swap traditional corn for riced cauliflower, simmered in rich, garlic-infused broth until tender.
Ingredients
- 1 lb wild-caught shrimp, peeled and deveined
- 1 large head cauliflower, riced (about 4 cups)
- 2 cups unsalted chicken stock
- 1/2 cup heavy cream
- 2 tbsp clarified butter
- 1 tbsp extra-virgin olive oil
- 3 cloves garlic, minced
- 1 tsp smoked paprika
- 1/2 tsp cayenne pepper
- 1/4 cup sharp cheddar cheese, grated
- Salt and freshly ground black pepper, to season
Instructions
- Heat olive oil in a large skillet over medium-high heat. Add shrimp, season with salt, black pepper, and smoked paprika. Sear for 2 minutes per side until pink. Remove and set aside.
- In the same skillet, melt clarified butter. Add minced garlic and sauté for 30 seconds until fragrant.
- Stir in riced cauliflower and chicken stock. Bring to a simmer, then reduce heat to low. Cover and cook for 10 minutes, stirring occasionally, until cauliflower is tender.
- Uncover, increase heat to medium. Add heavy cream, cayenne pepper, and cheddar cheese. Stir continuously for 3 minutes until mixture thickens.
- Return shrimp to the skillet. Gently fold into the cauliflower grits and heat through for 1 minute.
Fluffy cauliflower grits soak up the smoky, spicy flavors, while plump shrimp add a succulent bite. Serve in shallow bowls with a sprinkle of fresh chives for a pop of color.
Pork Chops with Garlic Butter Green Beans
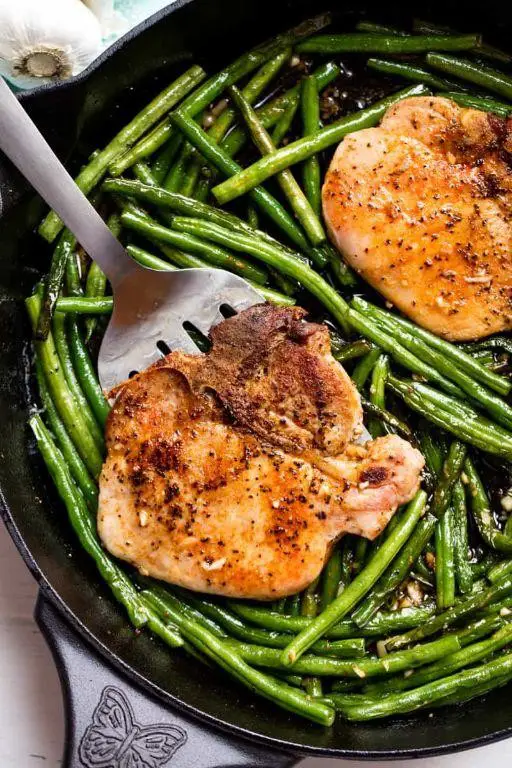
Dig into this no-fuss, flavor-packed dish that’s weeknight easy but weekend special. **Seared pork chops** meet **garlic butter green beans** for a meal that’s all about bold flavors and crisp textures.
Ingredients
- 4 bone-in, pasture-raised pork chops (1-inch thick)
- 1 lb fresh haricot verts, trimmed
- 3 tbsp unsalted European-style butter
- 4 garlic cloves, minced
- 1 tbsp extra-virgin olive oil
- 1/2 tsp kosher salt
- 1/4 tsp freshly ground black pepper
- 1/4 tsp smoked paprika
Instructions
- Preheat a large cast-iron skillet over medium-high heat until a drop of water sizzles upon contact, about 2 minutes.
- Season pork chops evenly with kosher salt, black pepper, and smoked paprika.
- Add olive oil to the skillet, then place pork chops in the skillet. Sear for 4 minutes per side, or until a golden crust forms and internal temperature reaches 145°F.
- Transfer pork chops to a plate; tent loosely with foil to rest.
- In the same skillet, melt butter over medium heat. Add minced garlic; sauté until fragrant, about 30 seconds.
- Add haricot verts to the skillet; toss to coat in garlic butter. Cook for 5 minutes, stirring occasionally, until beans are crisp-tender.
- Return pork chops to the skillet; spoon garlic butter green beans over the top. Serve immediately.
**Tip:** For extra flavor, deglaze the skillet with a splash of white wine before adding the butter. **Tip:** Let pork chops rest for 5 minutes after cooking to retain juices. **Tip:** Use tongs to flip pork chops for even searing.
Lusciously juicy pork chops pair with crisp-tender green beans in a rich garlic butter sauce. Try serving over a bed of creamy polenta for a comforting twist.
Salmon with Asparagus
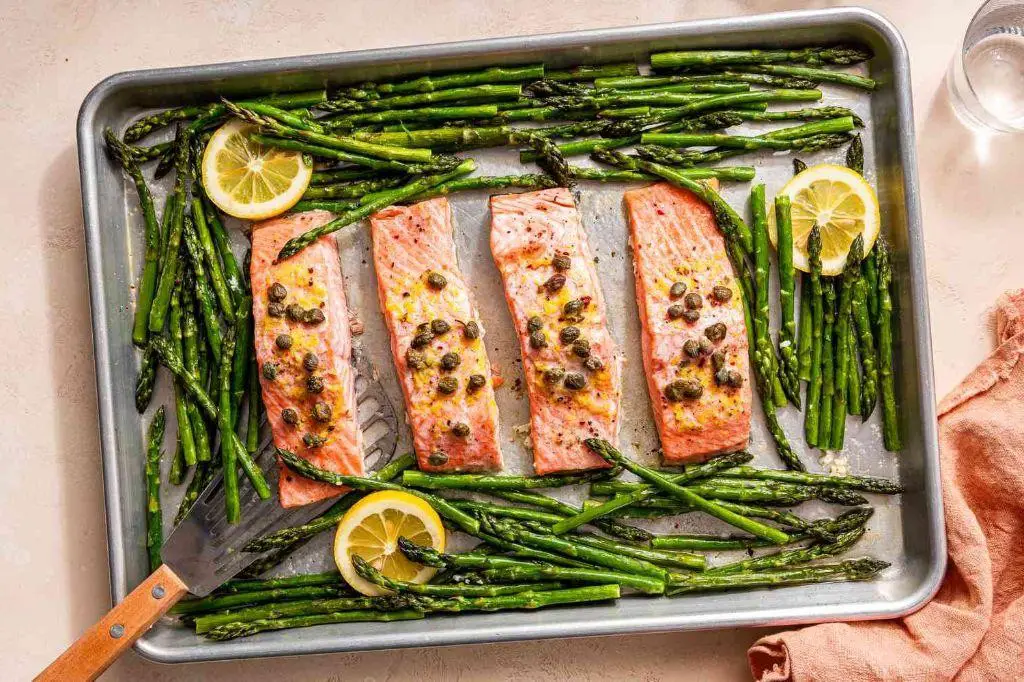
Viral in kitchens across the country, this salmon with asparagus dish **marries** simplicity with elegance. **Seared** to perfection, the salmon **flakes** effortlessly, while the asparagus **sings** with a crisp-tender bite.
Ingredients
- 1 lb wild-caught salmon fillet, skin-on
- 1 bunch fresh asparagus, trimmed
- 2 tbsp clarified butter
- 1 tbsp extra virgin olive oil
- 1 tsp sea salt
- 1/2 tsp freshly ground black pepper
- 1 lemon, zested and juiced
- 2 cloves garlic, minced
Instructions
- Preheat your oven to 400°F (204°C) and line a baking sheet with parchment paper.
- Season the salmon fillet with sea salt and black pepper on both sides.
- Heat clarified butter in a large skillet over medium-high heat until shimmering.
- Place the salmon skin-side down in the skillet; sear for 3-4 minutes until the skin is crispy.
- Flip the salmon and sear the other side for 2 minutes, then transfer to the prepared baking sheet.
- In the same skillet, add olive oil and sauté minced garlic until fragrant, about 30 seconds.
- Add trimmed asparagus to the skillet, tossing to coat in the garlic oil, and sauté for 2 minutes.
- Arrange the asparagus around the salmon on the baking sheet, drizzle with lemon juice, and sprinkle with lemon zest.
- Roast in the preheated oven for 8-10 minutes, until the salmon is cooked through and the asparagus is tender.
- Remove from the oven and let rest for 2 minutes before serving.
Zesty and vibrant, this dish **boasts** a buttery salmon with a crisp exterior, paired with garlicky asparagus that’s **bursting** with freshness. **Serve** it over a bed of quinoa or with a side of roasted baby potatoes for a complete meal.
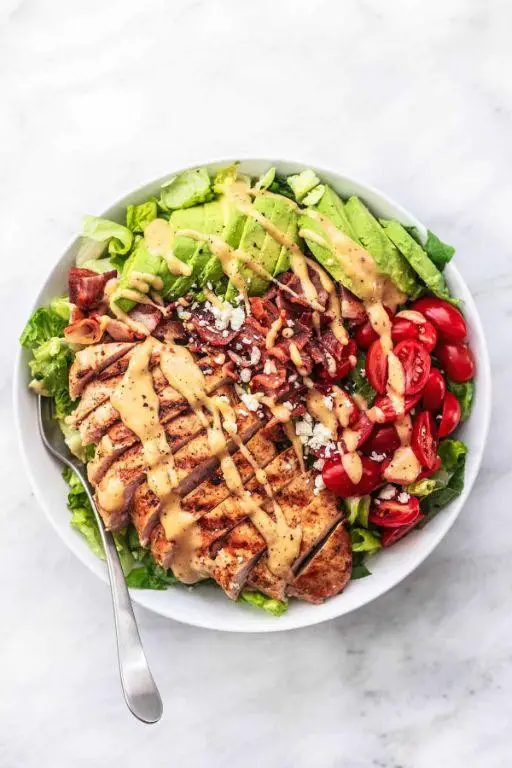
Low Carb Taco Salad
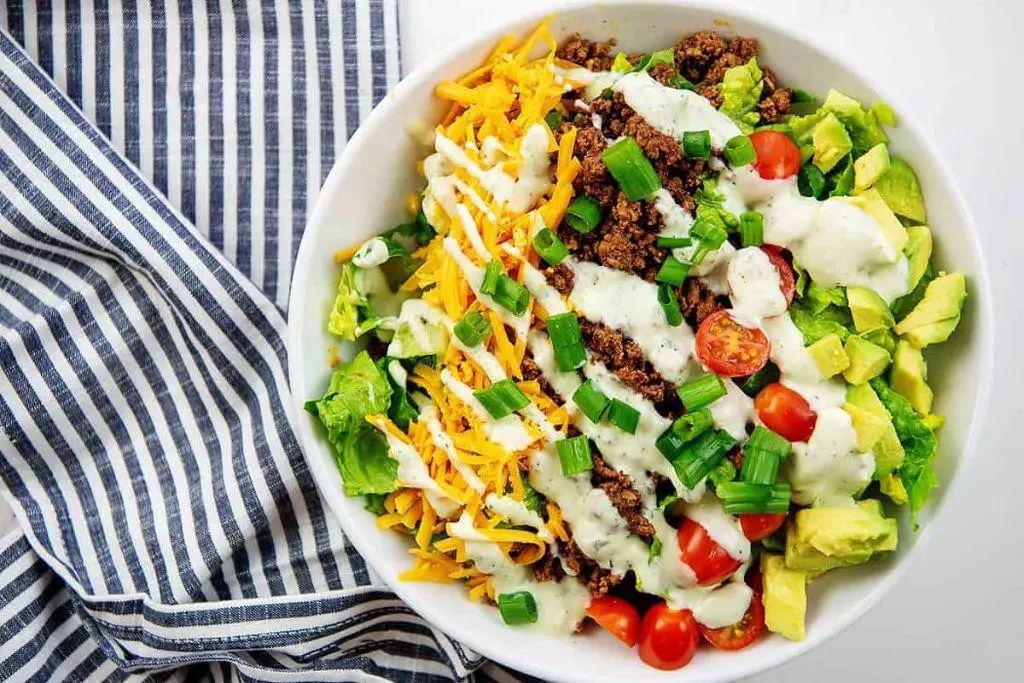
Need a meal that’s as fun to make as it is to eat? This low carb taco salad **delivers** bold flavors and crisp textures without the guilt. Perfect for meal prep or a quick dinner fix.
Ingredients
- 1 lb ground beef, 85% lean
- 1 tbsp avocado oil
- 1 tbsp taco seasoning, no sugar added
- 1 cup romaine lettuce, finely chopped
- 1/2 cup cherry tomatoes, quartered
- 1/4 cup red onion, thinly sliced
- 1/4 cup cheddar cheese, shredded
- 1/4 cup sour cream
- 1/4 cup guacamole
- 1 tbsp fresh cilantro, chopped
- 1 lime, cut into wedges
Instructions
- Heat avocado oil in a large skillet over medium-high heat until shimmering, about 1 minute.
- Add ground beef to the skillet, breaking it apart with a wooden spoon. Cook until no pink remains, about 5-7 minutes.
- Sprinkle taco seasoning over the beef, stirring to coat evenly. Cook for an additional 1 minute to bloom the spices.
- Remove skillet from heat and let the beef rest for 2 minutes to absorb flavors.
- In a large bowl, layer romaine lettuce, seasoned beef, cherry tomatoes, red onion, and cheddar cheese.
- Dollop sour cream and guacamole over the salad, then garnish with fresh cilantro.
- Serve immediately with lime wedges on the side for squeezing.
This salad **boasts** a crunchy, creamy, and zesty profile that’s irresistibly fresh. Try serving it in a hollowed-out bell pepper for a fun, edible bowl twist.
Spaghetti Squash with Marinara Sauce
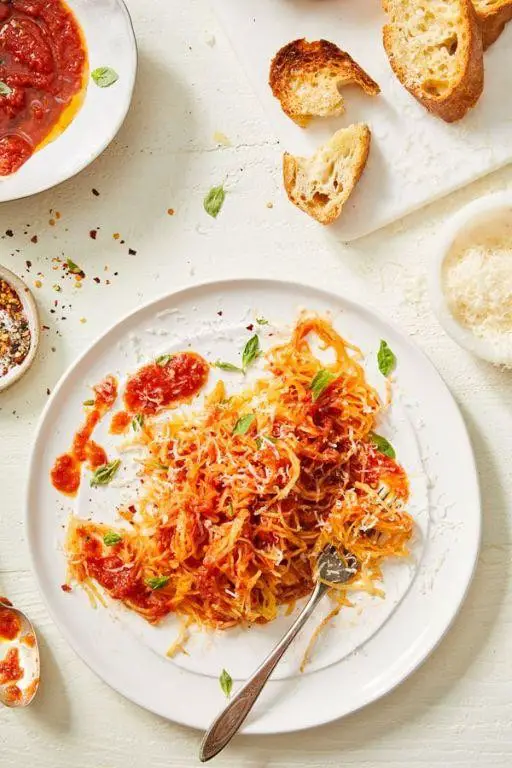
Just when you thought spaghetti couldn’t get healthier, spaghetti squash waltzes in. Roast it, shred it, drown it in marinara—boom, guilt-free pasta night.
Ingredients
- 1 medium spaghetti squash, halved lengthwise and seeds removed
- 2 tbsp extra-virgin olive oil
- 1/2 tsp kosher salt
- 1/4 tsp freshly ground black pepper
- 2 cups marinara sauce, preferably homemade
- 1/4 cup freshly grated Parmigiano-Reggiano
- 2 tbsp chopped fresh basil
Instructions
- Preheat oven to 400°F. Line a baking sheet with parchment paper.
- Brush the cut sides of the spaghetti squash with olive oil and season with salt and pepper.
- Place the squash cut-side down on the prepared baking sheet. Roast for 40 minutes, or until the flesh is easily pierced with a fork.
- Let the squash cool for 5 minutes. Use a fork to scrape the flesh into strands.
- In a medium saucepan, warm the marinara sauce over low heat for 5 minutes, stirring occasionally.
- Divide the spaghetti squash strands among plates. Top with warm marinara sauce, Parmigiano-Reggiano, and fresh basil.
Buttery strands of squash mimic pasta’s allure, while the marinara clings with a savory embrace. Serve it with a crisp white wine for a dinner that’s effortlessly chic.
Chicken Caesar Salad Wraps
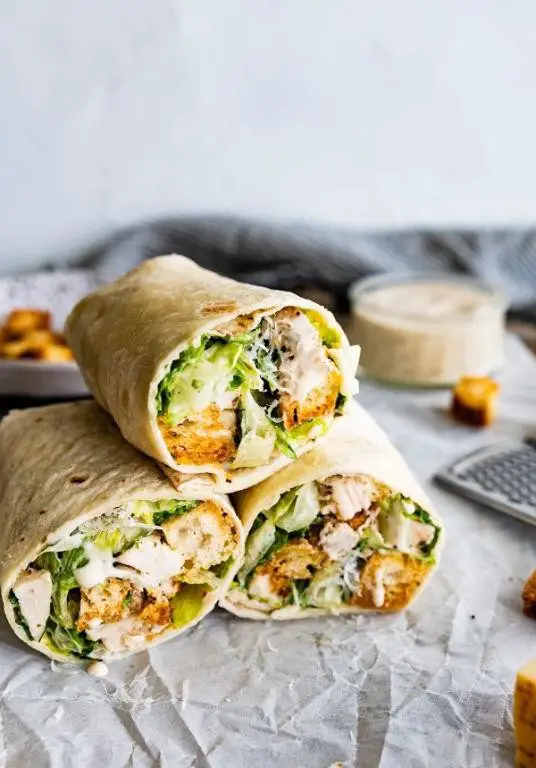
Forget the fork—these Chicken Caesar Salad Wraps are your new grab-and-go obsession. Packed with crisp romaine, juicy chicken, and a creamy dressing, they’re a lunchtime game-changer.
Ingredients
- 2 boneless, skinless chicken breasts, grilled and sliced
- 1 cup romaine lettuce, finely chopped
- 1/2 cup Parmesan cheese, freshly grated
- 1/4 cup Caesar dressing, homemade or premium store-bought
- 4 large flour tortillas, warmed
- 1 tbsp extra-virgin olive oil
- 1 tsp garlic powder
- 1/2 tsp sea salt
- 1/4 tsp black pepper, freshly ground
Instructions
- Preheat a grill or grill pan to medium-high heat (375°F). Brush chicken breasts with olive oil and season with garlic powder, sea salt, and black pepper.
- Grill chicken for 6-7 minutes per side, or until internal temperature reaches 165°F. Let rest for 5 minutes before slicing.
- In a large bowl, combine romaine lettuce, Parmesan cheese, and Caesar dressing. Toss until evenly coated.
- Divide the salad mixture evenly among the warmed tortillas, placing it in the center of each.
- Top each tortilla with sliced grilled chicken.
- Fold the sides of the tortillas inward, then roll tightly from the bottom to encase the filling.
- Slice each wrap diagonally for a professional presentation, or leave whole for a handheld option.
Unwrap the flavors of summer with every bite—these wraps boast a crunch from the romaine, a punch from the Parmesan, and a smooth finish from the dressing. Serve them with a side of sweet potato fries for a contrast in textures, or pack them for a picnic to enjoy al fresco.
Bacon and Egg Breakfast Bowls
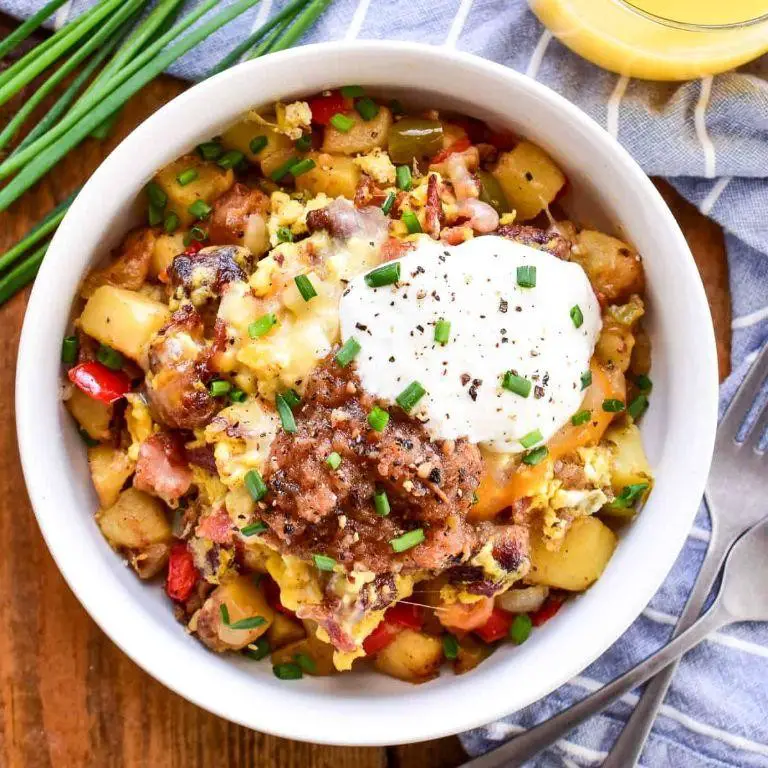
Let’s dive into a breakfast that’s as easy as it is delicious—Bacon and Egg Breakfast Bowls. Crispy, savory, and ready in minutes, this dish is your morning game-changer.
Ingredients
- 4 slices thick-cut bacon, diced
- 1 tbsp clarified butter
- 4 pasture-raised eggs, lightly beaten
- 1/2 cup sharp cheddar cheese, shredded
- 1/4 cup green onions, finely sliced
- 1/2 tsp sea salt
- 1/4 tsp freshly ground black pepper
Instructions
- Preheat a skillet over medium heat. Add diced bacon and cook until crispy, about 5 minutes. Transfer to a paper towel-lined plate.
- In the same skillet, melt clarified butter over medium heat. Pour in lightly beaten eggs and let sit for 30 seconds without stirring.
- Gently scramble the eggs with a spatula, folding them over until just set, about 2 minutes. Tip: For fluffier eggs, resist over-stirring.
- Season eggs with sea salt and freshly ground black pepper. Remove from heat.
- Divide scrambled eggs into bowls. Top with crispy bacon, shredded sharp cheddar cheese, and finely sliced green onions.
- Serve immediately. Tip: For a spicy kick, add a dash of hot sauce or a sprinkle of crushed red pepper flakes before serving.
Golden and gooey, these bowls are a texture dream with creamy eggs, crunchy bacon, and melty cheese. Try serving them with a side of toasted sourdough for the ultimate breakfast experience.
Grilled Chicken with Roasted Brussels Sprouts
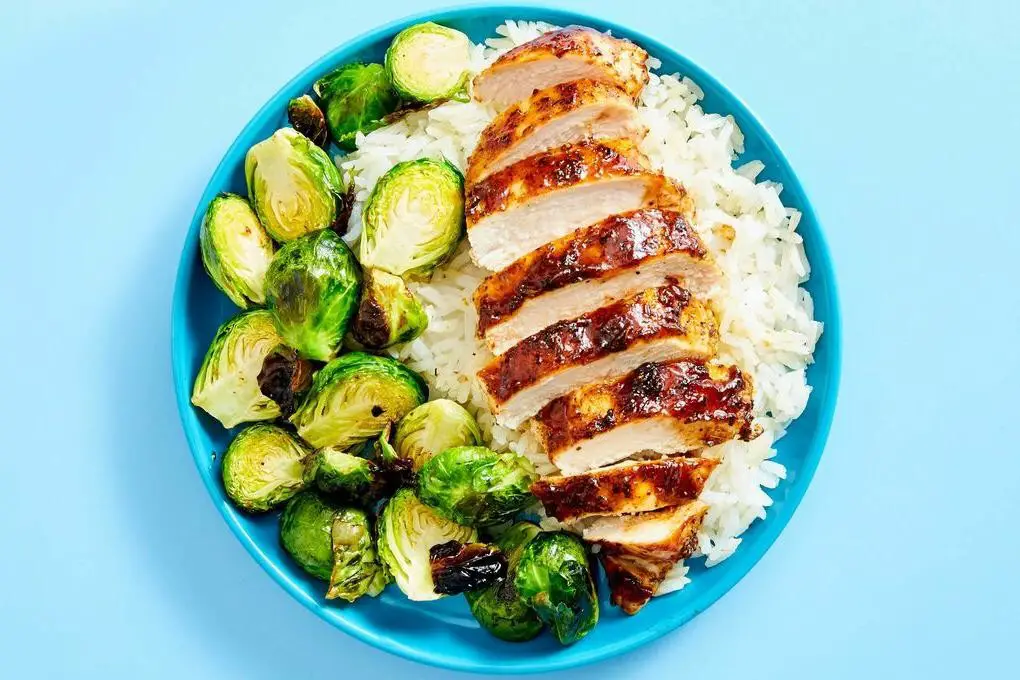
Make your weeknight dinners unforgettable with this **Grilled Chicken with Roasted Brussels Sprouts**—juicy, charred, and packed with flavor.
Ingredients
- 4 boneless, skinless chicken breasts, pasture-raised
- 1 lb Brussels sprouts, trimmed and halved
- 3 tbsp extra-virgin olive oil
- 2 tbsp clarified butter
- 1 tsp smoked paprika
- 1 tsp garlic powder
- 1/2 tsp sea salt
- 1/4 tsp freshly ground black pepper
Instructions
- Preheat your grill to medium-high heat (375°F) and your oven to 400°F.
- In a large bowl, toss Brussels sprouts with 2 tbsp olive oil, sea salt, and black pepper until evenly coated.
- Spread Brussels sprouts on a baking sheet in a single layer. Roast for 20 minutes, flipping halfway, until caramelized and tender.
- Meanwhile, rub chicken breasts with remaining olive oil, smoked paprika, and garlic powder.
- Grill chicken for 6-7 minutes per side, or until internal temperature reaches 165°F.
- During the last 2 minutes of grilling, brush chicken with clarified butter for a golden finish.
- Remove chicken from grill and let rest for 5 minutes before slicing.
Flavorful and satisfying, the smoky chicken pairs perfectly with the sweet, crispy Brussels sprouts. Serve atop a bed of quinoa for a complete meal, or slice the chicken for a hearty salad topping.
Low Carb Pizza with Almond Flour Crust

Zesty and bold, this low-carb pizza flips the script on traditional dough with an almond flour crust that’s crispy, golden, and utterly addictive. Dive into a guilt-free slice that packs all the flavor without the carbs.
Ingredients
- 1 1/2 cups finely ground almond flour
- 1/4 cup grated Parmesan cheese
- 1 tsp xanthan gum
- 1 large pasture-raised egg, lightly beaten
- 2 tbsp extra virgin olive oil
- 1/2 tsp sea salt
- 1/2 cup sugar-free marinara sauce
- 1 cup shredded mozzarella cheese
- 10 slices pepperoni
- 1/4 cup fresh basil leaves, thinly sliced
Instructions
- Preheat your oven to 375°F and line a baking sheet with parchment paper.
- In a mixing bowl, combine almond flour, Parmesan cheese, xanthan gum, and sea salt until well blended.
- Add the lightly beaten egg and olive oil to the dry ingredients, stirring until a dough forms. Tip: If the dough is too sticky, let it rest for 5 minutes to firm up.
- Transfer the dough to the prepared baking sheet and press into a 10-inch circle, about 1/4-inch thick. Tip: Use a second piece of parchment paper on top to prevent sticking while pressing.
- Bake the crust for 12-15 minutes, or until golden and firm to the touch.
- Spread marinara sauce evenly over the baked crust, leaving a small border for the edges.
- Sprinkle mozzarella cheese over the sauce and arrange pepperoni slices on top.
- Return the pizza to the oven and bake for an additional 8-10 minutes, or until the cheese is bubbly and slightly browned.
- Remove from the oven and let cool for 2 minutes before slicing. Tip: For extra crispiness, place the pizza under the broiler for the last 1-2 minutes of baking.
- Garnish with fresh basil before serving.
Just out of the oven, this pizza boasts a crust that’s delightfully crisp with a nutty undertone, while the toppings meld into a gooey, savory masterpiece. Try serving it with a side of garlic-infused olive oil for dipping, or top with arugula for a peppery contrast.
Steak and Mushroom Kebabs
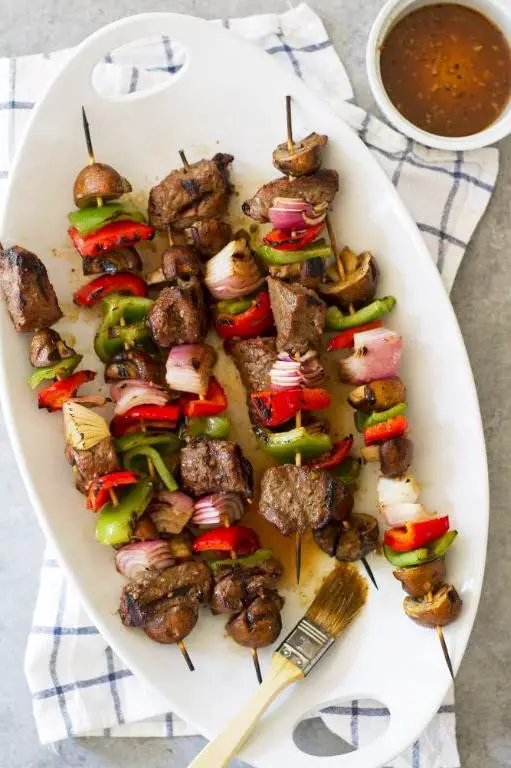
Absolutely no one can resist the smoky, savory allure of Steak and Mushroom Kebabs—**juicy**, **flavor-packed**, and **grill-ready** in minutes.
Ingredients
- 1.5 lbs ribeye steak, cut into 1.5-inch cubes
- 8 oz cremini mushrooms, stems removed
- 1/4 cup extra-virgin olive oil
- 2 tbsp balsamic glaze
- 1 tbsp fresh rosemary, finely chopped
- 1 tsp kosher salt
- 1/2 tsp freshly ground black pepper
- 4 metal or bamboo skewers (if using bamboo, soak in water for 30 minutes prior)
Instructions
- **Preheat** your grill to medium-high heat (450°F).
- **Thread** the steak cubes and mushrooms alternately onto the skewers, leaving a small space between each piece for even cooking.
- **Whisk** together the olive oil, balsamic glaze, rosemary, salt, and pepper in a small bowl. **Brush** this mixture generously over the assembled kebabs.
- **Place** the kebabs on the grill. **Cook** for 4 minutes per side for medium-rare, or until the internal temperature reaches 135°F for medium-rare, 145°F for medium.
- **Remove** the kebabs from the grill and **let rest** for 5 minutes before serving to allow the juices to redistribute.
**Tip 1:** For extra tenderness, marinate the steak cubes in the olive oil mixture for up to 2 hours before grilling.
**Tip 2:** Keep a spray bottle of water handy to tame any flare-ups from the olive oil.
**Tip 3:** Use a meat thermometer to ensure perfect doneness without overcooking.
Kebabs come off the grill with a **caramelized crust** and **tender interior**, the mushrooms soaking up all the rich, herby flavors. Serve over a bed of wild rice or with a crisp arugula salad for a meal that’s as beautiful as it is delicious.
Coconut Flour Pancakes

Start your morning with a twist—these coconut flour pancakes are a game-changer for your breakfast routine. Light, fluffy, and packed with flavor, they’re the perfect way to shake up your pancake game.
Ingredients
- 1/2 cup coconut flour, sifted
- 4 pasture-raised eggs, lightly beaten
- 1 cup almond milk, unsweetened
- 2 tbsp clarified butter, melted
- 1 tsp pure vanilla extract
- 1/2 tsp baking soda
- 1/4 tsp sea salt
- 1 tbsp raw honey
Instructions
- In a large mixing bowl, whisk together the sifted coconut flour, baking soda, and sea salt until fully combined.
- Add the lightly beaten eggs, almond milk, melted clarified butter, pure vanilla extract, and raw honey to the dry ingredients. Whisk vigorously for 2 minutes until the batter is smooth and free of lumps. Tip: Let the batter sit for 5 minutes to thicken—it helps achieve the perfect pancake texture.
- Heat a non-stick skillet over medium-low heat (300°F) and lightly grease with clarified butter.
- Pour 1/4 cup of batter onto the skillet for each pancake. Cook for 2-3 minutes until bubbles form on the surface and the edges look set. Tip: Keep the heat low to prevent burning—coconut flour browns quickly.
- Flip the pancakes carefully and cook for an additional 1-2 minutes on the other side until golden brown. Tip: Use a thin spatula for flipping to keep the delicate pancakes intact.
- Transfer to a plate and repeat with the remaining batter, greasing the skillet as needed.
These pancakes boast a subtly sweet, nutty flavor with a tender, airy texture. Serve them stacked high with a drizzle of maple syrup and a handful of fresh berries for a breakfast that feels indulgent yet wholesome.
Avocado and Egg Salad
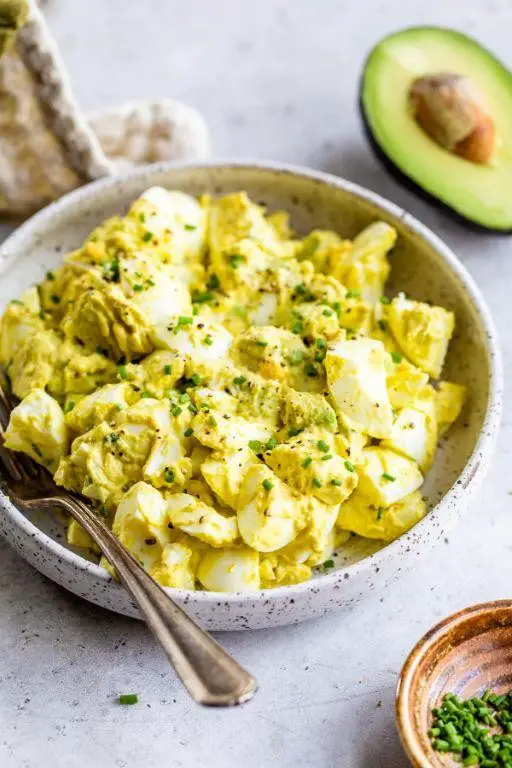
Zesty, creamy, and packed with protein, this Avocado and Egg Salad is your next go-to for a quick, nutritious meal. Mash, mix, and devour—it’s that simple.
Ingredients
- 2 ripe Hass avocados, halved and pitted
- 4 pasture-raised eggs, hard-boiled and peeled
- 1/4 cup Greek yogurt
- 1 tbsp Dijon mustard
- 1/2 tsp smoked paprika
- 1/4 cup finely chopped red onion
- 1 tbsp fresh lemon juice
- 1/4 tsp sea salt
- 1/4 tsp freshly ground black pepper
Instructions
- Place the eggs in a medium saucepan and cover with cold water by 1 inch. Bring to a boil over high heat, then cover and remove from heat. Let stand for 12 minutes.
- Transfer the eggs to a bowl of ice water to cool for 5 minutes. Peel under running water for easier removal.
- In a large bowl, scoop the avocado flesh and mash with a fork until smooth but slightly chunky.
- Chop the hard-boiled eggs into small pieces and add to the avocado.
- Stir in the Greek yogurt, Dijon mustard, smoked paprika, red onion, lemon juice, sea salt, and black pepper until well combined.
- Adjust seasoning with additional salt and pepper if needed, based on preference.
This salad boasts a creamy texture with a smoky, tangy kick from the paprika and mustard. Serve it on toasted sourdough for a hearty breakfast or stuff it into lettuce cups for a light lunch.
Conclusion
Savvy home cooks, this roundup is your golden ticket to stress-free, healthy weeknights! With 18 delicious low-carb recipes at your fingertips, meal prep has never been easier or tastier. We invite you to dive in, try these dishes, and find your new favorites. Don’t forget to share your thoughts in the comments and pin your top picks on Pinterest to spread the low-carb love. Happy cooking!

Michael Johnson is the founder of Pan Mastery, Inspired by his blacksmith grandfather’s legacy has a deep appreciation for hand-crafted pots and pans, he provides invaluable guides, reviews, and recipes to enhance your culinary journey.