Unlock the flavors of yesteryear with our collection of 18 Delicious Old Fashioned Homemade Recipes Traditional. Whether you’re craving the comfort of grandma’s kitchen or looking to bring timeless dishes to your modern table, these recipes are sure to delight. From hearty stews to sweet, buttery desserts, each dish tells a story. Ready to create memories? Let’s dive into these cherished classics together!
Grandma’s Homemade Apple Pie
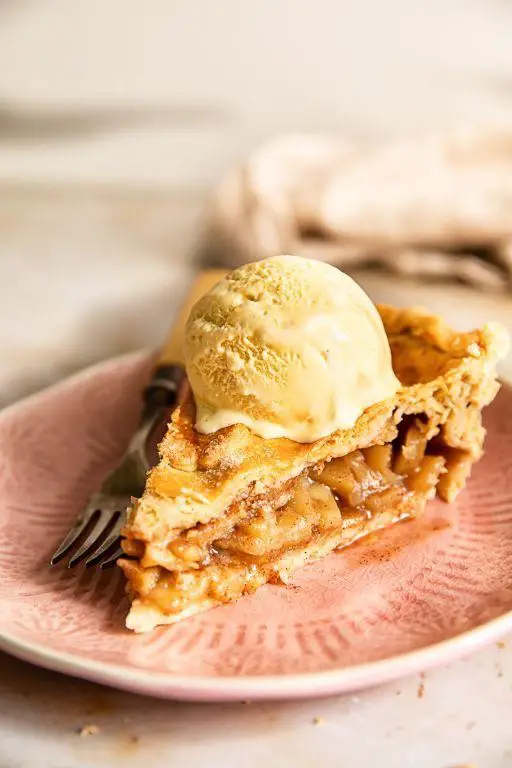
Just like the comforting embrace of a warm blanket on a chilly evening, Grandma’s Homemade Apple Pie brings warmth and joy to any table. This classic dessert, with its flaky crust and tender apple filling, is a testament to the love and care that goes into homemade baking.
Ingredients
- 2 1/2 cups all-purpose flour (I swear by King Arthur for consistent results)
- 1 cup unsalted butter, chilled and diced (European-style butter adds a richer flavor)
- 1/4 cup granulated sugar (a little extra never hurt)
- 1/2 tsp salt (fine sea salt dissolves more evenly)
- 6-8 medium apples, peeled and thinly sliced (a mix of Granny Smith and Honeycrisp gives the perfect balance of tart and sweet)
- 3/4 cup brown sugar (dark brown sugar for a deeper molasses flavor)
- 1 tbsp lemon juice (freshly squeezed makes all the difference)
- 2 tsp ground cinnamon (Saigon cinnamon has a more intense aroma)
- 1/4 tsp ground nutmeg (freshly grated nutmeg is worth the effort)
- 1 egg, beaten (room temperature eggs blend more smoothly)
Instructions
- In a large bowl, whisk together the flour, granulated sugar, and salt.
- Add the diced butter to the flour mixture. Using a pastry cutter or your fingers, work the butter into the flour until the mixture resembles coarse crumbs.
- Gradually add 6-8 tbsp of ice water, one tablespoon at a time, mixing until the dough just comes together. Tip: The dough should hold together when pinched but not be sticky.
- Divide the dough into two equal parts, flatten into disks, wrap in plastic, and refrigerate for at least 1 hour.
- Preheat your oven to 375°F (190°C) and place a rack in the middle position.
- In another bowl, combine the sliced apples, brown sugar, lemon juice, cinnamon, and nutmeg. Toss until the apples are evenly coated.
- Roll out one disk of dough on a floured surface to fit a 9-inch pie dish. Transfer the dough to the dish, trimming any excess.
- Fill the pie crust with the apple mixture, mounding slightly in the center.
- Roll out the second disk of dough and place it over the filling. Trim, seal, and crimp the edges. Cut a few slits in the top crust to vent.
- Brush the top crust with the beaten egg for a golden finish.
- Bake for 50-60 minutes, or until the crust is golden brown and the filling is bubbly. Tip: Place a baking sheet underneath to catch any drips.
- Allow the pie to cool on a wire rack for at least 2 hours before serving. Tip: This patience ensures the filling sets properly.
Every bite of this pie offers a harmonious blend of textures—from the crisp, buttery crust to the soft, spiced apples. Serve it warm with a scoop of vanilla ice cream for a delightful contrast, or enjoy a slice with a sharp cheddar cheese for a traditional twist.
Classic Homemade Bread
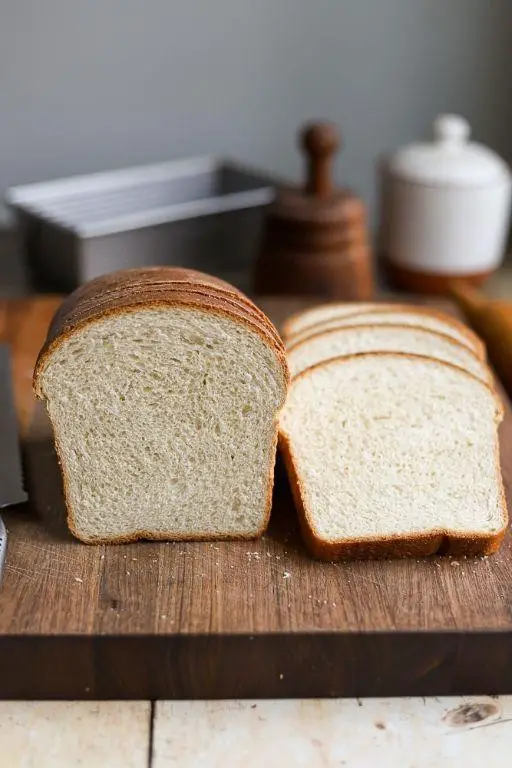
Baking your own bread at home is a rewarding experience that fills your kitchen with an irresistible aroma. This classic homemade bread recipe is perfect for beginners, offering a straightforward path to delicious, crusty-on-the-outside, soft-on-the-inside loaves.
Ingredients
- 4 cups all-purpose flour (I like to use King Arthur for its consistent quality)
- 1 1/2 cups warm water (around 110°F, just warm to the touch)
- 2 1/4 tsp active dry yeast (one packet, check the expiration date for best results)
- 1 tbsp granulated sugar (helps feed the yeast)
- 1 tbsp extra virgin olive oil (my go-to for its fruity notes)
- 1 1/2 tsp salt (I prefer sea salt for its subtle minerality)
Instructions
- In a large mixing bowl, dissolve the sugar in warm water, then sprinkle the yeast on top. Let it sit for 5-10 minutes until frothy. Tip: This ‘proofing’ step ensures your yeast is active.
- Stir in the olive oil and salt into the yeast mixture.
- Gradually add the flour, one cup at a time, stirring with a wooden spoon until a shaggy dough forms. Tip: Don’t rush this step; adding flour gradually helps achieve the right texture.
- Turn the dough onto a floured surface and knead for about 10 minutes until smooth and elastic. Tip: If the dough sticks to your hands, add a little more flour, but sparingly to keep the bread tender.
- Place the dough in a greased bowl, cover with a damp towel, and let rise in a warm place for 1 hour or until doubled in size.
- Punch down the dough, shape it into a loaf, and place it in a greased 9×5 inch loaf pan. Cover and let rise for another 30 minutes.
- Preheat your oven to 375°F. Bake the bread for 30-35 minutes until golden brown and sounds hollow when tapped.
Serve this bread warm with a smear of butter or use it to make the ultimate grilled cheese sandwich. The crust is perfectly crisp, while the inside remains soft and airy, making every bite a delight.
Old Fashioned Beef Stew

Every home cook should have a reliable beef stew recipe in their arsenal, and this Old Fashioned Beef Stew is a comforting classic that never disappoints. Let’s walk through the process together, ensuring you end up with a rich, flavorful stew that’s perfect for any chilly evening.
Ingredients
- 2 lbs beef chuck, cut into 1-inch pieces (I find chuck offers the perfect balance of flavor and tenderness.)
- 3 tbsp extra virgin olive oil (My go-to for its fruity notes.)
- 1 large onion, diced (Yellow onions work best for their sweetness.)
- 3 carrots, peeled and sliced into 1/2-inch rounds (Don’t skip peeling; it makes a difference.)
- 3 celery stalks, sliced (Adds a nice crunch and freshness.)
- 3 cloves garlic, minced (Freshly minced garlic beats pre-mined any day.)
- 4 cups beef broth (Homemade if you have it, but store-bought is fine.)
- 2 tbsp tomato paste (Adds depth and a slight sweetness.)
- 1 tsp dried thyme (I prefer thyme for its earthy flavor.)
- 2 bay leaves (Don’t forget to remove them before serving!)
- Salt and pepper to taste (Season as you go for the best flavor.)
Instructions
- Heat the olive oil in a large Dutch oven over medium-high heat until shimmering, about 2 minutes.
- Add the beef pieces in a single layer, working in batches if necessary to avoid overcrowding, and brown on all sides, about 5 minutes per batch. Tip: Don’t rush the browning; it’s key for flavor.
- Remove the beef with a slotted spoon and set aside. In the same pot, add the onion, carrots, and celery. Cook until the vegetables are softened, about 5 minutes.
- Stir in the garlic and cook until fragrant, about 30 seconds. Tip: Garlic burns easily, so keep an eye on it.
- Return the beef to the pot. Add the beef broth, tomato paste, thyme, and bay leaves. Stir to combine.
- Bring the mixture to a boil, then reduce the heat to low. Cover and simmer for 1.5 to 2 hours, until the beef is tender. Tip: Check occasionally and skim off any excess fat.
- Season with salt and pepper to taste. Remove the bay leaves before serving.
Goodness comes in many forms, and this stew is a testament to that with its tender beef and hearty vegetables swimming in a rich, savory broth. Serve it with a slice of crusty bread to soak up every last drop, or over a bed of mashed potatoes for an extra comforting meal.
Homemade Chicken Pot Pie
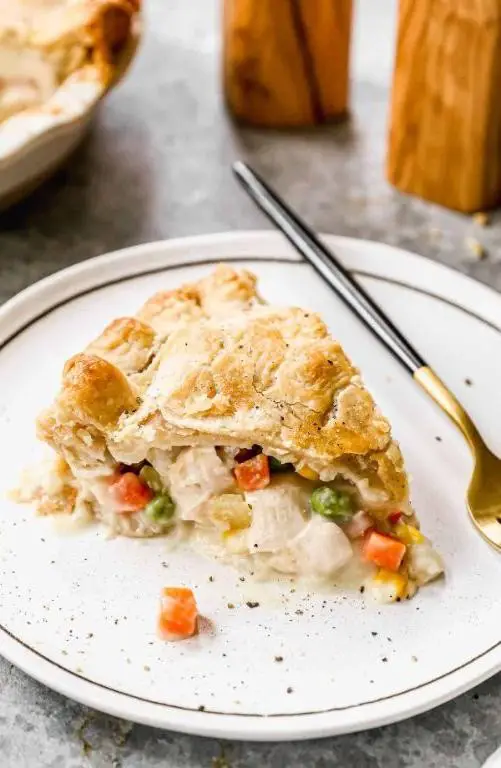
Kickstart your comfort food journey with this Homemade Chicken Pot Pie, a classic dish that combines tender chicken, vibrant vegetables, and a creamy sauce, all encased in a flaky, golden crust. Perfect for beginners, this recipe walks you through each step to ensure a delicious outcome.
Ingredients
- 2 cups all-purpose flour (I like to sift mine for a lighter crust)
- 1/2 cup unsalted butter, chilled and cubed (extra cold butter makes the crust flakier)
- 1/2 teaspoon salt (a pinch more if you prefer a savory crust)
- 1/4 cup ice water (just enough to bring the dough together)
- 1 lb chicken breast, diced (I find thigh meat adds more flavor)
- 1 cup carrots, diced (for a sweet crunch)
- 1 cup peas (frozen works perfectly here)
- 1/2 cup celery, chopped (adds a nice texture)
- 1/4 cup unsalted butter (for the filling)
- 1/3 cup all-purpose flour (to thicken the sauce)
- 1 3/4 cups chicken broth (homemade broth elevates the flavor)
- 2/3 cup milk (whole milk makes the sauce richer)
- 1 teaspoon salt (adjust according to your taste)
- 1/2 teaspoon black pepper (freshly ground is best)
Instructions
- Preheat your oven to 425°F (220°C) to ensure it’s hot enough for the crust to bake properly.
- In a large bowl, combine 2 cups flour and 1/2 teaspoon salt. Add 1/2 cup cubed butter, using your fingers to mix until the mixture resembles coarse crumbs.
- Gradually add 1/4 cup ice water, stirring until the dough comes together. Wrap in plastic and chill for 30 minutes. Tip: Chilling the dough prevents shrinkage during baking.
- While the dough chills, melt 1/4 cup butter in a large skillet over medium heat. Add diced chicken, cooking until no longer pink, about 5-7 minutes. Remove and set aside.
- In the same skillet, add carrots, peas, and celery, cooking for 5 minutes until slightly softened.
- Sprinkle 1/3 cup flour over the vegetables, stirring to coat. Gradually whisk in chicken broth and milk, bringing to a simmer until the sauce thickens, about 5 minutes. Tip: Constant stirring prevents lumps in your sauce.
- Return the chicken to the skillet, seasoning with 1 teaspoon salt and 1/2 teaspoon pepper. Remove from heat.
- Roll out the chilled dough on a floured surface to fit your pie dish. Pour the filling into the dish, covering with the dough. Crimp edges to seal and cut slits on top.
- Bake for 30-35 minutes, until the crust is golden and the filling is bubbly. Tip: Place a baking sheet underneath to catch any spills.
Yield a pie with a perfectly flaky crust and a creamy, savory filling that’s bursting with flavors. Serve it with a side of crisp green salad for a balanced meal.
Traditional Homemade Pancakes
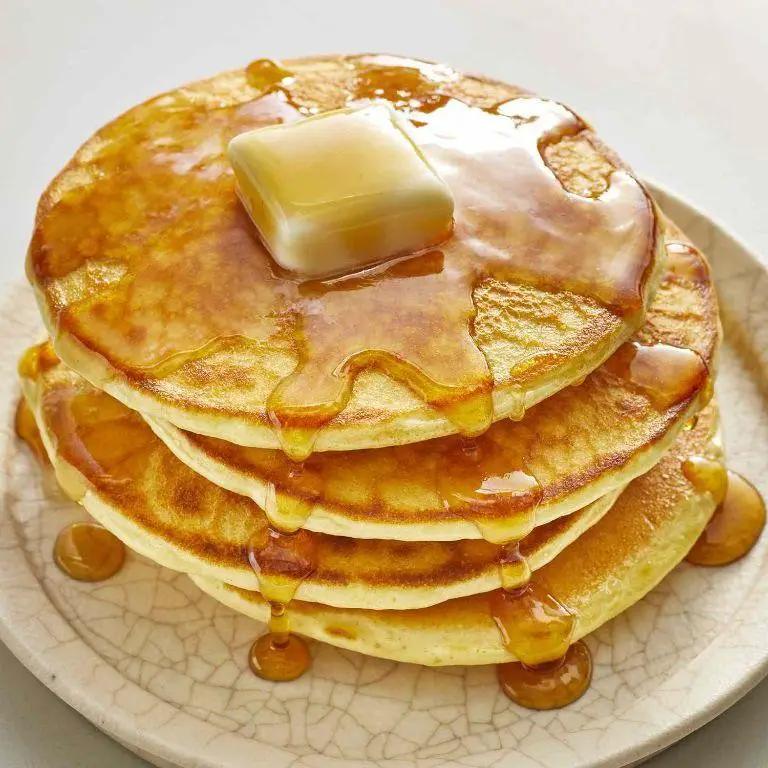
Zesty mornings call for something special, and nothing beats the comfort of traditional homemade pancakes. Let’s dive into creating these fluffy delights, step by step, ensuring even beginners can master them with ease.
Ingredients
- 1 cup all-purpose flour (I swear by King Arthur for consistent results)
- 2 tbsp sugar (a little extra won’t hurt if you like them sweet)
- 1 tsp baking powder (the fresher, the fluffier)
- 1/2 tsp salt (I prefer sea salt for its subtle crunch)
- 1 cup milk (whole milk makes them richer, but any works)
- 1 large egg (room temp blends smoother)
- 2 tbsp unsalted butter, melted (plus extra for the pan)
- 1 tsp vanilla extract (the real deal, not imitation)
Instructions
- In a large bowl, whisk together the flour, sugar, baking powder, and salt until well combined.
- In another bowl, beat the egg lightly, then mix in the milk, melted butter, and vanilla extract.
- Pour the wet ingredients into the dry ingredients. Stir gently until just combined; a few lumps are okay. Overmixing leads to tough pancakes.
- Heat a non-stick skillet or griddle over medium heat (350°F is ideal) and brush lightly with butter.
- Pour 1/4 cup of batter for each pancake onto the skillet. Cook until bubbles form on the surface and the edges look set, about 2-3 minutes.
- Flip the pancakes carefully and cook for another 1-2 minutes until golden brown. Adjust heat if they’re browning too quickly.
- Serve warm with your favorite toppings. Maple syrup and fresh berries are my go-to for a classic touch.
Fluffy, golden, and just the right amount of sweet, these pancakes are a canvas for your creativity. Try adding chocolate chips or nuts to the batter for an extra treat, or serve them with a dollop of whipped cream for a decadent twist.
Homemade Macaroni and Cheese
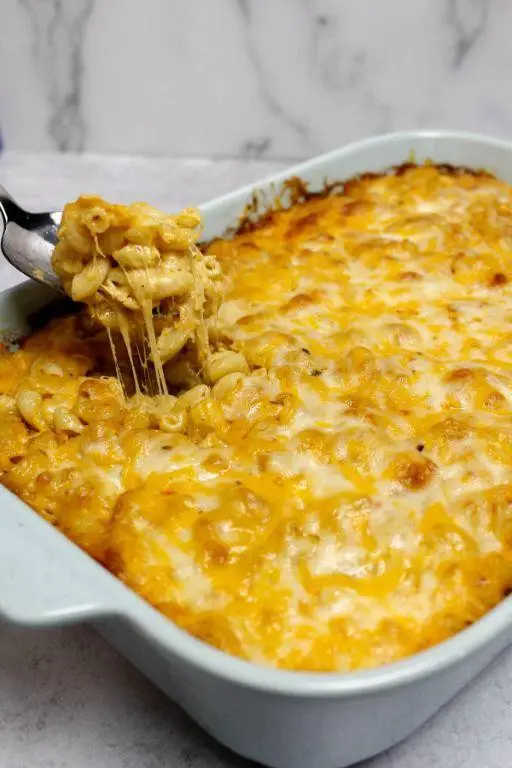
Kickstart your culinary journey with this comforting classic that’s as fun to make as it is to eat. Homemade Macaroni and Cheese is a creamy, dreamy dish that promises to be a crowd-pleaser, perfect for any day of the week.
Ingredients
- 8 oz elbow macaroni (I find this shape holds the cheese sauce best)
- 2 cups sharp cheddar cheese, shredded (for that perfect melt and tang)
- 1/2 cup whole milk (room temperature blends smoother)
- 2 tbsp unsalted butter (I always use unsalted to control the dish’s saltiness)
- 1/4 cup all-purpose flour (for thickening the sauce just right)
- 1/2 tsp salt (adjust based on your cheese’s saltiness)
- 1/4 tsp black pepper (freshly ground adds a nice kick)
Instructions
- Preheat your oven to 350°F (175°C) to ensure it’s ready for baking later.
- Cook the macaroni according to package instructions until al dente, about 8 minutes, then drain and set aside.
- In a medium saucepan, melt the butter over medium heat, then whisk in the flour to create a roux, cooking for 1-2 minutes until golden.
- Gradually whisk in the milk, ensuring no lumps form, and cook until the mixture thickens, about 3-4 minutes.
- Remove from heat and stir in the cheddar cheese until fully melted and smooth, then season with salt and pepper.
- Combine the cheese sauce with the cooked macaroni, stirring until evenly coated.
- Transfer the mixture to a greased baking dish and bake for 20-25 minutes, until bubbly and lightly golden on top.
Rich and creamy with a slight crunch from the baked top, this Homemade Macaroni and Cheese is a versatile dish. Try serving it with a sprinkle of smoked paprika or breadcrumbs for an extra layer of flavor and texture.
Old Fashioned Meatloaf
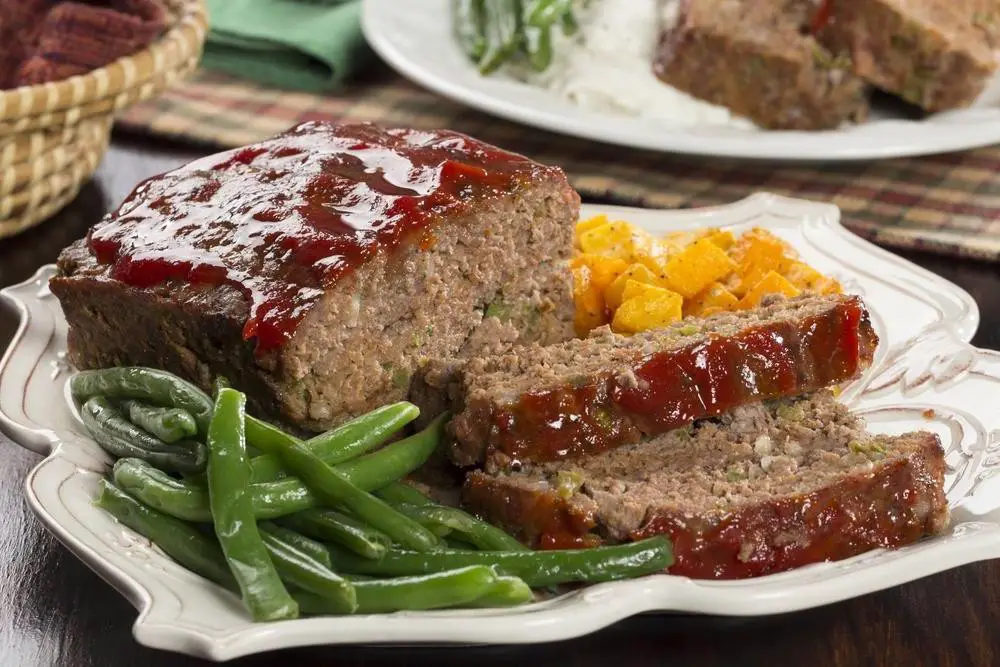
Today’s recipe brings us back to the basics with a comforting classic that never fails to satisfy. This Old Fashioned Meatloaf is a testament to the power of simple ingredients coming together to create something truly memorable.
Ingredients
– 1 1/2 pounds ground beef (I find an 80/20 mix perfect for moisture and flavor)- 1 cup breadcrumbs (I like using panko for a lighter texture)- 1/2 cup milk (whole milk adds richness)- 1 large egg (room temperature blends more smoothly)- 1/4 cup ketchup (plus extra for glazing, my secret is a smoky barbecue sauce mix-in)- 1 small onion, finely diced (sautéed lightly for sweetness)- 1 tbsp Worcestershire sauce (a dash more won’t hurt)- 1 tsp salt (I prefer sea salt for its clean taste)- 1/2 tsp black pepper (freshly ground makes all the difference)- 1/2 tsp garlic powder (for that subtle kick)
Instructions
1. Preheat your oven to 350°F (175°C) to ensure it’s ready for baking.2. In a large bowl, combine the ground beef, breadcrumbs, milk, egg, ketchup, diced onion, Worcestershire sauce, salt, black pepper, and garlic powder. Mix gently with your hands to avoid overworking the meat. Tip: Overmixing can lead to a dense meatloaf.3. Transfer the mixture to a loaf pan or shape it into a loaf on a baking sheet for a crustier exterior.4. Spread a thin layer of ketchup (or your barbecue sauce mix) over the top for a glossy, flavorful glaze.5. Bake in the preheated oven for 1 hour, or until the internal temperature reaches 160°F (71°C). Tip: Letting it rest for 10 minutes before slicing ensures juiciness.6. Serve slices with mashed potatoes and green beans for a classic combo. Tip: Leftovers make amazing sandwiches the next day.Nothing beats the hearty, homely feel of this meatloaf, with its tender interior and slightly caramelized edges. Try serving it with a side of roasted vegetables for a colorful, nutritious twist.
Homemade Chocolate Chip Cookies
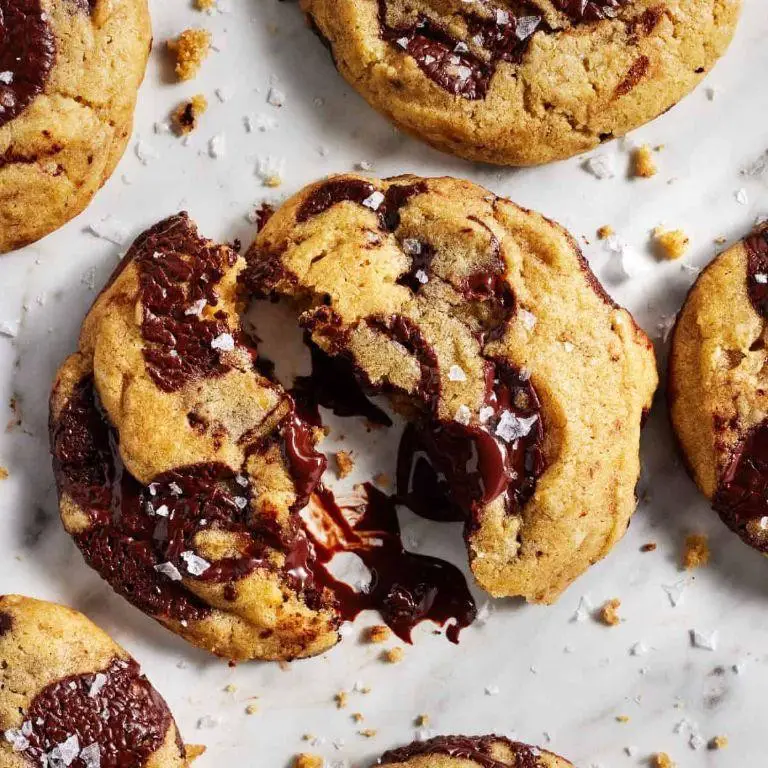
Delight in the simple joy of baking with these classic homemade chocolate chip cookies, a timeless treat that’s perfect for any occasion. Whether you’re a novice baker or looking to refine your skills, this step-by-step guide will ensure your cookies come out perfectly golden and irresistibly chewy every time.
Ingredients
- 1 cup unsalted butter, softened (I find room temperature butter blends more smoothly)
- 3/4 cup granulated sugar (for that perfect sweetness)
- 3/4 cup packed brown sugar (adds a deep, molasses-like flavor)
- 2 large eggs (room temperature eggs incorporate better)
- 2 teaspoons pure vanilla extract (the real deal makes all the difference)
- 2 1/4 cups all-purpose flour (spooned and leveled for accuracy)
- 1 teaspoon baking soda (helps the cookies rise just right)
- 1/2 teaspoon salt (balances the sweetness)
- 2 cups semisweet chocolate chips (because more chocolate is always better)
Instructions
- Preheat your oven to 375°F (190°C) to ensure it’s perfectly heated for baking.
- In a large bowl, cream together the softened butter, granulated sugar, and brown sugar until light and fluffy, about 3 minutes. Tip: Scrape down the sides of the bowl to ensure even mixing.
- Beat in the eggs one at a time, then stir in the vanilla extract. Tip: Adding eggs one at a time prevents the mixture from curdling.
- In a separate bowl, whisk together the flour, baking soda, and salt. Gradually add this to the creamed mixture, mixing just until incorporated. Tip: Overmixing the flour can lead to tough cookies.
- Fold in the chocolate chips until evenly distributed throughout the dough.
- Drop rounded tablespoons of dough onto ungreased baking sheets, spacing them about 2 inches apart.
- Bake for 9 to 11 minutes, or until the edges are golden but the centers are still soft. Tip: For chewier cookies, take them out when they’re just set.
- Let the cookies cool on the baking sheets for 2 minutes before transferring to wire racks to cool completely.
Fresh out of the oven, these cookies boast a delightful contrast of crispy edges and soft, gooey centers, packed with melty chocolate chips. Serve them warm with a glass of cold milk for the ultimate comfort food experience, or get creative by sandwiching a scoop of vanilla ice cream between two cookies for an indulgent dessert.
Traditional Homemade Biscuits

Making traditional homemade biscuits is a rewarding experience that fills your kitchen with warmth and your belly with comfort. Mastering this recipe will give you fluffy, buttery biscuits perfect for any meal.
Ingredients
- 2 cups all-purpose flour (I always sift mine for extra fluffiness)
- 1 tbsp baking powder (make sure it’s fresh for the best rise)
- 1 tsp salt (I like to use fine sea salt for even distribution)
- 1/4 cup cold unsalted butter, cubed (keep it cold for flaky layers)
- 3/4 cup whole milk (room temperature blends better)
Instructions
- Preheat your oven to 450°F (232°C) and line a baking sheet with parchment paper.
- In a large bowl, whisk together the flour, baking powder, and salt until well combined.
- Add the cold butter cubes to the flour mixture. Using your fingertips, quickly rub the butter into the flour until the mixture resembles coarse crumbs. Tip: Work fast to keep the butter cold.
- Make a well in the center of the mixture and pour in the milk. Stir with a fork until just combined. Tip: Overmixing leads to tough biscuits.
- Turn the dough onto a lightly floured surface and gently pat it into a 1-inch thick rectangle.
- Using a floured 2-inch round cutter, stamp out biscuits without twisting the cutter. Tip: Twisting seals the edges and prevents rising.
- Place the biscuits on the prepared baking sheet, leaving about 1 inch apart.
- Bake for 12-15 minutes, or until golden brown on top.
Just out of the oven, these biscuits are irresistibly flaky and tender. Serve them warm with a drizzle of honey or alongside your favorite gravy for a truly comforting dish.
Old Fashioned Pumpkin Pie
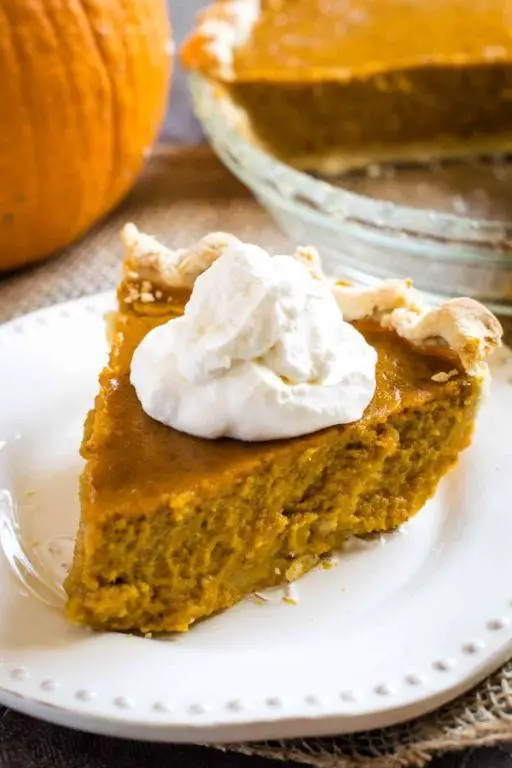
Gathering around the table for a slice of pumpkin pie is a tradition many of us cherish, especially when the recipe is as timeless as this Old Fashioned Pumpkin Pie. Let me guide you through creating this classic dessert with a methodical approach, ensuring even beginners can achieve pie perfection.
Ingredients
- 1 1/2 cups pure pumpkin puree (I swear by the homemade kind for its depth of flavor)
- 3/4 cup granulated sugar (adjust slightly if you prefer a less sweet pie)
- 1/2 teaspoon salt (sea salt adds a nice touch)
- 1 teaspoon ground cinnamon
- 1/2 teaspoon ground ginger
- 1/4 teaspoon ground cloves
- 2 large eggs (room temperature blends smoother)
- 1 cup evaporated milk (the richness it adds is unparalleled)
- 1 unbaked 9-inch pie crust (homemade or store-bought, both work)
Instructions
- Preheat your oven to 425°F (220°C). This high initial heat helps set the crust.
- In a large bowl, whisk together the pumpkin puree, sugar, salt, cinnamon, ginger, and cloves until well combined.
- Beat in the eggs one at a time, ensuring each is fully incorporated before adding the next.
- Gradually stir in the evaporated milk until the mixture is smooth and homogenous.
- Pour the filling into the unbaked pie crust, smoothing the top with a spatula for an even layer.
- Bake at 425°F for 15 minutes, then reduce the oven temperature to 350°F (175°C) and continue baking for 40-50 minutes. The pie is done when a knife inserted near the center comes out clean.
- Cool the pie on a wire rack for at least 2 hours before serving. This allows the filling to set properly.
Nothing beats the creamy texture and warm spices of this Old Fashioned Pumpkin Pie. Serve it with a dollop of whipped cream or a scoop of vanilla ice cream for an extra special treat.
Homemade Vanilla Ice Cream

Just imagine the creamy, dreamy texture of homemade vanilla ice cream melting on your tongue—it’s simpler to make than you might think, and today, we’re walking through it step by step.
Ingredients
- 2 cups heavy cream (I always go for organic; the flavor is unparalleled)
- 1 cup whole milk (the richer, the better for that luxurious texture)
- 3/4 cup granulated sugar (adjust slightly if you prefer a less sweet version)
- 1 tbsp pure vanilla extract (splurge on the good stuff—it makes all the difference)
- 6 large egg yolks (room temperature eggs blend more smoothly)
- 1/4 tsp salt (just a pinch to balance the sweetness)
Instructions
- In a medium saucepan, combine the heavy cream, milk, and half of the sugar. Heat over medium heat until the mixture is warm but not boiling, stirring occasionally.
- While the cream mixture heats, whisk the egg yolks and remaining sugar in a separate bowl until pale and slightly thickened.
- Slowly pour about 1/2 cup of the warm cream mixture into the egg yolks, whisking constantly to temper the eggs.
- Pour the tempered egg mixture back into the saucepan with the remaining cream mixture, stirring continuously.
- Cook over low heat, stirring constantly, until the mixture thickens enough to coat the back of a spoon (about 170°F on a candy thermometer).
- Remove from heat and stir in the vanilla extract and salt. Let the mixture cool to room temperature, then cover and refrigerate for at least 4 hours, or overnight.
- Once chilled, pour the mixture into an ice cream maker and churn according to the manufacturer’s instructions, usually about 20-25 minutes.
- Transfer the churned ice cream to a freezer-safe container and freeze until firm, about 2 hours.
Out of the freezer, this vanilla ice cream is velvety and rich, with a perfect balance of sweetness and vanilla flavor. Try serving it with a drizzle of warm caramel or a sprinkle of toasted nuts for an extra special treat.
Classic Homemade Pizza Dough

Starting with the basics, making your own pizza dough at home is simpler than you might think, and the results are infinitely rewarding. Let’s dive into the process together, ensuring you end up with a perfectly chewy, flavorful base for your favorite toppings.
Ingredients
- 3 1/2 cups all-purpose flour (I like to use unbleached for a better texture)
- 1 1/4 cups warm water (around 110°F, just warm to the touch)
- 1 packet (2 1/4 tsp) active dry yeast (always check the expiration date!)
- 2 tbsp extra virgin olive oil (my go-to for its fruity flavor)
- 1 tsp sugar (helps activate the yeast)
- 1 tsp salt (I prefer sea salt for its subtle crunch)
Instructions
- In a large mixing bowl, combine the warm water, yeast, and sugar. Let it sit for 5 minutes until frothy. This is your yeast waking up!
- Add the olive oil and salt to the yeast mixture, stirring gently to combine.
- Gradually mix in the flour, one cup at a time, until a dough begins to form. Tip: If the dough feels too sticky, add a little more flour, but do so sparingly.
- Turn the dough onto a floured surface and knead for about 8 minutes, until smooth and elastic. Tip: Use the heel of your hand to push the dough away, then fold it back over itself.
- Place the dough in a lightly oiled bowl, cover with a damp towel, and let it rise in a warm spot for 1 hour, or until doubled in size. Tip: The oven with the light on is a great spot for rising.
- Punch down the dough to release any air bubbles, then divide it into two equal parts for two pizzas, or leave it whole for one large pizza.
- Preheat your oven to 475°F. Roll out the dough on a floured surface to your desired thickness, then transfer to a baking sheet or pizza stone.
- Add your favorite toppings and bake for 12-15 minutes, until the crust is golden and the toppings are bubbly.
After baking, you’ll notice the crust has a delightful chewiness with a slight crispness on the outside. For a fun twist, try brushing the baked crust with garlic butter or sprinkling with grated Parmesan right out of the oven.
Old Fashioned Cornbread
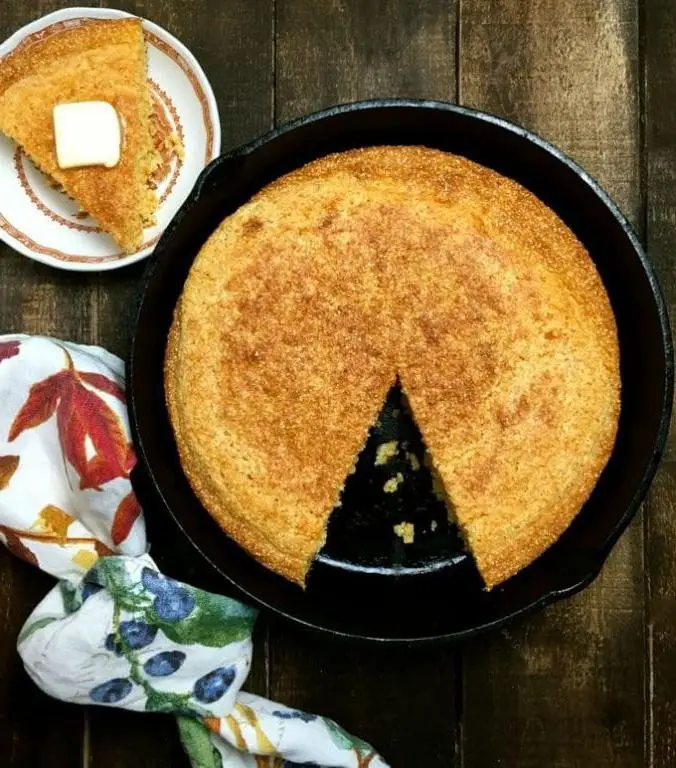
Here’s a classic recipe that brings warmth and comfort to any table, especially when served straight from the oven. Old Fashioned Cornbread is a staple in many households, and for good reason—its simplicity and versatility make it a favorite among both novice and experienced bakers.
Ingredients
- 1 cup yellow cornmeal – I find the yellow variety gives a richer color and slightly sweeter flavor.
- 1 cup all-purpose flour – For a lighter texture, sift it before measuring.
- 1/4 cup granulated sugar – Adjust to your sweetness preference, but this amount gives a perfect balance.
- 1 tbsp baking powder – Ensure it’s fresh for the best rise.
- 1/2 tsp salt – A pinch enhances all the other flavors.
- 1 cup whole milk – Room temperature blends more smoothly with other ingredients.
- 1 large egg – Beaten lightly before adding to the mix.
- 1/4 cup unsalted butter, melted – I always use unsalted to control the saltiness of the dish.
Instructions
- Preheat your oven to 400°F (200°C) and grease an 8-inch square baking pan. Tip: A well-greased pan ensures easy removal and a golden crust.
- In a large bowl, whisk together the cornmeal, flour, sugar, baking powder, and salt until well combined.
- In another bowl, mix the milk, egg, and melted butter until fully incorporated. Tip: Mixing the wet ingredients separately prevents overworking the batter when combined.
- Pour the wet ingredients into the dry ingredients and stir just until combined. Tip: A few lumps are okay; overmixing can lead to tough cornbread.
- Transfer the batter to the prepared pan and smooth the top with a spatula.
- Bake for 20-25 minutes, or until the top is golden and a toothpick inserted in the center comes out clean.
Zesty and slightly sweet, this cornbread has a delightful crumbly texture that pairs wonderfully with a pat of butter or a drizzle of honey. For a creative twist, try adding jalapeños or cheddar cheese to the batter before baking.
Homemade Strawberry Jam
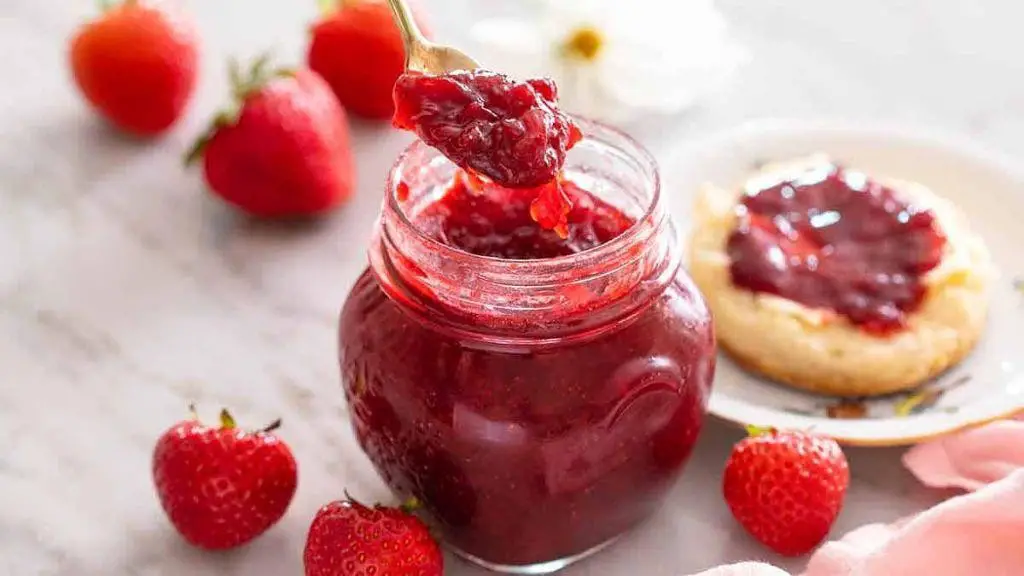
Whipping up a batch of homemade strawberry jam is simpler than you might think, and the payoff is a jar full of sweet, vibrant flavor that beats store-bought any day. Let’s walk through the process together, ensuring you end up with the perfect spread for your morning toast or afternoon scone.
Ingredients
- 2 pounds fresh strawberries, hulled and halved (I find that organic strawberries pack the most flavor)
- 1 1/2 cups granulated sugar (adjust slightly if your strawberries are very sweet or tart)
- 2 tablespoons lemon juice (freshly squeezed makes a noticeable difference)
- 1 teaspoon vanilla extract (my secret for depth of flavor)
Instructions
- In a large bowl, gently toss the strawberries with sugar and let them sit for 1 hour at room temperature. This macerates the berries, drawing out their natural juices.
- Transfer the strawberry mixture to a large pot and stir in the lemon juice. Bring to a boil over medium-high heat, stirring occasionally.
- Once boiling, reduce the heat to medium and simmer for 20-25 minutes, stirring frequently to prevent sticking. The jam is ready when it coats the back of a spoon and a small amount placed on a chilled plate wrinkles when pushed with a finger.
- Remove from heat and stir in the vanilla extract. Let the jam cool for 5 minutes before transferring to jars.
- Seal the jars and let them cool to room temperature, then refrigerate. The jam will thicken further as it cools.
Now you’ve got a jar of homemade strawberry jam with a bright, fresh flavor and a slightly chunky texture that’s perfect for pairing with creamy cheeses or swirling into yogurt. Not to mention, it makes a thoughtful gift when packaged with a pretty ribbon.
Traditional Homemade Gravy
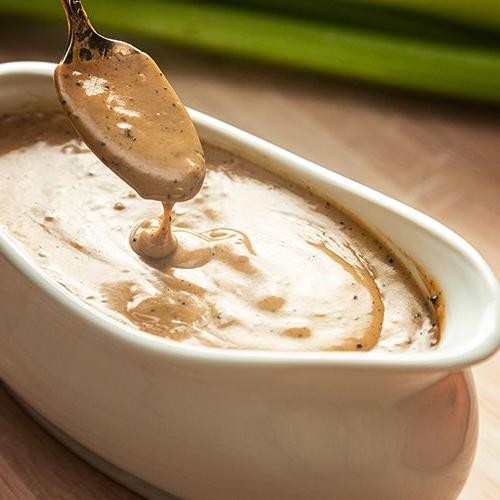
Delving into the art of making Traditional Homemade Gravy can transform your meals from ordinary to extraordinary. This guide will walk you through each step, ensuring you achieve that rich, velvety texture and deep flavor that only homemade gravy can offer.
Ingredients
- 4 tbsp unsalted butter (I always use unsalted to control the seasoning)
- 1/4 cup all-purpose flour (a good scoop for thickening)
- 2 cups chicken or beef stock (homemade stock is my preference for deeper flavor)
- 1/2 tsp salt (adjust based on your stock’s saltiness)
- 1/4 tsp black pepper (freshly ground adds a nice kick)
Instructions
- Melt the butter in a medium saucepan over medium heat until fully liquid and just starting to bubble.
- Whisk in the flour continuously for about 2 minutes to create a smooth roux, which should turn a light golden color.
- Slowly pour in the stock, whisking constantly to prevent lumps from forming.
- Bring the mixture to a gentle boil, then reduce the heat to low, letting it simmer for 5 minutes. The gravy will thicken as it cooks.
- Season with salt and pepper, whisking well to incorporate. Taste and adjust seasoning if necessary.
For a smoother gravy, you can strain it through a fine mesh sieve before serving. This step is optional but makes a difference in texture.
Finally, this gravy pairs beautifully with mashed potatoes, roasted meats, or even over biscuits for a Southern twist. Its rich flavor and creamy texture make it a versatile addition to any meal.
Old Fashioned Peanut Butter Cookies
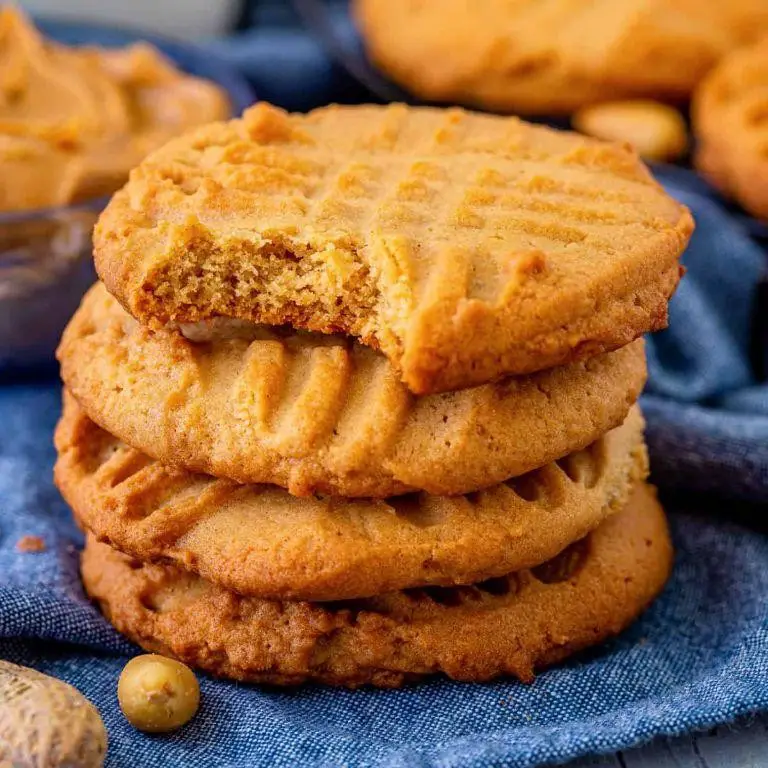
Always a classic, these Old Fashioned Peanut Butter Cookies bring back memories with every bite. Let’s walk through the process together, ensuring you end up with cookies that are just like grandma used to make.
Ingredients
- 1 cup creamy peanut butter (I swear by the natural kind for its rich flavor)
- 1 cup granulated sugar (for that perfect sweetness)
- 1 large egg (room temperature eggs blend more smoothly)
- 1 tsp vanilla extract (a splash of vanilla elevates the peanut flavor)
Instructions
- Preheat your oven to 350°F (175°C) to ensure it’s ready for baking.
- In a large mixing bowl, combine 1 cup creamy peanut butter, 1 cup granulated sugar, 1 large egg, and 1 tsp vanilla extract. Mix until smooth. Tip: Scrape the sides of the bowl to incorporate all ingredients evenly.
- Roll the dough into 1-inch balls and place them on a parchment-lined baking sheet, spacing them about 2 inches apart. Tip: Wetting your hands slightly prevents the dough from sticking.
- Flatten each ball with a fork, creating a crisscross pattern. This not only looks classic but helps the cookies bake evenly.
- Bake for 10-12 minutes, or until the edges are lightly golden. Tip: The cookies will seem soft but will firm up as they cool, so don’t overbake.
- Let the cookies cool on the baking sheet for 5 minutes before transferring them to a wire rack to cool completely.
Delightfully crisp on the edges with a chewy center, these cookies are a peanut butter lover’s dream. Serve them with a glass of cold milk or crumble them over vanilla ice cream for an extra special treat.
Homemade Cinnamon Rolls
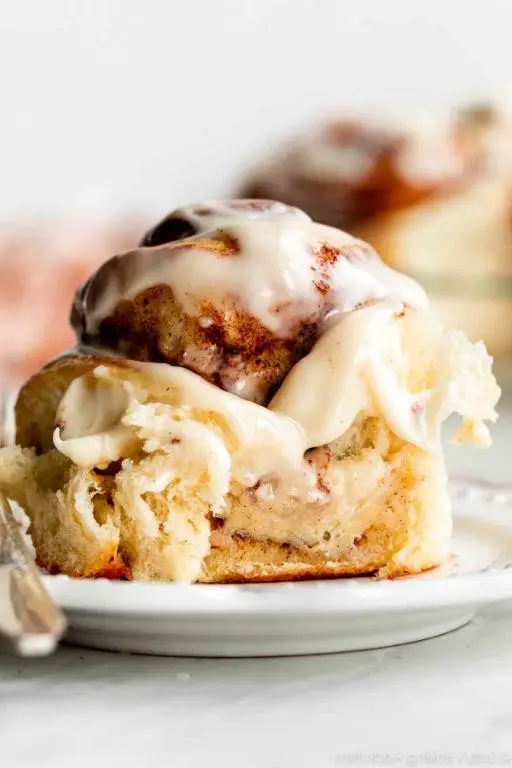
Sometimes, the best way to start your morning is with the warm, comforting embrace of homemade cinnamon rolls. Let me guide you through creating these sweet, fluffy delights that are sure to make any day a little brighter.
Ingredients
- 1 cup warm milk (about 110°F, it should feel like a warm bath)
- 2 1/4 tsp active dry yeast (I always check the expiration date to ensure it’s active)
- 1/2 cup granulated sugar (for that perfect sweetness)
- 1/3 cup melted butter (unsalted is my preference, but salted works in a pinch)
- 2 large eggs (room temperature blends better)
- 4 cups all-purpose flour (plus extra for dusting)
- 1 tsp salt (to balance the sweetness)
- 1/2 cup packed brown sugar (for the filling, dark brown sugar adds depth)
- 2 tbsp ground cinnamon (the star of the show)
- 1/3 cup softened butter (for spreading, unsalted is my go-to)
Instructions
- In a large bowl, combine warm milk, yeast, and a pinch of sugar. Let sit for 5 minutes until frothy.
- Add the remaining sugar, melted butter, eggs, flour, and salt to the yeast mixture. Mix until a soft dough forms.
- Turn the dough onto a floured surface and knead for 5 minutes until smooth and elastic. Tip: If the dough sticks, add a little more flour.
- Place the dough in a greased bowl, cover, and let rise in a warm place for 1 hour or until doubled in size.
- Roll the dough into a 16×21 inch rectangle on a floured surface. Spread softened butter over the surface.
- Sprinkle evenly with brown sugar and cinnamon. Tip: Leave a small border to prevent filling from leaking.
- Roll up tightly from the long side and pinch the seam to seal. Cut into 12 slices. Tip: Use dental floss for clean cuts.
- Place rolls in a greased 9×13 inch baking pan. Cover and let rise for 30 minutes.
- Preheat oven to 350°F. Bake rolls for 20-25 minutes until golden brown.
Best enjoyed fresh out of the oven, these cinnamon rolls are irresistibly soft with a gooey center. For an extra treat, drizzle with cream cheese frosting while still warm.
Classic Homemade Lasagna

Nothing beats the comfort of a Classic Homemade Lasagna, especially when it’s made from scratch with love and patience. This guide will walk you through each step, ensuring your lasagna turns out perfectly layered and bursting with flavor.
Ingredients
- 1 lb ground beef (I like using 80/20 for the perfect fat ratio)
- 1/2 lb Italian sausage (removed from casing for easier browning)
- 1 onion, finely diced (yellow onions are my preference for their sweetness)
- 3 garlic cloves, minced (fresh is always best)
- 28 oz can crushed tomatoes (San Marzano tomatoes are my go-to for their rich flavor)
- 2 tbsp tomato paste (adds depth to the sauce)
- 1/4 cup fresh basil, chopped (tearing releases more flavor than chopping)
- 1 tsp sugar (balances the acidity of the tomatoes)
- 15 oz ricotta cheese (whole milk for creaminess)
- 1 egg (room temperature blends smoother)
- 3 cups shredded mozzarella (I prefer whole milk mozzarella for better melt)
- 1/2 cup grated Parmesan (freshly grated makes a difference)
- 12 lasagna noodles (no-boil noodles save time and work just as well)
- 2 tbsp olive oil (extra virgin for its fruity notes)
- Salt and pepper (season every layer for the best flavor)
Instructions
- Preheat your oven to 375°F (190°C) to ensure it’s ready for baking.
- Heat olive oil in a large skillet over medium heat. Add onions and garlic, sautéing until translucent, about 5 minutes.
- Add ground beef and Italian sausage to the skillet. Cook until browned, breaking it apart with a spoon, about 8 minutes. Tip: Drain excess fat for a less greasy lasagna.
- Stir in crushed tomatoes, tomato paste, basil, sugar, salt, and pepper. Simmer for 20 minutes, stirring occasionally. The sauce should thicken slightly.
- In a bowl, mix ricotta cheese, egg, 1/4 cup Parmesan, salt, and pepper until well combined. Tip: Letting the mixture sit for 10 minutes allows flavors to meld.
- Spread a thin layer of meat sauce in the bottom of a 9×13 inch baking dish. Arrange 4 lasagna noodles over the sauce.
- Layer with 1/3 of the ricotta mixture, 1 cup mozzarella, and 1/3 of the remaining meat sauce. Repeat layers twice, ending with meat sauce. Sprinkle remaining mozzarella and Parmesan on top.
- Cover with foil and bake for 25 minutes. Remove foil and bake for another 25 minutes until bubbly and golden. Tip: Let it rest for 15 minutes before slicing for cleaner cuts.
Mouthwatering layers of tender pasta, rich meat sauce, and creamy cheeses make this lasagna a crowd-pleaser. Serve with a crisp green salad and garlic bread for a complete meal that’s sure to impress.
Conclusion
Old-fashioned recipes bring warmth and nostalgia to our kitchens, offering timeless flavors that have been cherished for generations. This roundup of 18 delicious homemade recipes is your ticket to creating memorable meals and treats. We invite you to try these dishes, share your favorites in the comments, and spread the love by pinning this article on Pinterest. Happy cooking!

Michael Johnson is the founder of Pan Mastery, Inspired by his blacksmith grandfather’s legacy has a deep appreciation for hand-crafted pots and pans, he provides invaluable guides, reviews, and recipes to enhance your culinary journey.