Sweet dreams are made of these—18 delicious wedding cake icing recipes that promise to turn your baking into a masterpiece. Whether you’re crafting a cake for a grand celebration or simply indulging in the art of baking, our roundup offers elegant, foolproof options to suit every taste. Dive in and discover the perfect icing to crown your creation, making every slice a moment to remember.
Classic Vanilla Buttercream Icing
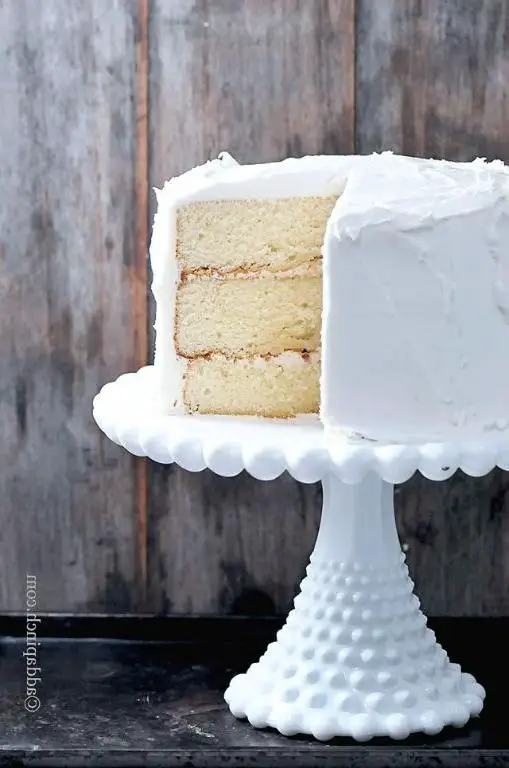
Vanilla buttercream icing is like a soft whisper of sweetness, a simple yet profound delight that transforms any cake into a celebration. It’s the kind of recipe that feels like a warm hug, familiar and comforting, yet always leaves a little room for personal touches.
Ingredients
- 1 cup of unsalted butter, softened to room temperature (it should give slightly when pressed)
- 4 cups of powdered sugar, sifted to avoid lumps
- 2 teaspoons of pure vanilla extract (the good stuff makes all the difference)
- A splash of whole milk or heavy cream, about 2 tablespoons, to adjust consistency
- A pinch of salt, just to balance the sweetness
Instructions
- In a large mixing bowl, beat the softened butter on medium speed for about 2 minutes until it’s creamy and pale. Tip: Scrape down the sides of the bowl occasionally to ensure even mixing.
- Gradually add the sifted powdered sugar, one cup at a time, beating on low speed after each addition to prevent a sugar cloud. Once all the sugar is incorporated, increase the speed to medium and beat for another 2 minutes.
- Add the vanilla extract and a pinch of salt, then beat for another minute to combine. Tip: If the icing seems too thick, add milk or cream one tablespoon at a time until you reach the desired consistency.
- For the final touch, beat the icing on high speed for 1-2 minutes until it’s light and fluffy. Tip: This extra beating incorporates air, making the icing smoother and easier to spread.
Now, the icing should be silky and spreadable, with a rich vanilla flavor that’s not overly sweet. It’s perfect for layering between cakes, piping onto cupcakes, or even as a dip for fresh fruit. Never underestimate the power of a well-made vanilla buttercream to elevate the simplest desserts into something extraordinary.
Rich Chocolate Ganache Icing
Whispering the words ‘chocolate ganache’ feels like summoning a little piece of magic into the kitchen. It’s a simple yet profound way to elevate any dessert, turning the ordinary into something unforgettable with its rich, velvety embrace.
Ingredients
- a cup of heavy cream
- a couple of cups of semi-sweet chocolate chips
- a splash of vanilla extract
- a pinch of salt
Instructions
- Pour the heavy cream into a small saucepan and heat it over medium heat until it just begins to simmer, about 2-3 minutes. Keep an eye on it to prevent boiling.
- Place the chocolate chips in a medium heatproof bowl. Once the cream is simmering, pour it over the chocolate chips, making sure they’re fully submerged.
- Let the mixture sit for about 5 minutes to allow the chocolate to soften. This patience ensures a smoother ganache.
- Add the vanilla extract and a pinch of salt to the bowl. Gently stir the mixture with a whisk until it becomes smooth and glossy. If you rush this, you might end up with a grainy texture.
- Allow the ganache to cool at room temperature for about 15 minutes before using it. It will thicken as it cools, perfect for spreading or piping.
Kindly note how the ganache transforms from a liquid to a lush, spreadable consistency, ideal for draping over cakes or filling macarons. Its deep chocolate flavor, with just a hint of vanilla, makes it a versatile companion to both bold and subtle desserts.
Cream Cheese Frosting for Red Velvet

Gently, the thought of cream cheese frosting draping over a slice of red velvet cake brings a sense of comfort, like a quiet morning with the first light filtering through the curtains. It’s a simple pleasure, yet it holds the power to transform the ordinary into something memorable.
Ingredients
- 8 ounces of cream cheese, softened to room temperature
- 1/2 cup (1 stick) of unsalted butter, also softened
- 4 cups of powdered sugar, sifted to avoid lumps
- a splash of vanilla extract, about 1 teaspoon
- a pinch of salt, just to balance the sweetness
Instructions
- In a large mixing bowl, beat the softened cream cheese and butter together on medium speed until smooth and creamy, about 2 minutes. Tip: Make sure both are at room temperature to avoid lumps.
- Gradually add the sifted powdered sugar, one cup at a time, beating on low speed after each addition until fully incorporated. Tip: Cover the bowl with a towel during the first few additions to prevent a sugar cloud.
- Add the vanilla extract and a pinch of salt, then beat on medium-high speed for another 2 minutes until the frosting is light and fluffy. Tip: If the frosting is too thick, you can add a teaspoon of milk to loosen it up.
Now, the frosting should be velvety smooth with a rich, tangy sweetness that perfectly complements the deep flavors of red velvet cake. Try spreading it generously between layers or piping it into delicate swirls for an elegant finish. Nothing beats the classic combination, but a sprinkle of crushed pecans on top adds a delightful crunch.
Whipped Cream Icing with Vanilla Bean
Remembering the first time I tried whipped cream icing with vanilla bean, it felt like discovering a secret garden of flavors, where each spoonful was a step deeper into its lush, creamy embrace.
Ingredients
- 2 cups of heavy cream, cold as a winter morning
- 1/4 cup of powdered sugar, because granulated just won’t do
- 1 vanilla bean, split and scraped, for those tiny black specks of joy
- A splash of vanilla extract, for good measure
Instructions
- Chill your mixing bowl and whisk in the freezer for about 10 minutes. Cold tools are the secret to peaks that stand tall.
- Pour the heavy cream into the chilled bowl and start whisking on medium speed. Watch as it transforms from liquid to soft peaks, about 3 minutes.
- Sprinkle in the powdered sugar and the seeds from the vanilla bean. Add the splash of vanilla extract. Tip: If you overdo it with the extract, the flavor can overpower the delicate vanilla bean.
- Continue whisking on high speed until stiff peaks form, about 2 more minutes. Tip: Stop the mixer and check the peaks often to avoid over-whipping, which can turn your cream into butter.
- Use immediately or store in the fridge. Tip: If storing, give it a quick whisk before using to bring back its fluffy texture.
Every bite of this icing is a cloud of vanilla-scented bliss, perfect for crowning your favorite cupcakes or layering between sponge cakes. Try it with a sprinkle of edible gold dust for a touch of elegance.
Silky Smooth Fondant Icing
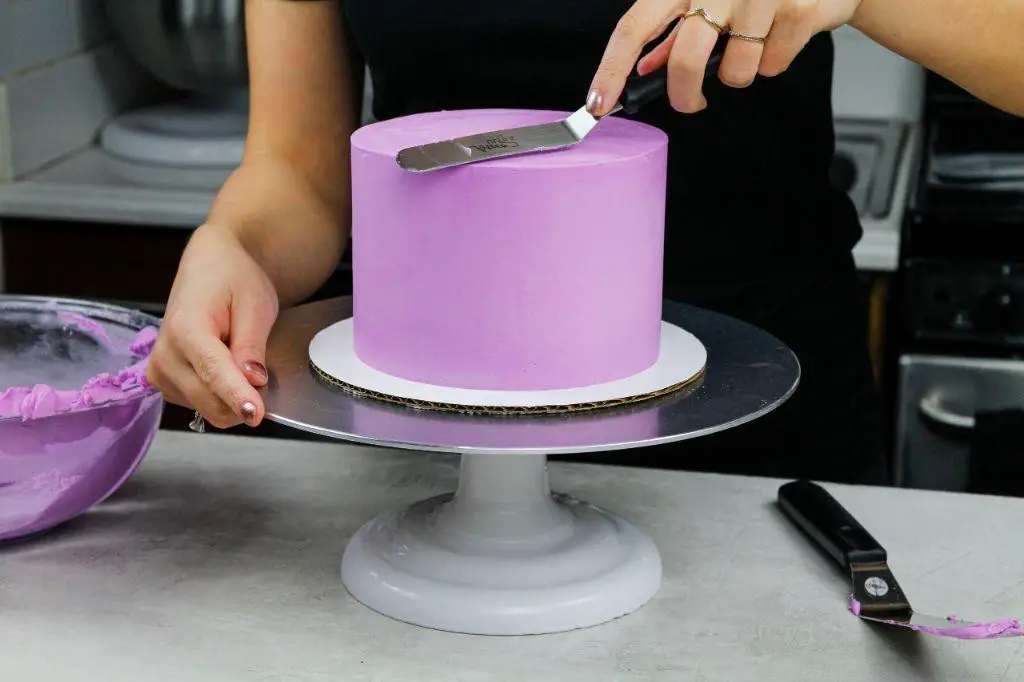
Venturing into the world of baking brings us to the delicate art of fondant icing, a silky smooth canvas that transforms cakes into edible masterpieces. It’s a journey of patience and precision, where each step is a meditation on texture and taste.
Ingredients
- 4 cups of powdered sugar, sifted to avoid lumps
- 1/2 cup of light corn syrup, for that glossy finish
- 1/4 cup of water, just enough to bring it together
- A splash of vanilla extract, for a whisper of flavor
- A couple of tablespoons of vegetable shortening, to keep it pliable
Instructions
- In a large mixing bowl, combine the sifted powdered sugar and vegetable shortening. Use your fingers to rub the shortening into the sugar until it resembles fine crumbs.
- Warm the light corn syrup and water in a small saucepan over low heat until just combined, about 2 minutes. Stir in the vanilla extract.
- Gradually pour the warm liquid into the sugar mixture, stirring continuously with a wooden spoon. The mixture will start to come together into a dough.
- Turn the dough out onto a surface lightly dusted with powdered sugar. Knead for about 8 minutes until the fondant is smooth, pliable, and no longer sticky.
- If the fondant feels too stiff, add a teaspoon of water at a time until it reaches the desired consistency. Conversely, if it’s too sticky, knead in a little more powdered sugar.
- Wrap the fondant tightly in plastic wrap and let it rest at room temperature for at least an hour before using. This allows the gluten to relax, making it easier to roll out.
Molding this fondant is like working with edible silk, its flavor subtly sweet with a hint of vanilla. Try draping it over a cake for a flawless finish or sculpting it into delicate flowers for a touch of elegance.
Lemon Curd Buttercream Icing
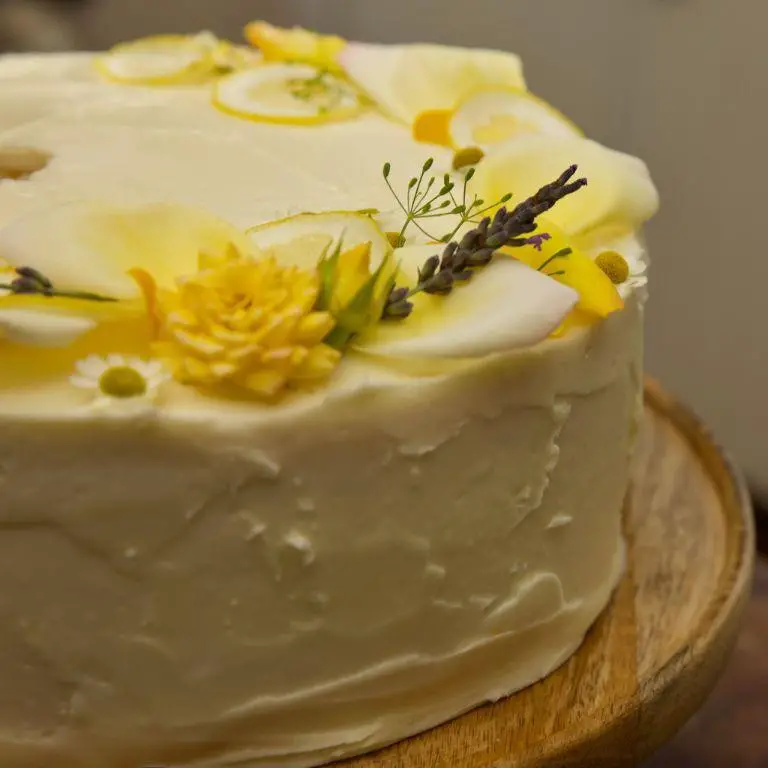
Zestfully, let’s wander into the creation of a lemon curd buttercream icing, a delightful concoction that marries the tangy brightness of lemon with the creamy sweetness of buttercream. It’s a recipe that feels like a gentle whisper of summer, perfect for those moments when you crave something light yet indulgent.
Ingredients
- 1 cup of unsalted butter, softened to room temperature
- 3 cups of powdered sugar, because every good icing starts here
- A generous 1/4 cup of lemon curd, homemade or store-bought
- A splash of vanilla extract, for that hint of warmth
- A couple of tablespoons of heavy cream, to bring it all together
Instructions
- In a large bowl, beat the softened butter on medium speed for about 2 minutes, until it’s creamy and pale. This is your foundation, so don’t rush it.
- Gradually add the powdered sugar, about a cup at a time, beating well after each addition. Tip: Cover the mixer with a towel to avoid a sugar cloud.
- Once all the sugar is incorporated, add the lemon curd and vanilla extract. Beat on medium-high for another 2 minutes, scraping down the sides as needed.
- With the mixer on low, drizzle in the heavy cream until the icing reaches your desired consistency. Tip: Start with one tablespoon and add more as needed for a spreadable but not runny icing.
- Give it a final beat on high for about 30 seconds to make it extra fluffy. Tip: If the icing is too thick, a little more cream can loosen it; if too thin, a bit more powdered sugar will thicken it up.
Velvety and vibrant, this lemon curd buttercream icing is a dream to spread or pipe, with a flavor that’s both rich and refreshing. Try it atop vanilla cupcakes for a classic pairing, or go bold with a lemon-lavender cake for an unexpected twist.
Strawberry Flavored Whipped Cream Icing

Just imagine the lightest, fluffiest whipped cream, kissed with the sweet, tangy essence of fresh strawberries. It’s the kind of topping that turns a simple dessert into something magical, something worth savoring slowly.
Ingredients
- 1 cup of heavy cream, cold as a winter morning
- 2 tablespoons of powdered sugar, because granulated just won’t do
- A splash of vanilla extract, for that whisper of warmth
- 1/2 cup of fresh strawberry puree, strained to keep it smooth
- A pinch of salt, to make the flavors pop
Instructions
- Chill your mixing bowl and whisk in the freezer for about 10 minutes. Cold tools are the secret to peaks that stand tall.
- Pour the heavy cream into the chilled bowl and whisk on medium speed until it starts to thicken, about 2 minutes. Tip: Watch for the cream to leave slight trails as it begins to hold shape.
- Add the powdered sugar, vanilla extract, and a pinch of salt. Continue whisking until soft peaks form, about another minute. Tip: Soft peaks should curl slightly when the whisk is lifted.
- Gently fold in the strawberry puree with a spatula, being careful not to deflate the cream. Tip: Fold in a figure-eight motion to distribute the puree evenly without overmixing.
- Once fully incorporated, give it a final whisk by hand to ensure everything is perfectly blended. The icing should be smooth, with a lovely pink hue and a consistency that’s spreadable but holds its shape.
How this strawberry flavored whipped cream icing drapes over cakes or crowns a bowl of fresh berries is nothing short of delightful. Its texture is cloud-like, with a flavor that’s both rich and refreshing—perfect for those moments when only something sweet and slightly indulgent will do.
Earl Grey Tea Infused Buttercream
Sometimes, the most comforting flavors come from the simplest of infusions, like the delicate aroma of Earl Grey tea blending into a smooth, creamy buttercream. It’s a subtle nod to those quiet moments with a cup of tea, now transformed into a dessert that feels both familiar and new.
Ingredients
- 1 cup of unsalted butter, softened to room temperature
- 4 cups of powdered sugar, because we’re keeping it sweet
- A splash of whole milk, just enough to bring it all together
- 2 tablespoons of Earl Grey tea leaves, finely ground, for that signature flavor
- A pinch of salt, to balance the sweetness
Instructions
- In a large bowl, beat the softened butter on medium speed until it’s creamy and pale, about 3 minutes. This is your foundation, so take your time.
- Gradually add the powdered sugar, one cup at a time, beating well after each addition. The mixture will thicken, but don’t rush it.
- Pour in the milk, a little at a time, until the buttercream reaches your desired consistency. It should be smooth but hold its shape.
- Fold in the ground Earl Grey tea leaves and that pinch of salt. The tea leaves should be fine enough to blend seamlessly, leaving no gritty texture.
- Give it one final mix on low speed for about a minute, ensuring everything is perfectly combined. Taste it—adjust the tea or sugar if needed, but remember, the flavor will develop as it sits.
Just like that, you’ve got a buttercream that’s rich with the floral notes of Earl Grey, perfect for frosting cakes or piping onto cupcakes. The texture is luxuriously smooth, with just a hint of tea leaves for depth. Try it layered between vanilla cake layers for a subtle surprise, or as a decadent dip for shortbread cookies.
Coconut Cream Cheese Icing
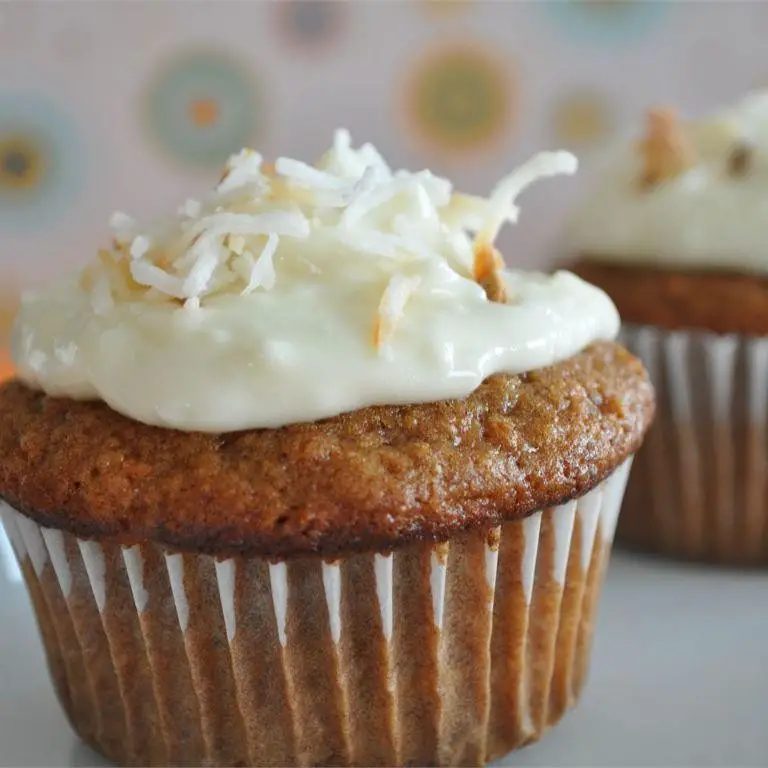
There’s something deeply comforting about the process of making coconut cream cheese icing, a task that feels both meditative and rewarding. The way the ingredients come together, transforming into something greater than the sum of their parts, is a small miracle in itself.
Ingredients
- 8 ounces of cream cheese, softened to room temperature
- 1/2 cup of unsalted butter, also at room temperature
- 4 cups of powdered sugar, sifted to avoid lumps
- a splash of vanilla extract
- a couple of tablespoons of coconut milk, for that tropical flair
- a pinch of salt, to balance the sweetness
Instructions
- In a large mixing bowl, beat the softened cream cheese and butter together on medium speed until smooth and creamy, about 2 minutes.
- Gradually add the sifted powdered sugar, one cup at a time, beating on low speed after each addition to incorporate it fully.
- Mix in the vanilla extract, coconut milk, and a pinch of salt, then increase the speed to medium and beat for another 2 minutes until the icing is fluffy.
- If the icing is too thick, add a teaspoon more of coconut milk; if it’s too thin, add a bit more powdered sugar until you reach the desired consistency.
- Use immediately to frost your favorite cake or cupcakes, or store in the refrigerator if not using right away.
Perfectly creamy with a hint of coconut, this icing pairs wonderfully with carrot cake or red velvet. For an extra touch, sprinkle toasted coconut flakes on top for texture and a deeper coconut flavor.
Dark Chocolate Mocha Icing
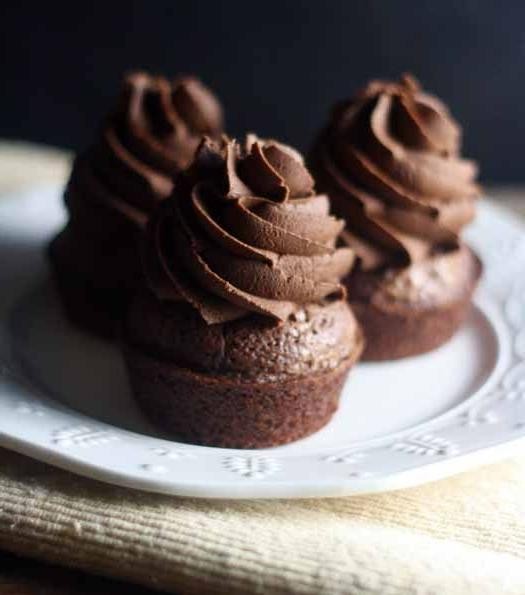
Zephyrs of morning light filter through the kitchen window as I ponder the rich, velvety allure of dark chocolate mocha icing, a perfect companion to your favorite cake or cupcake. Its deep, aromatic flavors whisper of quiet mornings and the simple joy of baking.
Ingredients
- 1 cup of powdered sugar, because every good icing starts here
- 1/2 cup of unsweetened cocoa powder, for that deep chocolate soul
- 1/4 cup of strong brewed coffee, cooled, to weave in the mocha magic
- A splash of vanilla extract, for a hint of sweetness and warmth
- A couple of tablespoons of milk, to bring it all together to the right consistency
- 1/2 teaspoon of espresso powder, because we’re not shy about that coffee kick
Instructions
- In a medium bowl, sift together the powdered sugar and cocoa powder to avoid any lumps, ensuring a smooth icing.
- Gradually whisk in the cooled coffee and vanilla extract, blending until the mixture is smooth. Tip: If the icing is too thick, add milk one tablespoon at a time until desired consistency is reached.
- Stir in the espresso powder, tasting as you go to adjust the coffee flavor to your liking. Tip: For a stronger mocha flavor, you can add an extra 1/4 teaspoon of espresso powder.
- Once everything is combined, let the icing sit for about 5 minutes to allow the flavors to meld together beautifully. Tip: If you’re not using it right away, cover the bowl with a damp cloth to prevent the icing from drying out.
Dark and decadent, this icing drapes over cakes like a luxurious velvet cloak, with the espresso powder lending a subtle buzz that elevates the chocolate. Try it atop a chocolate zucchini cake for an unexpected twist that delights the senses.
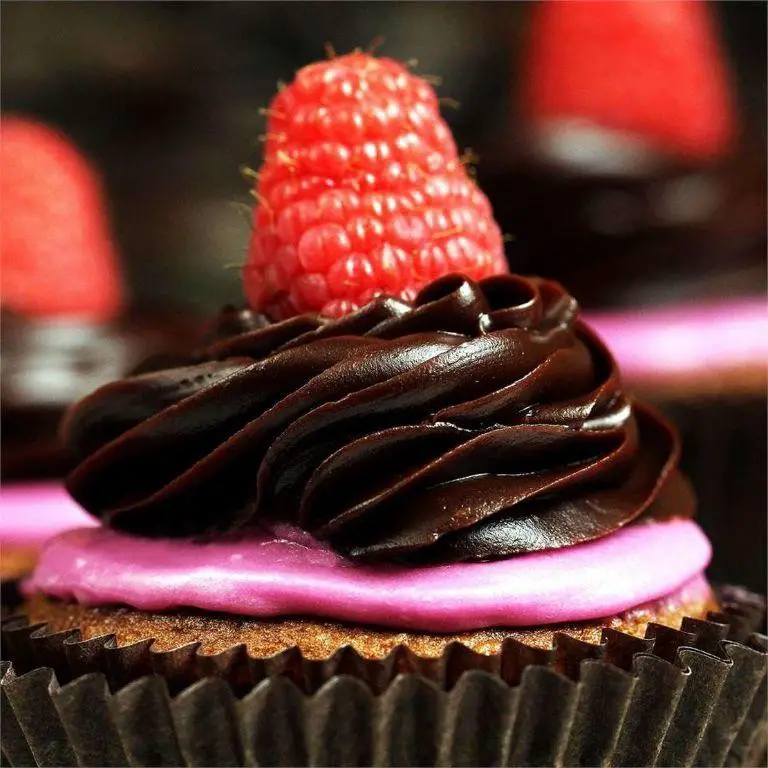
Raspberry Mascarpone Icing
Whispering the words ‘raspberry mascarpone icing’ feels like sharing a secret, one that’s sweet, slightly tangy, and utterly indulgent. It’s the kind of recipe that turns a simple dessert into a moment to remember, blending the lushness of mascarpone with the bright kiss of raspberries.
Ingredients
- 1 cup of fresh raspberries, plus a few extra for garnish
- 8 oz mascarpone cheese, softened to room temperature
- 1/2 cup powdered sugar, sifted to avoid lumps
- A splash of vanilla extract, because it makes everything better
- A couple of tablespoons of heavy cream, just enough to reach your desired consistency
Instructions
- In a small bowl, gently mash the fresh raspberries with a fork until they’re broken down but still a bit chunky.
- Using a hand mixer or a whisk, beat the softened mascarpone in a large bowl until it’s smooth and creamy, about 2 minutes.
- Gradually add the sifted powdered sugar to the mascarpone, mixing well after each addition to ensure it’s fully incorporated.
- Fold in the mashed raspberries and a splash of vanilla extract, mixing until the color is a uniform pink.
- Add heavy cream, one tablespoon at a time, until the icing reaches a spreadable consistency. Tip: If it’s too thick, a little more cream will loosen it; if too thin, a bit more powdered sugar will thicken it.
- Once your icing is ready, use it immediately to frost your favorite cake or cupcakes. Tip: For a smoother application, let your baked goods cool completely before icing.
- Garnish with a few whole raspberries on top for a fresh, vibrant finish. Tip: If you’re not using the icing right away, cover it tightly and refrigerate to keep it fresh.
This raspberry mascarpone icing is luxuriously creamy with pockets of tart raspberry that burst in every bite. Try it layered between vanilla sponge cake for an elegant dessert, or simply spread on morning toast for a decadent start to the day.
Pistachio Buttercream Icing

Today feels like the perfect day to slow down and savor the little things, like the rich, nutty aroma of pistachio buttercream icing wafting through the kitchen. This recipe is a gentle nod to those moments when baking becomes more than just mixing ingredients—it’s a quiet celebration of flavor and texture.
Ingredients
- 1 cup of unsalted butter, softened to room temperature (because nobody likes lumpy icing)
- 3 cups of powdered sugar, sifted (to keep things light and airy)
- 1/2 cup of pistachio paste (for that deep, nutty essence)
- A splash of vanilla extract (just to round out the flavors)
- A couple of tablespoons of heavy cream (adjust for your perfect consistency)
- A pinch of salt (to make all those flavors pop)
Instructions
- In a large bowl, beat the softened butter with an electric mixer on medium speed until it’s creamy and pale, about 2 minutes. This is your foundation, so take your time here.
- Gradually add the sifted powdered sugar to the butter, mixing on low speed at first to avoid a sugar cloud, then increasing to medium as it incorporates. Tip: Scrape down the sides of the bowl occasionally to ensure everything mixes evenly.
- Mix in the pistachio paste and vanilla extract until fully combined. The color should be a lovely pale green, speckled with bits of pistachio.
- Add a pinch of salt, then drizzle in the heavy cream one tablespoon at a time, mixing well after each addition. Stop when the icing is smooth and spreadable but still holds its shape. Tip: If it’s too thick, add a bit more cream; too thin, a little more powdered sugar.
- Once your icing is just right, give it a final mix on high speed for about 30 seconds to fluff it up. This makes it extra light and easy to spread.
Gently spread this pistachio buttercream over your favorite cake or cupcakes, and watch as its subtle sweetness and creamy texture transform them into something truly special. The flecks of pistachio add not just flavor but a bit of whimsy, making each bite a little adventure.
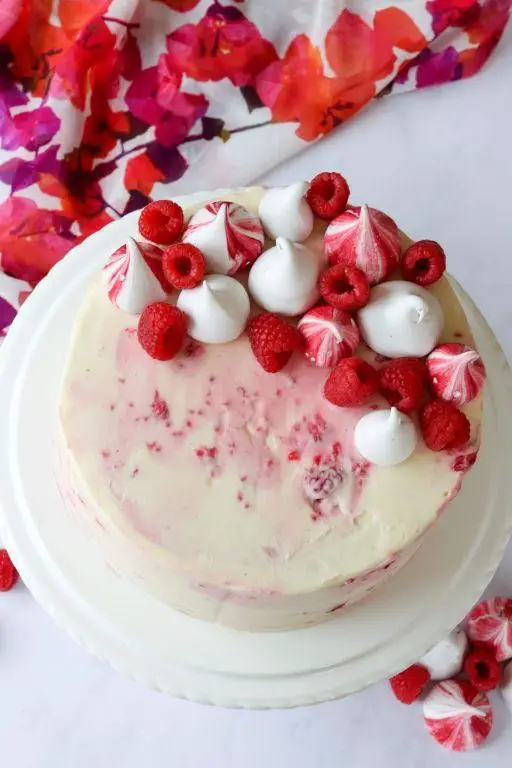
White Chocolate Raspberry Icing
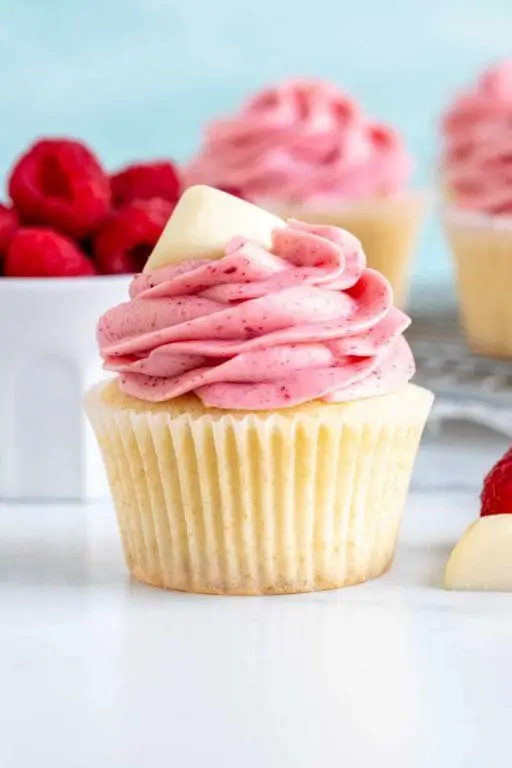
Curling up with a cup of tea on a quiet afternoon, I often find myself dreaming up sweet creations that blend the richness of white chocolate with the tartness of fresh raspberries. This icing is a little like those moments—soft, sweet, and unexpectedly bright.
Ingredients
- 1 cup of white chocolate chips, because they melt so smoothly
- A handful of fresh raspberries, about a cup, for that tangy punch
- A splash of heavy cream, just enough to bring it all together
- A couple of tablespoons of unsalted butter, softened, to add richness
Instructions
- Start by melting the white chocolate chips in a double boiler over low heat, stirring gently until completely smooth. Tip: Keep the heat low to avoid seizing the chocolate.
- While the chocolate melts, mash the raspberries with a fork until they’re mostly pureed but still a bit chunky for texture.
- Once the chocolate is melted, remove it from the heat and whisk in the heavy cream and butter until the mixture is glossy and uniform. Tip: Let the butter soften at room temperature for easier mixing.
- Fold the mashed raspberries into the chocolate mixture, stirring just until combined to keep those lovely streaks of pink. Tip: Don’t overmix to maintain the raspberry’s vibrant color and flavor.
- Let the icing sit for about 5 minutes to thicken slightly before using it to frost your favorite cake or cupcakes.
Whispering softly against the sweetness of the white chocolate, the raspberries add a lively contrast that’s both visually stunning and delicious. Try spreading this icing over a dark chocolate cake for a dramatic, flavor-packed dessert that’s sure to impress.
Maple Syrup Buttercream Icing
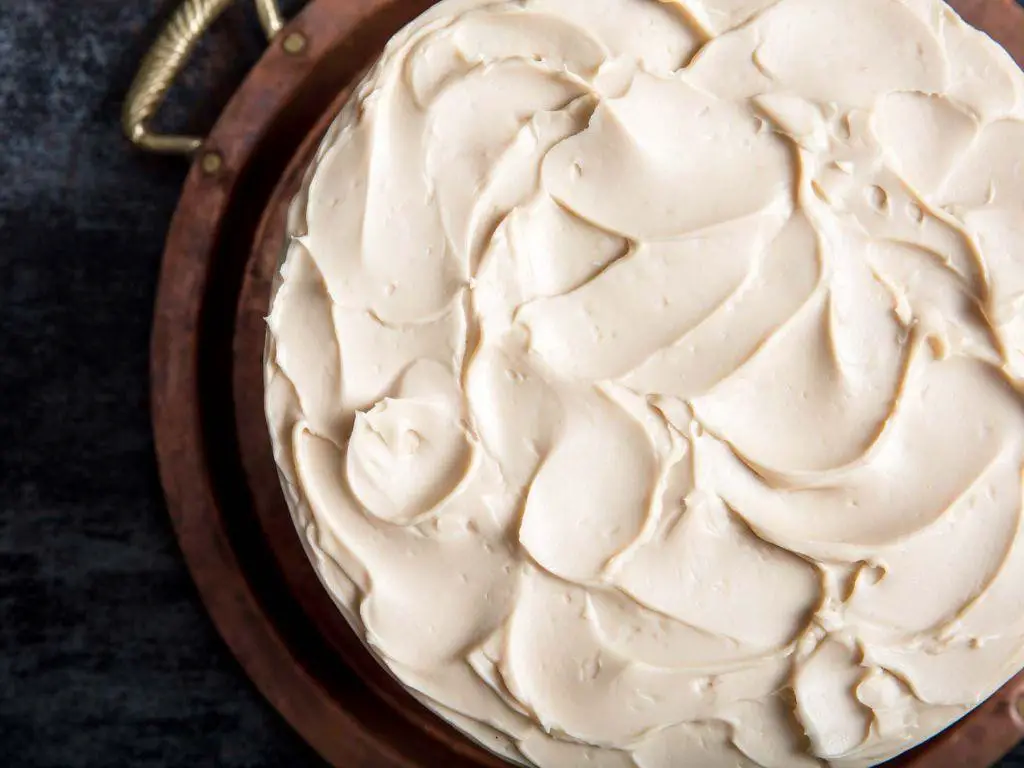
Sometimes, the simplest pleasures come from the sweetest combinations, like the rich, comforting embrace of maple syrup buttercream icing. It’s a whisper of autumn in every bite, a reminder of cozy mornings and the warmth of home.
Ingredients
- 1 cup of unsalted butter, softened to room temperature
- 3 cups of powdered sugar, because every good icing starts here
- A generous 1/4 cup of pure maple syrup, the star of the show
- A splash of vanilla extract, for that hint of warmth
- A couple of tablespoons of heavy cream, to bring it all together
Instructions
- In a large bowl, beat the softened butter on medium speed for about 2 minutes until it’s creamy and light.
- Gradually add the powdered sugar, one cup at a time, beating well after each addition to avoid a dusty kitchen.
- Pour in the maple syrup and vanilla extract, then beat on low speed until everything is just combined.
- Increase the speed to medium-high and beat for another 3 minutes, scraping down the sides of the bowl as needed, to ensure a smooth consistency.
- If the icing seems too thick, add heavy cream, one tablespoon at a time, until you reach your desired consistency.
Gliding a knife through this icing feels like slicing through clouds, its flavor a perfect balance of sweet and earthy. Try it atop spiced cupcakes or as a decadent dip for fresh fruit, and let the maple syrup’s depth surprise you.
Peanut Butter Cream Cheese Icing
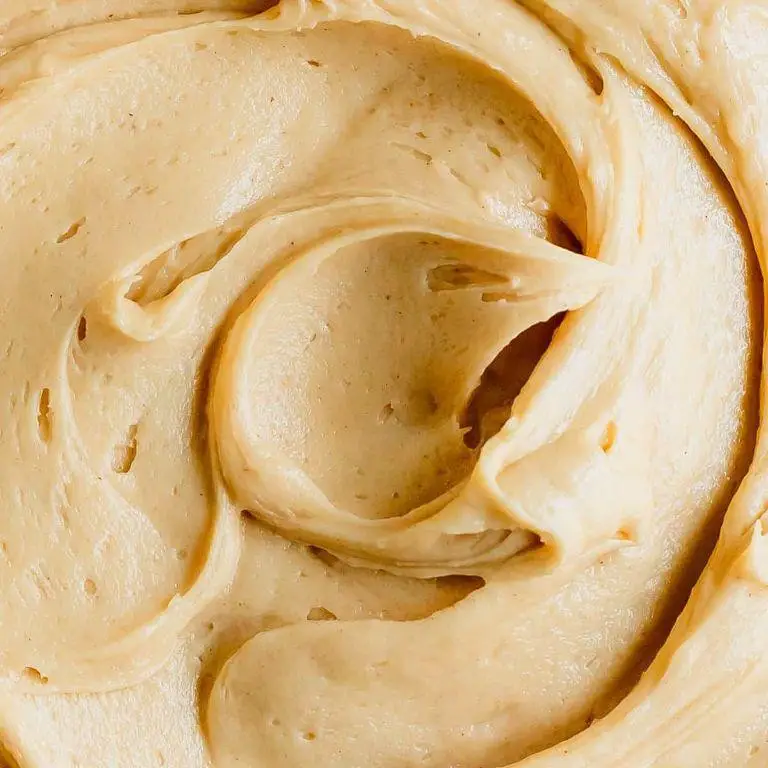
Lately, I’ve found myself lost in the simple joy of blending flavors that feel like a warm hug, and this peanut butter cream cheese icing is just that—a creamy, dreamy topping that turns any dessert into a moment of comfort.
Ingredients
- 1 cup of smooth peanut butter, because chunky just doesn’t blend as smoothly here
- 8 oz of cream cheese, softened to room temperature for that perfect whip
- 1/2 cup of unsalted butter, also softened, because it’s all about that smooth texture
- 2 cups of powdered sugar, sifted to avoid any lumps
- A splash of vanilla extract, for that hint of sweetness
- A couple of tablespoons of milk, just enough to get the consistency right
Instructions
- In a large bowl, beat the softened cream cheese and butter together on medium speed until fluffy, about 2 minutes. Tip: Make sure both are at room temperature to avoid a lumpy mixture.
- Add the peanut butter and vanilla extract to the bowl, continuing to beat until everything is well combined and smooth, another minute or so.
- Gradually add the sifted powdered sugar, half a cup at a time, beating on low speed to incorporate. Tip: Cover the mixer with a towel to prevent a sugar cloud.
- After all the sugar is added, pour in a tablespoon of milk and beat on medium speed. Add more milk if needed, one tablespoon at a time, until the icing reaches your desired consistency. Tip: The icing should be thick but spreadable.
- Once ready, use immediately or store in the refrigerator. If refrigerated, let it sit at room temperature for about 30 minutes before using to soften.
This icing is luxuriously smooth with a rich peanut butter flavor that’s perfectly balanced by the tanginess of the cream cheese. Try it atop chocolate cupcakes for a decadent treat, or spread it between layers of a vanilla cake for a surprising twist.
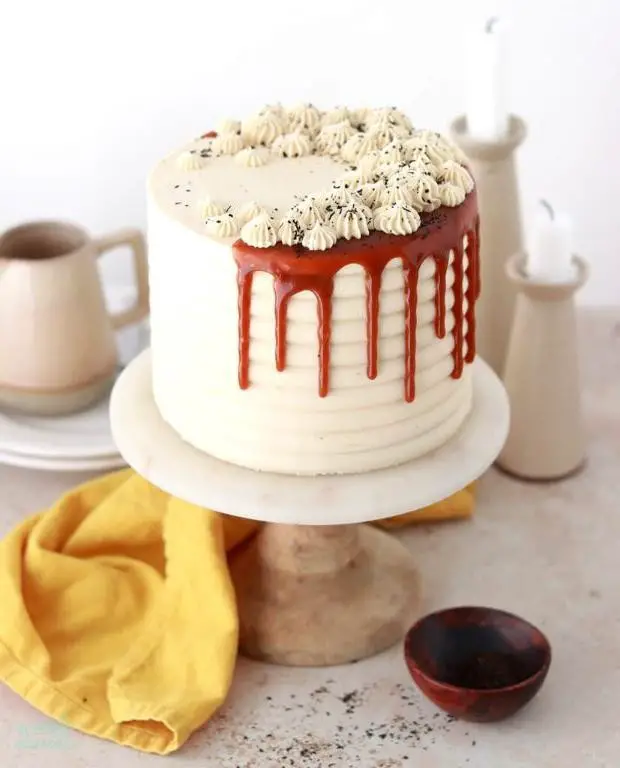
Caramel Drizzle Buttercream
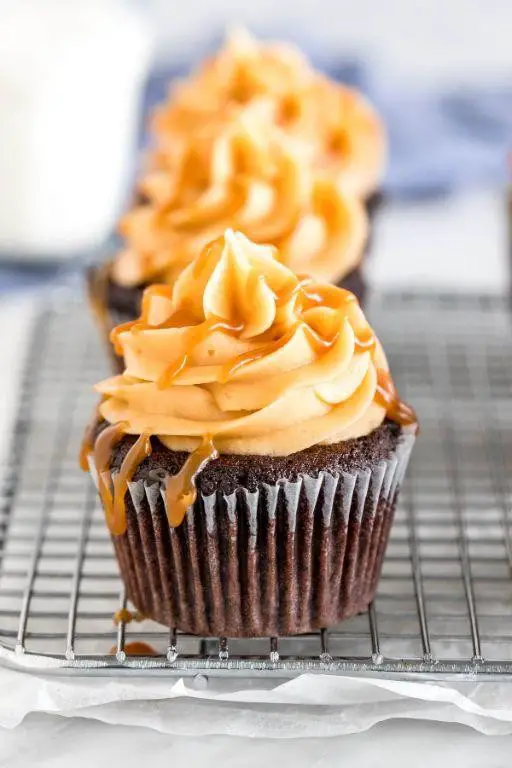
Today feels like the perfect day to share something sweet and comforting, a recipe that feels like a warm hug on a quiet afternoon. Caramel Drizzle Buttercream is that indulgent treat you’ve been looking for, with its rich flavors and smooth texture that melts right into your soul.
Ingredients
- 1 cup of unsalted butter, softened to room temperature
- 3 cups of powdered sugar, because we’re keeping it sweet
- A splash of vanilla extract, for that cozy aroma
- A couple of tablespoons of heavy cream, to get that dreamy consistency
- 1/2 cup of caramel sauce, homemade or store-bought, because we’re all about ease and deliciousness
Instructions
- In a large mixing bowl, beat the softened butter on medium speed for about 2 minutes until it’s creamy and light. Tip: Make sure your butter is at room temperature to avoid lumps.
- Gradually add the powdered sugar, one cup at a time, beating well after each addition. This prevents a sugar cloud from taking over your kitchen.
- Mix in the vanilla extract and a tablespoon of heavy cream. If the mixture feels too thick, add another tablespoon of cream until you reach your desired consistency.
- Once the buttercream is smooth and fluffy, drizzle in the caramel sauce and fold it gently with a spatula for a marbled effect. Tip: Don’t overmix to keep those beautiful caramel swirls.
- Use immediately to frost cakes or cupcakes, or store in the fridge if you’re planning ahead. Tip: Let it come to room temperature before using if refrigerated, for easy spreading.
Whipping up this Caramel Drizzle Buttercream is like creating a little jar of happiness. Its velvety texture and the perfect balance of sweetness and richness make it a versatile companion to your favorite desserts. Try it layered between chocolate cake for an irresistible treat that’ll have everyone asking for seconds.
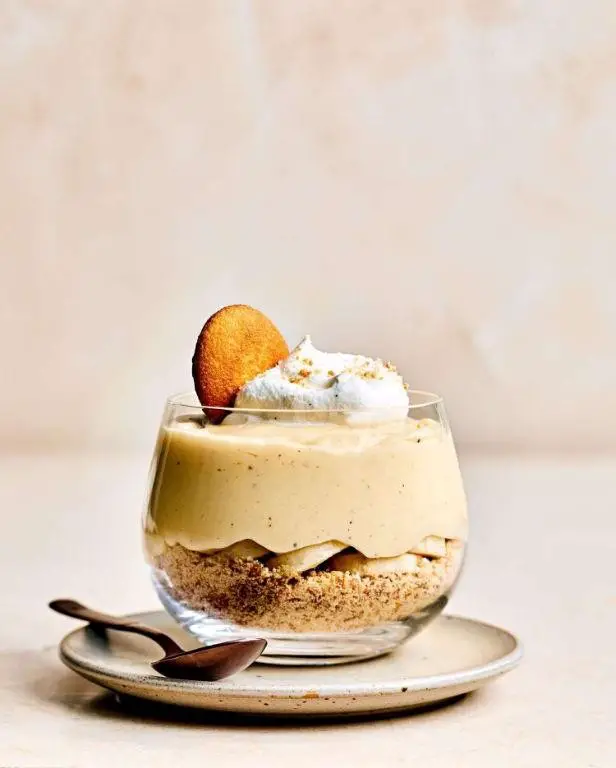
Orange Blossom Honey Icing
Remembering the first time I drizzled orange blossom honey icing over a warm slice of cake, the kitchen filled with a scent so sweet, it felt like a quiet morning in spring. This icing, with its delicate floral notes and smooth texture, turns even the simplest desserts into something memorable.
Ingredients
- A cup of powdered sugar, sifted to avoid lumps
- Two tablespoons of orange blossom honey, for that unmistakable floral sweetness
- A splash of whole milk, just enough to bring it all together
- A teaspoon of vanilla extract, because a little depth never hurts
Instructions
- In a medium bowl, combine the sifted powdered sugar and orange blossom honey. The sifting is key here—it ensures your icing is silky smooth.
- Add the vanilla extract to the mix. This is where the magic starts, as the vanilla rounds out the floral notes of the honey.
- Slowly pour in the milk, a little at a time, stirring continuously. You’re looking for a consistency that’s thick but pourable—think of it as the perfect drizzle.
- Once combined, let the icing sit for about 5 minutes. This waiting period allows the flavors to meld beautifully.
- Give it one final stir before using. If it’s too thick, a tiny bit more milk will do the trick; too thin, a sprinkle more of powdered sugar.
Orange blossom honey icing is a dream on cinnamon rolls, adding a floral contrast to the spice. Its texture is luxuriously smooth, with a flavor that’s sweet but not overpowering, thanks to the honey’s natural complexity. Try it drizzled over almond cake for a pairing that feels both elegant and comforting.
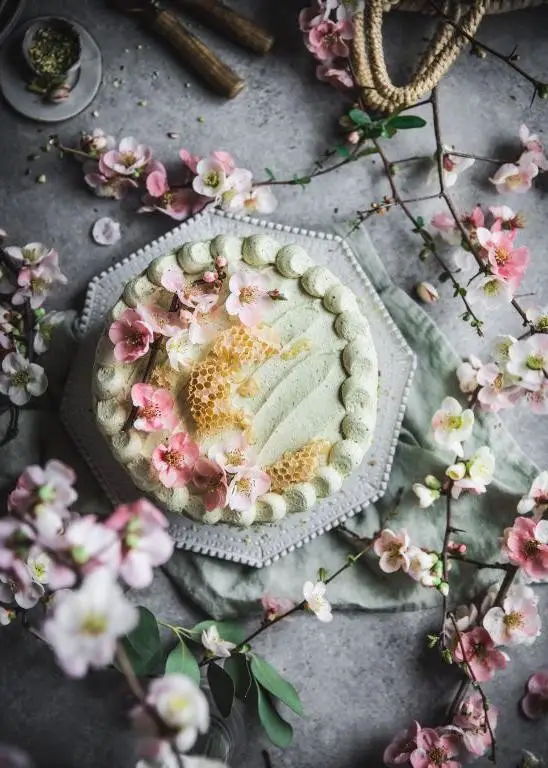
Matcha Green Tea Buttercream
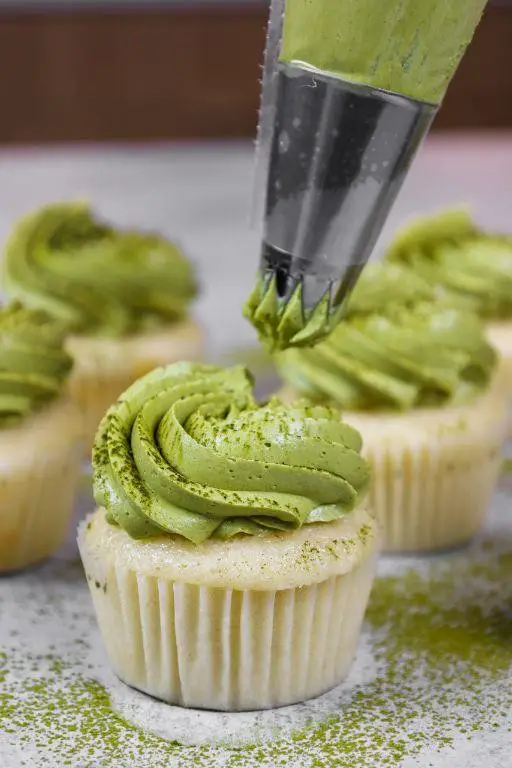
As the morning light filters through the kitchen window, there’s something deeply soothing about whisking together a batch of matcha green tea buttercream. Its vibrant hue and delicate flavor promise a touch of serenity in every bite, a sweet pause in the rush of daily life.
Ingredients
- 1 cup of unsalted butter, softened to room temperature
- 3 cups of powdered sugar, sifted to avoid lumps
- 2 tablespoons of matcha green tea powder, for that earthy sweetness
- A splash of vanilla extract, just to round out the flavors
- A couple of tablespoons of heavy cream, to get the perfect consistency
Instructions
- In a large mixing bowl, beat the softened butter on medium speed for about 2 minutes until it’s creamy and pale.
- Gradually add the sifted powdered sugar, half a cup at a time, beating well after each addition to ensure a smooth texture.
- Sift in the matcha green tea powder to avoid any clumps, then mix on low speed until fully incorporated.
- Add the vanilla extract and a tablespoon of heavy cream, then beat on medium speed for another minute. If the buttercream is too thick, add more cream, a teaspoon at a time, until you reach the desired consistency.
- Once everything is well combined, give the buttercream a final beat on high speed for about 30 seconds to make it extra fluffy.
Fluffy and light with a subtle earthiness, this matcha green tea buttercream is a dream to spread or pipe. Try it atop vanilla cupcakes for a contrast in flavors, or swirl it into a rich chocolate cake for an unexpected twist.
Conclusion
From classic buttercream to luxurious fondant, our roundup of 18 Delicious Wedding Cakes Icing Recipes offers something for every couple’s big day. Whether you’re a baking novice or a seasoned pro, these elegant recipes promise to inspire. We’d love to hear which one stole your heart—drop a comment below! Don’t forget to share your favorite finds on Pinterest for others to enjoy. Happy baking!

Michael Johnson is the founder of Pan Mastery, Inspired by his blacksmith grandfather’s legacy has a deep appreciation for hand-crafted pots and pans, he provides invaluable guides, reviews, and recipes to enhance your culinary journey.